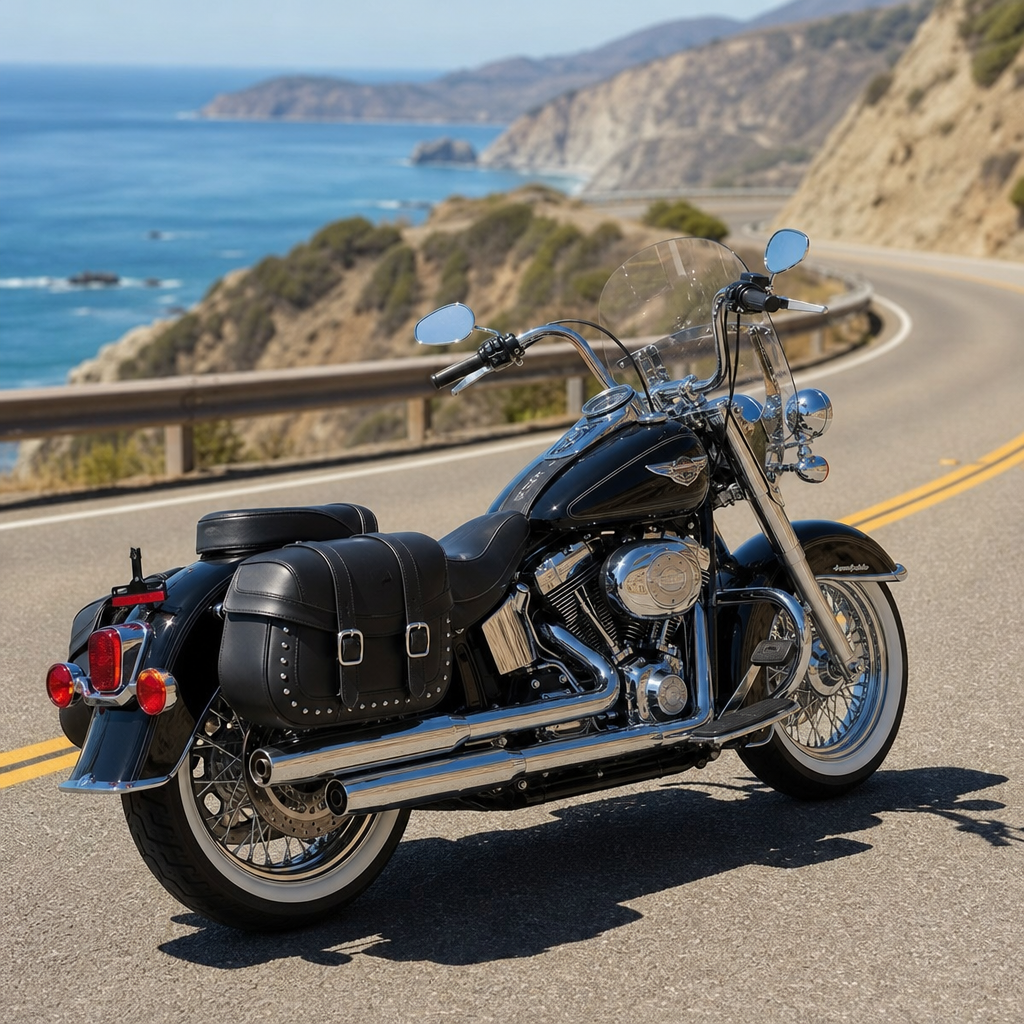
The 2026 Road Glide 3 is already a serious long-distance machine, but touring comfort and cargo control improve dramatically when you treat the luggage rack and Tour-Pak setup as a model-specific system instead of a pile of accessories. Riders shopping this trike usually focus first on the sharknose fairing, Milwaukee-Eight torque, and rear trunk space, yet the real difference between a tiring weekend and a clean thousand-mile run often comes down to mounting geometry, loading discipline, and ergonomic tuning. I have spent enough time packing Harley touring platforms to know that a badly placed bag can upset passenger room, block trunk access, and add strain at the bars faster than most owners expect.
In practical terms, a luggage rack is the external platform mounted over or behind the trunk area for soft bags, duffels, or compact hard cases. A Tour-Pak is Harley-Davidson’s top case system, often added for lockable storage, passenger back support, and expanded touring capacity. Mounting hacks are not gimmicks here; they are repeatable setup methods that improve fit, stability, weather resistance, and day-to-day usability without compromising the trike’s structure. Because the 2026 Road Glide 3 has specific rear bodywork, passenger seating proportions, and a trike chassis with different weight behavior than a two-wheel Road Glide, generic bag advice is not enough.
This matters for three reasons. First, the Road Glide 3 invites heavier packing because it feels more stable at low speed than a motorcycle, which can tempt owners to overload high and rearward. Second, passenger ergonomics on a trunk-equipped trike are highly sensitive to backrest angle, rack height, and how luggage presses forward under braking. Third, touring reliability depends on details: fastener torque, rack rating, quick-detach hardware fit, harness routing for Tour-Pak lighting, and keeping trunk lids, antennas, and saddlebag doors clear. Get those details right and the machine becomes easier to live with every day, whether you are planning a cross-state ride, a two-up vacation, or building a repeatable packing recipe for the whole season.
As the sub-pillar hub for model-specific ergonomics and performance recipes, this guide connects cargo mounting to rider triangle, passenger comfort, suspension feel, braking confidence, and airflow management. The goal is not merely to bolt on parts, but to create a balanced touring setup that preserves the Road Glide 3 character while solving real use cases. If you are deciding between a rack-only approach and a full Tour-Pak build, trying to stop bag sway, or wondering how cargo position affects comfort and handling, the sections below will give you a clear blueprint.
Understand the Road Glide 3 Touring Platform Before You Mount Anything
The 2026 Road Glide 3 uses Harley-Davidson’s frame-mounted fairing touring architecture on a trike platform, and that matters because the vehicle reacts differently to load placement than a two-wheel bagger. You do not countersteer the same way, you feel crosswinds differently, and rear weight is carried across the trike rear assembly rather than through a single rear tire contact patch. In practice, owners often assume that means cargo placement matters less. My experience says the opposite: the machine tolerates load better at parking-lot speeds, but poor cargo placement still shows up in steering effort, braking distance, and passenger comfort once the day gets long.
The first rule is to identify where the mass already lives. The trunk sits high relative to the axle line, the passenger seat is close to the rear storage zone, and many add-on racks place another layer of cargo above the trunk lid. That creates a vertical stack. A vertical stack is the enemy of easy transitions and smooth body control on crowned roads. If you keep the heaviest items low in the trunk, medium-weight items in the Tour-Pak, and light compressible items on the rack, the trike feels calmer and your passenger will not get shoved forward every time you slow down.
There is also a fitment rule that many owners learn the expensive way: use hardware designed specifically for the Road Glide 3 and confirm compatibility with the 2026 production year, factory trunk dimensions, and any quick-detach passenger backrest or sissy bar components already installed. Harley-Davidson Genuine Motor Parts, H-D fitment charts, and trusted aftermarket suppliers like Kuryakyn, Saddlemen, Advanblack, and Cobra usually document whether a rack works with stock lids, integrated lighting, or detachable systems. Do not assume compatibility because a part fits a two-wheel Road Glide or a Freewheeler; the bodywork and mounting points can differ enough to create lid interference or awkward strap angles.
Luggage Rack Mounting Hacks That Improve Stability and Daily Use
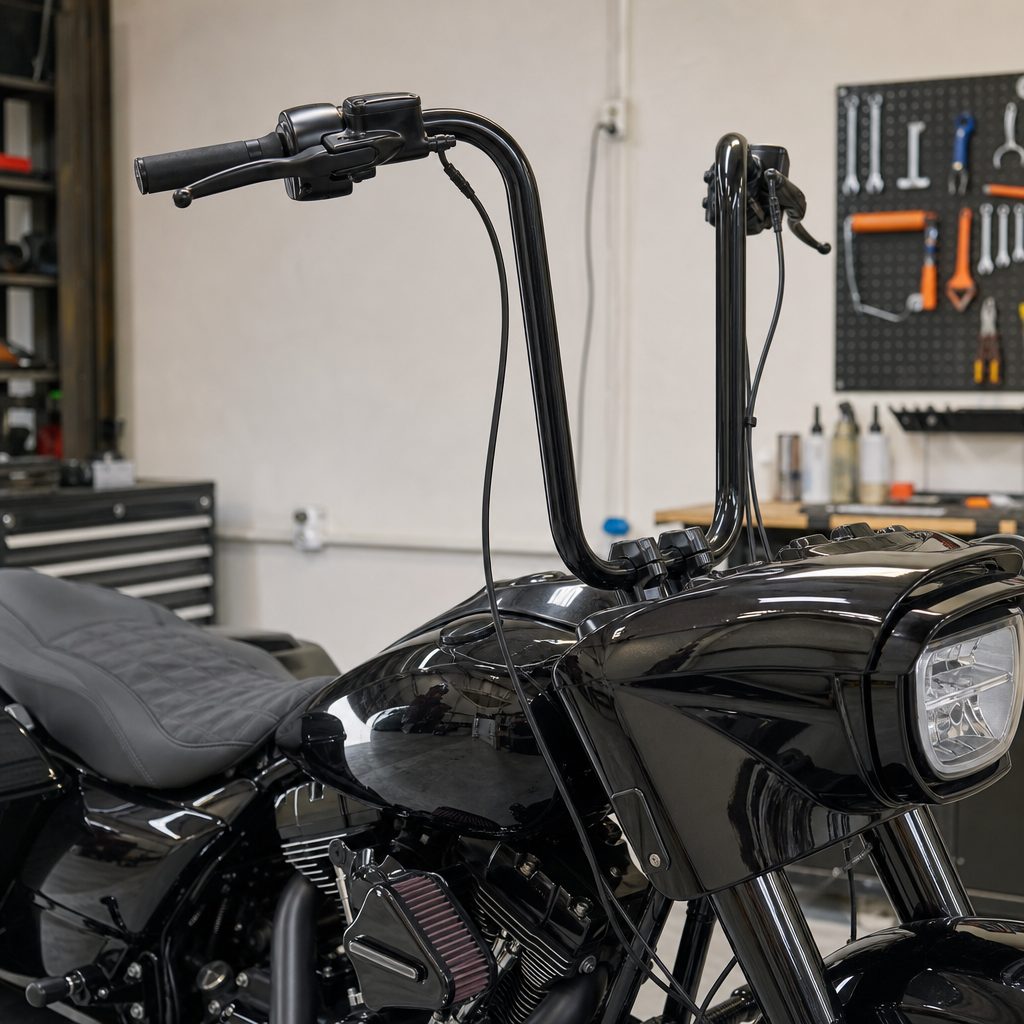
The best luggage rack hack is also the least glamorous: choose the lowest-profile rack that still clears the trunk lid through its full opening arc. Riders often buy the tallest or widest rack available because the photos look capable, but oversized racks encourage overpacking and place cargo farther into dirty airflow. A compact rack with multiple tie-down slots usually performs better because it keeps duffels flatter and reduces leverage on the fasteners. Stainless hardware with medium-strength threadlocker and torque set to manufacturer specification should be treated as mandatory, not optional.
Strap routing is the next big gain. Do not cross bungee cords randomly over the bag and call it done. Use two cam buckle straps front to rear anchored symmetrically, then add one lateral stabilizer strap if the bag is taller than the rack perimeter. Cam straps are superior to elastic cords because they maintain tension and do not turn into projectiles if they slip. I also recommend adding a thin non-slip pad between the rack and bag base. That simple layer cuts micro-movement, protects paint, and reduces the tendency of waterproof duffels to walk sideways over rough pavement.
Another useful trick is to pack the rack bag around access needs, not just around capacity. Keep rain gear, a compact tool roll, tire inflator, and first-aid kit at the top or in external pockets. If opening the trunk requires removing the whole bag every fuel stop, your setup is wrong for real touring. The most efficient Road Glide 3 rack loads are narrow enough to preserve rear visibility and short enough to let the trunk lid open at least partially. That may sound like a small convenience, but over a week on the road it becomes the difference between a smooth routine and constant irritation.
| Setup Choice | Best Use | Main Advantage | Main Limitation |
|---|---|---|---|
| Rack only with waterproof duffel | Solo weekend trips | Light, simple, lower cost | Less security and weatherproof access |
| Tour-Pak only | Daily touring and commuting | Lockable storage and passenger support | Less flexible for bulky soft gear |
| Rack plus Tour-Pak | Two-up travel and multi-day rides | Maximum organization and capacity | Highest risk of overloading rearward |
| Quick-detach Tour-Pak with rack strategy | Riders switching between local and travel use | Adaptable ergonomics and cleaner profile | More hardware complexity and cost |
Tour-Pak Mounting Hacks for Passenger Comfort and Secure Storage
A Tour-Pak on the 2026 Road Glide 3 should solve three problems at once: storage security, passenger support, and organized weight distribution. The common mistake is mounting for appearance only. Setback position and backrest pad thickness directly affect hip angle, lower-back support, and how cramped the passenger feels after an hour. When I set up a touring trike for two-up use, I start by seating the passenger in their normal boots and jacket, then check whether their pelvis is upright or rolled back. If the backrest pushes the shoulders forward, the pad is too thick or the Tour-Pak sits too close.
Quick-detach systems are excellent when properly installed, but they have to lock into docking points without preload or misalignment. If you need to force the latch, stop and correct the docking hardware. Misaligned detachable mounts wear fast, rattle over expansion joints, and can damage finish surfaces. After installation, grab the Tour-Pak at the top rear corners and check for fore-aft or lateral play. A tiny amount of perceived movement from rubber isolation can be normal depending on the system, but obvious clunking is not.
Electrical integration deserves more respect than it usually gets. If your Tour-Pak includes auxiliary brake or running lights, route the harness with abrasion protection and enough slack for lid movement and service access. Use factory-style connectors where possible. Scotch-lock style taps are rarely the right long-term answer on a premium touring machine because moisture and vibration eventually expose weak connections. A properly loomed harness with strain relief prevents intermittent lighting faults that can be difficult to trace on the road.
Inside the Tour-Pak, use modular pouches instead of loose items. That is the easiest way to prevent lid-side loading from becoming a mess when you open the case at a hotel or roadside stop. Heavier items should sit low and against the front wall of the Tour-Pak, closer to the passenger seat, not stacked high in the rear corners. This preserves latch alignment, reduces case shake, and keeps the center of mass from drifting farther back than necessary.
Model-Specific Ergonomics Recipes for Long Days in the Saddle
On the Road Glide 3, cargo mounting and ergonomics are inseparable. A rearward-heavy setup changes how the rider braces under braking, which increases wrist pressure and shoulder fatigue. That can lead owners to chase the wrong fix through bars, grips, or seat swaps when the real problem is luggage placement. My baseline recipe for solo touring is simple: keep dense gear in the trunk floor, mount only a light rack bag, and leave enough seat-to-back support space so you are not unconsciously sliding forward. For two-up travel, move shared heavy items into the trunk and reserve the Tour-Pak for medium-weight clothing, electronics, and passenger essentials.
Passenger ergonomics also respond to top case shape and rack use. If you strap a tall bag onto a rack above or behind the Tour-Pak, the passenger can feel trapped visually and physically, even if measurements look acceptable. Better results come from wider, flatter bags with compression straps that keep the profile low. Pair that with armrest clearance checks if you run them. The passenger should be able to enter and exit without twisting hard around hard luggage corners.
Rider airflow changes too. A heavily loaded rear can subtly alter posture, and posture changes where the fairing air hits your helmet and shoulders. If buffeting suddenly worsens after adding a Tour-Pak and rack load, review seating position before buying another windshield. On several touring setups I have tuned, reducing rear load height and rebalancing the trunk cured enough posture shift that the wind problem largely disappeared. Ergonomics recipes work best when you treat the whole machine as a connected system rather than chasing isolated symptoms.
Performance Recipes: Weight, Braking, Tire Pressure, and Packing Discipline
Performance on a touring trike is not just engine output; it is how consistently the machine accelerates, stops, tracks, and stays comfortable under load. The 2026 Road Glide 3 has ample torque for highway work, but no amount of torque cancels poor packing. The most important performance recipe is to weigh your travel kit at least once. Use a luggage scale or household scale and note the combined mass of trunk contents, Tour-Pak contents, and rack bag. Compare that number with Harley-Davidson’s gross vehicle weight rating and the rack manufacturer’s stated limit. Published limits exist for a reason, especially on elevated platforms subject to vibration and leverage.
Braking behavior is the next checkpoint. Added cargo increases stopping distance and shifts how the trike settles on the front end during firm deceleration. If the brake feel remains strong but the machine feels busier entering corners after a loaded stop, suspect high rear cargo placement. Tire pressure should be set to the specification for load condition using the owner’s manual as the baseline, and checked cold with a quality gauge. Underinflation builds heat and dulls response; overinflation can make the trike skittish on broken pavement.
Packing discipline is what turns these principles into a repeatable recipe. Put tools, chargers, liquids, locks, and dense items in the lowest available storage. Put layers, gloves, and compressible clothing in the Tour-Pak. Put only light items such as rain shells or compact bedding on the external rack. Recheck strap tension after the first 20 to 30 miles, then at every major stop. That habit catches settling before it becomes sway, scuffing, or hardware fatigue.
Build a Repeatable Touring Setup and Use This Hub as Your Starting Point
The best luggage rack and Tour-Pak mounting hacks for the 2026 Road Glide 3 are not dramatic modifications. They are disciplined, model-specific choices that keep cargo low, secure, accessible, and aligned with rider and passenger ergonomics. Use a rack that fits the trunk geometry, strap bags with non-elastic tension, and preserve lid access. Mount the Tour-Pak for actual passenger posture, not just showroom appearance. Protect wiring, verify docking fit, and organize contents by weight and frequency of use. Most important, remember that every added inch of height and every unnecessary pound at the rear changes how the trike feels over a full day.
As a hub for Harley-Davidson model-specific ergonomics and performance recipes, this page should anchor your setup decisions. Start with the stock machine, add one cargo variable at a time, and test the result on familiar roads before a major trip. That method reveals whether a problem comes from seating, wind management, weight distribution, or simple overpacking. When the setup is right, the Road Glide 3 becomes easier to maneuver, calmer at speed, and far more comfortable for both seats.
If you are preparing your 2026 Road Glide 3 for real touring, audit your current rack, Tour-Pak, straps, and packing list today. A smarter mounting recipe will give you better comfort, cleaner handling, and more confidence on every mile.
Frequently Asked Questions
1. Why should I treat the 2026 Road Glide 3 luggage rack and Tour-Pak setup as a single system instead of adding parts one at a time?
Because on a touring trike like the 2026 Road Glide 3, cargo equipment does not work in isolation. The luggage rack, Tour-Pak mount, trunk lid clearance, passenger backrest position, and the way weight sits behind the rear axle all affect one another. Riders often think of a rack as just extra carrying space and a Tour-Pak as just a storage box, but the real-world result depends on how those parts share load, vibration, leverage, and mounting points across the rear structure. If you stack accessories without considering that relationship, you can end up with annoying flex, lid interference, poor passenger access, unstable cargo, or extra stress on the mounting hardware.
When the setup is treated as a model-specific system, you make better decisions about bracket style, rack profile, fastener length, and total load placement. That matters even more on the Road Glide 3 because it is designed to cover distance comfortably, and long-distance comfort comes from predictability. A clean setup keeps the trunk opening unobstructed, preserves the passenger seating area, and prevents cargo from shifting during braking, crosswinds, or rough pavement. It also helps maintain a balanced feel rather than creating a top-heavy or rear-heavy load pattern that can make the machine feel less composed over long miles.
The smartest approach is to choose components that were engineered to work together, confirm fitment specifically for the 2026 Road Glide 3, and think through your actual touring use before you install anything. If you regularly carry a passenger, rain gear, a soft bag, and a backrest-mounted organizer, those details should shape the rack and Tour-Pak strategy from the beginning. That kind of planning usually produces a quieter, stronger, easier-to-live-with setup than mixing random accessories and trying to solve problems after the fact.
2. What are the best Tour-Pak mounting hacks for improving stability and reducing vibration on long trips?
The best “hack” is not a shortcut at all; it is improving mounting integrity in ways riders sometimes overlook. Start with a mount designed for the Road Glide 3’s exact rear platform and hardware layout. A lot of vibration complaints come from using universal-style solutions, mismatched spacers, or brackets that technically fit but do not distribute stress correctly. The Tour-Pak should sit square, the fasteners should clamp evenly, and the mounting surface should be fully supported rather than relying on a few points carrying all the load.
One of the most effective upgrades is careful hardware management. Use the correct fastener grade, torque everything to specification, and recheck torque after the first few heat cycles and the first several hundred miles. Many riders install a Tour-Pak once and never revisit it, but touring vibration can expose even small looseness surprisingly fast. Threadlocker where appropriate, quality washers, and model-correct spacers can make a major difference in keeping the assembly tight and quiet. If the mount uses isolation components or rubber dampers, inspect them regularly and replace them when they begin to compress, crack, or lose shape.
Another overlooked trick is controlling what goes inside the Tour-Pak. Even a perfectly mounted Tour-Pak can feel unstable if heavy items are packed high, loose, or far rearward. Put dense items low and as close to the center of the machine as possible. Keep tools, locks, and heavy electronics from bouncing around by using internal organizers or padded liners. In other words, reducing vibration is partly about the mount and partly about preventing the cargo from creating its own repeated impact loads from the inside out.
Finally, check alignment with the rest of the rear setup. If you are combining a Tour-Pak with a luggage rack bag, make sure the bag does not lean against the box in a way that adds pressure or chafing over hundreds of miles. Stable touring setups are usually the result of several small correct choices: proper mount selection, correct torque, periodic inspection, smart packing, and making sure no accessory is forcing the Tour-Pak to carry loads it was never meant to absorb.
3. How should I load a luggage rack on the 2026 Road Glide 3 without hurting comfort, handling, or cargo security?
The most important rule is to treat the luggage rack as a location for controlled, lightweight, well-secured cargo rather than a place to pile on everything that did not fit elsewhere. A rack-mounted duffel or dry bag can be extremely useful on the Road Glide 3, but how you load it matters more than the bag itself. Light, compressible gear such as rain layers, extra gloves, compact clothing, or soft camping items generally belongs on the rack. Dense items like tools, liquids, large locks, and spare parts should usually stay lower and more central, ideally inside the trunk or another more stable storage area.
Comfort and handling improve when the bag sits low, evenly centered, and does not extend so far back that it creates leverage against the mount. A tall stack may look manageable in the driveway, but on a thousand-mile run it can catch more wind, shift weight rearward, and make loading and unloading frustrating at every stop. Keeping the profile low also helps preserve rear visibility and reduces the chance of the cargo interfering with passenger movement, trunk operation, or access to tie-down points.
For cargo security, use purpose-built straps rather than bungee cords as your primary restraint. Cam buckle or quick-release strap systems with protective loops are usually a better touring solution because they maintain tension more consistently and are less likely to let the bag creep during a long day of bumps and temperature changes. Cross-strap the load if possible, and make sure no strap can touch hot exhaust components, sharp bracket edges, or moving parts. After you strap the bag down, try to move it aggressively by hand. If it shifts in the garage, it will definitely shift on the highway.
A practical touring habit is to pack by access frequency. Put roadside essentials where you can reach them quickly, but reserve the rack for things you do not need every fuel stop. That prevents repeated re-strapping and reduces the odds of sloppy tie-downs late in the day. A well-loaded rack should feel like a deliberate extension of the Road Glide 3’s touring capability, not an overloaded afterthought perched above the rear end.
4. What common mistakes do riders make when combining a luggage rack bag with a Tour-Pak on a long-distance Road Glide 3 setup?
The most common mistake is overpacking simply because the available space makes it tempting. When a rider has the rear trunk, a Tour-Pak, and a luggage rack, it becomes easy to carry too much gear and place too much of it too high and too far back. The machine may still move down the road just fine, but fatigue often shows up in more subtle ways: more attention needed in wind, more time spent reorganizing bags, more effort climbing on and off the trike, and more annoyance every time the trunk or Tour-Pak is blocked by strapped luggage.
Another mistake is creating interference between components. A rack bag can limit Tour-Pak lid movement, rub against the backrest area, or make trunk access inconvenient enough that the rider starts avoiding the storage they actually need during the day. Small fitment errors can become big touring frustrations after repeated fuel, weather, and meal stops. Before any trip, fully open and close every compartment with the luggage installed and confirm that the bag does not contact painted surfaces, hinges, latches, lights, or trim.
Riders also underestimate abrasion and hardware fatigue. A bag that “barely touches” the Tour-Pak or rack can wear through surfaces over time, especially when road vibration turns light contact into constant rubbing. Similarly, tie-down hooks clipped to the wrong points can chip finishes or side-load brackets in a way they were not designed to handle. Soft loops, protective sleeves, and clear routing paths are simple solutions that prevent cosmetic and structural problems later.
Finally, many people fail to reevaluate the setup once the trip begins. Loads change as you buy supplies, move rain gear, or repack at hotels. What was balanced on day one can become messy by day three. The best long-distance riders do quick inspections each morning: verify strap tension, check mount bolts visually, confirm the trunk and Tour-Pak still operate smoothly, and make sure cargo weight has not migrated upward or rearward. That routine keeps the system working the way it was intended and prevents minor issues from turning into road-trip headaches.
5. What should I check before leaving on a thousand-mile tour with a Road Glide 3 luggage rack and Tour-Pak setup?
Start with fitment and hardware. Confirm that every mounting component is correct for the 2026 Road Glide 3, that all fasteners are present, and that torque has been set according to the manufacturer’s specification. Do not assume a recently installed rack or Tour-Pak is automatically trip-ready. Inspect bracket seating, washer placement, spacer orientation, and any quick-detach or docking hardware for full engagement. If something looks slightly off in the garage, it will not improve at highway speed.
Next, run a full function test with the bike loaded exactly the way you plan to travel. Open the trunk, Tour-Pak, and