
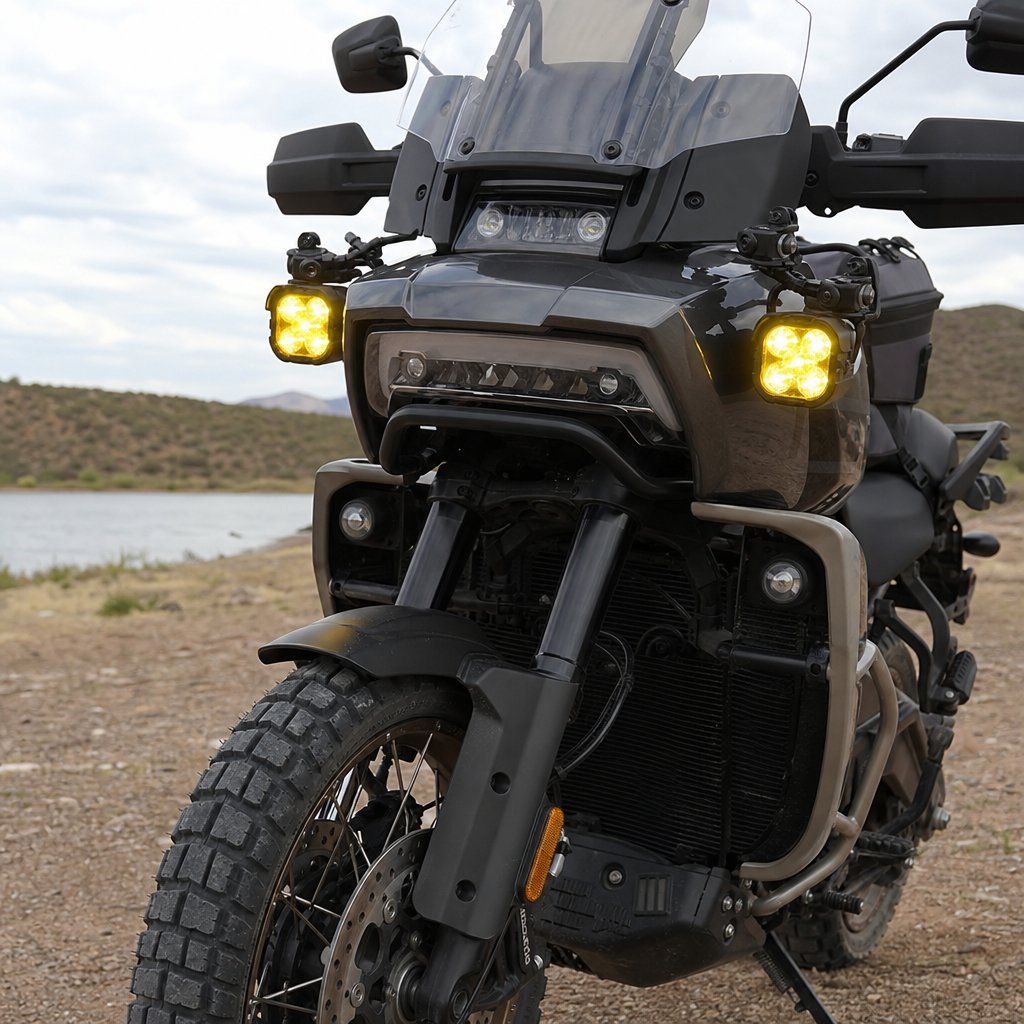
The Pan America 1250 rewards riders who treat it like a platform rather than a fixed package, and auxiliary lighting is one of the clearest examples of that approach. On the 2026 Limited bus architecture, adding lights is no longer just a matter of finding a switched lead and crimping two connectors. The motorcycle’s control network, current monitoring, electronic suspension packaging, and premium touring equipment all affect where you pull power, how you trigger relays, and which mounting choices preserve reliability. When riders search for a Pan America 1250 auxiliary lighting recipe, they usually want one thing: a wiring plan that works on the 2026 machine without causing fault codes, battery drain, or unpredictable behavior.
In practical terms, a recipe is a repeatable setup that combines parts selection, mounting logic, wire routing, fuse protection, switch strategy, and load management. On this platform, model-specific ergonomics matter just as much as electrical theory. Handguard clearance, windshield movement, steering sweep, crash bar geometry, rider sightline, and glove-friendly controls all shape a successful installation. Performance matters too. Good auxiliary lighting improves conspicuity in traffic, extends visual range on rural roads, reduces eye strain in rain, and supports adventure travel where OEM headlight spread may not match luggage weight, tire choice, or riding speed.
I have wired multiple modern CAN and LIN bus motorcycles, and the biggest mistake I see is treating them like older dual-sports. The 2026 Pan America Limited demands cleaner thinking. You want battery-direct fused power for the lamps, an isolated trigger strategy that respects the bike’s networked outputs, and mount locations that survive vibration without shaking the beam pattern loose. This hub article covers the full framework behind model-specific ergonomics and performance recipes for Harley-Davidson adventure and touring setups, using the Pan America 1250 auxiliary lighting recipe as the central example. It is designed to help riders choose a durable, serviceable system now, while also pointing toward related subtopics such as heated gear circuits, GPS integration, cockpit control layouts, suspension-dependent aiming, and luggage-compatible harness routing.
What the 2026 Limited Bus Changes in Auxiliary Light Wiring
The essential rule is simple: do not power auxiliary lamps from a factory lighting circuit on the 2026 Pan America Limited. The bike’s electronic architecture monitors loads and expects known current behavior. If you splice a pair of high-output LEDs into an OEM feed, you risk bulb-out logic issues, inconsistent switching, voltage drop, or unintended module behavior. Instead, build a separate lighting circuit with its own fused supply directly from the battery or approved auxiliary power distribution point. Use the motorcycle’s switched behavior only as a trigger signal for a relay or a solid-state controller.
Why does that matter? Because modern motorcycle networks are designed around low-current control and module-to-module communication, not accessory improvisation. A typical pair of premium auxiliary lights can draw anywhere from 2 amps total for conspicuity pods to more than 10 amps for long-range driving lamps at full output. Even if a factory wire seems capable, current spikes at startup and heat accumulation in bundled harness sections create failure points over time. I have opened enough accessory looms to know that neat routing beats clever shortcuts every time.
Another change on the 2026 bike is packaging. The Limited trim typically carries more equipment around the cockpit and fairing area, leaving less space for bulky relays, excess wire loops, and universal switchgear. That pushes riders toward compact fuse blocks, sealed connectors such as Deutsch DT or Superseal, adhesive-lined heat shrink, and harness branches measured to actual routing length. Serviceability matters. A good recipe lets you remove side panels, tank covers, or crash bars later without cutting zip ties in frustration.
The Core Wiring Recipe That Works Reliably
The most dependable recipe uses six building blocks: battery positive feed, inline fuse sized to lamp draw, ground return to battery or verified chassis ground, relay or electronic controller, low-current switched trigger, and weather-sealed lamp leads. For most Pan America installations, 14 AWG wire is appropriate for higher-output dual lamp setups, while 16 AWG is usually adequate for lower-draw conspicuity lights. Fuse sizing should follow actual measured or manufacturer-rated draw with margin, not guesswork. A pair of lamps drawing 8 amps total typically belongs on a 10- or 15-amp fused circuit depending on startup behavior and controller specifications.
The trigger source is where many riders hesitate. The right answer is any switched source specifically intended to wake an accessory relay or controller input, not to carry the lamp current. On networked motorcycles, that may mean an accessory circuit, a dedicated connector identified in the service information, or a smart controller that senses ignition-state voltage without imposing significant load. Denali CANsmart, HEX ezCAN, and Clearwater CANopener-style systems are well-known examples in the broader market because they isolate lamp power management while integrating dimming, cancel behavior, and high-beam response. If using a conventional relay, choose a sealed automotive micro relay and mount it with the terminals facing down or sheltered to reduce water intrusion.
| Component | Recommended Spec | Why It Fits the 2026 Pan America Limited |
|---|---|---|
| Main power lead | 14 AWG copper, abrasion sleeved | Handles common dual-lamp loads with margin and survives routing near frame contact points |
| Fuse protection | Inline ATC/ATO or mini fuse, sized 125% to 150% of steady draw | Protects the harness without nuisance blowing during lamp startup |
| Switching method | Sealed relay or smart controller | Keeps lamp current off factory circuits and respects networked electronics |
| Connectors | Deutsch DT or equivalent sealed connectors | Resists water, dust, and repeated service disconnects |
| Ground strategy | Battery negative or confirmed low-resistance chassis point | Reduces flicker, voltage loss, and intermittent faults |
| Harness protection | Braided sleeve plus adhesive heat shrink at branch points | Prevents chafing and keeps the loom stable under vibration |
If you want the shortest version of the recipe, it is this: battery to fuse, fuse to relay or controller, relay output to lamps, lamp negatives to ground, switched accessory lead to relay trigger, and all connections sealed and strain relieved. That formula works because it separates control from power and gives the lights a stable voltage supply. Stable voltage equals stable output, which matters more than many riders realize. LED lamps often lose useful performance when voltage sags across long, undersized, or poorly grounded circuits.
Ergonomics: Mounting, Beam Placement, and Rider Interface
Lighting performance starts with mount location, and the Pan America’s ergonomics strongly influence that choice. Crash bar mounts are popular because they create a wide triangle of light for daytime conspicuity and lower fog penetration. The tradeoff is vulnerability in a tip-over and more spray exposure. Fork or caliper-area mounts move with steering and can improve corner fill at low speed, but they add unsprung or steering-adjacent mass and complicate brake line clearance. Upper fairing or beak-area mounts usually deliver the longest useful throw because the lamps sit higher, though they can create glare off the windscreen or handguards if aimed poorly.
From experience, the most balanced recipe for mixed pavement and gravel travel uses one wide-beam pair mounted low and one selective yellow or amber option only if the rider regularly deals with fog, dust, or deer-heavy backroads. A single do-everything pod pair rarely performs as well as riders expect. Beam pattern should match riding purpose. Floods help near-field awareness. Driving beams extend down-road distance. Hybrid lenses split the difference but still need careful aiming. SAE fog-compliant lamps are useful when you want disciplined cutoff and legal on-road behavior, while ECE-compliant options often provide excellent beam control for international-minded buyers.
The rider interface also matters. A switch placed too low, too small, or too close to another control becomes a distraction with winter gloves. The best ergonomic setups tie auxiliary light behavior to high beam, a dimmer wheel, or a proven controller that can drop output with low beam and jump to 100 percent with high beam. That reduces workload. On the Pan America cockpit, every added component competes for bar space with navigation mounts, heated gear controls, phone chargers, and tank bag sightlines. The recipe should preserve full steering lock, windshield adjustment, and standing-rider movement without snagging cables or obscuring the TFT display.
Performance Tuning: Brightness, Color, Aiming, and Real-World Use
More lumens do not automatically mean better visibility. Effective auxiliary lighting depends on candela, beam shape, mounting height, and color temperature. Many high-output LEDs advertise huge lumen numbers, but raw emitter output is less meaningful than delivered beam intensity where the rider needs it. For road use, a controlled pattern with useful hotspot placement beats a giant wall of foreground light. Too much foreground brightness shrinks your distance vision by forcing your eyes to adapt to the near field. I see this often when riders install broad floods low on crash bars and then complain that dark tree lines still hide wildlife.
Color temperature matters as well. Lamps in the 5000K to 5700K range usually look crisp and bright, but very cool white light can feel harsher in rain or dust. Amber selective yellow improves contrast for some riders in poor weather and can help oncoming traffic notice the bike sooner. That said, white driving lamps generally provide better distance detail on dry rural pavement. The right answer depends on use case, not internet fashion. Riders commuting in dense traffic need conspicuity and disciplined glare control. Riders crossing remote Western highways after sunset need long-range reach and reliability under vibration.
Aiming should be treated as a measured task. Start with the motorcycle loaded as it is actually ridden, including panniers, top case, and rider weight. Electronic suspension settings change front-to-rear attitude, which changes beam angle. Set a baseline against a wall at a known distance, then road test on a dark route. Low-mounted conspicuity or fog lamps should stay low enough to avoid dazzling others. Driving lamps paired to high beam can be aimed farther out, but they still need lateral discipline. Recheck aim after the first 300 to 500 miles because brackets settle and fasteners bed in.
Reliability, Safety, and Common Failure Points
The most common failure on auxiliary light installs is not the lamp. It is the harness. Chafed insulation near the steering head, water intrusion at unsealed splices, overloaded cheap switches, and poor grounds cause most of the troubleshooting calls I get. On the Pan America, steering sweep is non-negotiable. Turn the bars from lock to lock with the suspension compressed and extended if possible, and verify that nothing pulls tight, rubs the fork tubes, or pinches between body panels. Keep harnesses away from exhaust heat, radiator edges, and sharp bracket corners. Use P-clamps or factory-style retaining points where possible instead of relying only on zip ties.
Fuse placement is another safety issue. The main fuse should sit close to the battery positive terminal so an accidental short anywhere downstream is protected immediately. If you run separate left and right lamp branches over a long distance, secondary branch fusing can make diagnosis easier and limit damage. For connectors, dielectric grease is sometimes helpful on external seals but should not be used as a substitute for proper terminal crimp quality. A poor crimp hidden under heat shrink is still a poor crimp. Use the correct ratcheting crimper for the terminal family you choose.
There are legal and practical limits too. Some jurisdictions restrict the number, color, or mounting height of forward-facing auxiliary lamps. Others prohibit certain lights on public roads unless they extinguish with low beam. Check local rules before finalizing the recipe. Also think about battery management. LED lamps are efficient, but multiple accessories add up. Heated gear, GPS, phone charging, air compressor use, and auxiliary lights together can challenge charging headroom at idle. If your use case includes slow off-road work with fan cycling and frequent stop-start riding, confirm alternator capacity and watch system voltage.
How This Hub Connects to Other Harley-Davidson Ergonomics and Performance Recipes
This Pan America 1250 auxiliary lighting recipe works as a hub because lighting sits at the intersection of ergonomics, electrical integration, and performance tuning. Once riders understand this framework, related upgrades become easier to evaluate. Heated seat and grip add-ons use similar switched-power logic. GPS and phone mounts raise the same cockpit packaging questions. Suspension setup affects headlight and auxiliary beam aim. Luggage choices change rear sag and therefore nighttime visibility. Even handguard and mirror selection can influence glare, switch access, and cable routing.
Within a broader Harley-Davidson content structure, this page should point readers toward model-specific recipes for cockpit control layout, adventure travel power distribution, off-road standing ergonomics, seat-to-peg comfort tuning, and tire-plus-suspension combinations that alter road feel. The point of a good recipe is not to push random accessories. It is to create systems that work together. On the Pan America, that means every electrical and ergonomic choice should support rider confidence, quick service access, and consistent performance in bad weather, at highway speed, and on rough surfaces. Build the light circuit once, build it correctly, and the motorcycle becomes easier to trust after dark. Use this hub as your starting point, then map the rest of your Harley-Davidson ergonomics and performance upgrades around the same disciplined standard.
Frequently Asked Questions
1. Why can’t I wire auxiliary lights on a 2026 Pan America 1250 Limited the same way I would on an older motorcycle?
The short answer is that the 2026 Pan America 1250 Limited uses a far more integrated electrical and control architecture than older bikes, so the old “find a switched hot wire and tap into it” method can create problems very quickly. On this platform, lighting, accessory behavior, fault reporting, and other electronic functions are influenced by a bus-based system that monitors loads and expects certain circuits to behave within narrow parameters. If you add a pair of auxiliary lights directly to a factory lighting wire, the bike may interpret the added draw as a fault, trigger diagnostic warnings, shut down a circuit, or create intermittent behavior that is difficult to troubleshoot.
This matters even more on the Limited trim because the packaging is tighter and the motorcycle typically includes more touring-oriented electronics and hardware competing for space and power distribution. Electronic suspension components, rider aids, factory lighting modules, heated equipment, and accessory interfaces all share the same environment. That means your lighting upgrade is not happening in isolation. A wiring plan that ignores the bike’s control network can lead to nuisance codes, reduced reliability, or harness damage over time.
The best approach is to treat auxiliary lights as their own managed accessory circuit. In practical terms, that usually means taking primary power directly from the battery through a properly fused harness, using a relay or solid-state power distribution module, and using a safe low-current trigger source that does not overload or confuse monitored factory circuits. In other words, the factory system should only be asked to authorize the lights, not feed them. This method protects the OEM wiring, keeps current off sensitive control circuits, and gives you a cleaner installation that is easier to service later.
2. What is the safest and most reliable way to power auxiliary lights on the 2026 Limited bus architecture?
The most reliable recipe is a dedicated battery-fed lighting circuit with its own fuse protection, switching logic, and grounding strategy. Start with a fused positive lead run directly from the battery to a relay, auxiliary fuse block, or a high-quality electronic accessory controller. From there, feed the auxiliary lights through appropriately sized wire based on total current draw and the length of the run. The fuse should be placed as close to the battery as possible so the harness is protected immediately if a short occurs anywhere downstream.
For triggering, use a low-current switched source or a CAN/bus-safe trigger interface rather than pulling full lighting current from a factory headlamp or accessory lead. That trigger can energize a conventional relay or signal a modern power module to turn the lights on. If you want the lights to follow ignition status, high beam activation, or an auxiliary switch command, the trigger side is where you build that logic. The key principle is separation: factory circuits provide information, while your dedicated harness provides power.
Grounding deserves just as much attention as positive power routing. Either return grounds directly to the battery or to a known high-quality chassis ground approved for accessories. Avoid daisy-chaining grounds through multiple components or relying on marginal contact points near coated brackets or painted hardware. Poor grounds are one of the most common causes of dim output, flickering, relay chatter, and hard-to-find electrical noise issues.
If you are building a premium setup, an auxiliary power distribution module can be worth the added cost. These units simplify fuse management, reduce bulky relay clusters, and often provide programmable switching behavior. On a modern adventure-touring bike with tight packaging and multiple electrical consumers, that cleaner architecture often pays off in reliability and easier future expansion.
3. Where should I get the trigger signal for the lights, and how do I avoid upsetting the bike’s control network?
The correct trigger source depends on how you want the lights to behave, but the rule is consistent: choose a signal that is low-current, stable, and compatible with the bike’s monitored systems. Many riders want auxiliary lights to come on with ignition, with the low beam, or only with the high beam. On a traditional motorcycle, you might simply splice into the desired wire and call it done. On the 2026 Pan America 1250 Limited, that can be risky because the lighting and accessory circuits may be electronically monitored, pulse-width managed, or otherwise sensitive to added loads.
A safer strategy is to use a trigger interface designed for modern motorcycle bus systems, or identify a true low-current switched output intended for accessory control rather than power delivery. If your lighting kit includes a relay harness, the relay coil usually draws very little current, which makes it a much safer thing to trigger from a factory source than the lights themselves. Even then, you should verify that the source is appropriate and not part of a circuit the vehicle tests for expected resistance or current behavior.
If you want high-beam-linked functionality, a trigger isolation method is especially helpful. This can include a relay, opto-isolated controller, or purpose-built accessory module that reads the signal without materially loading it. The goal is for the bike to “see” its original circuit behavior while your auxiliary system independently responds to that information. That distinction is what keeps the installation bus-friendly.
As for physical execution, use non-destructive connection methods whenever possible. Avoid random Scotch-lock style taps on premium motorcycles unless the manufacturer of the kit specifically supports that method and you are confident in weather sealing and strain relief. A clean trigger connection, proper sealing, and secure routing away from heat and steering movement are just as important as the electrical theory behind the circuit.
4. How do mounting location and the Limited model’s packaging affect the wiring plan for auxiliary lights?
Mounting choices directly influence wire length, routing complexity, connector exposure, service access, and even suspension and steering safety. On the Pan America 1250 platform, and especially on the Limited model with its premium equipment and tighter packaging, there is rarely a “universal” light mount that works without considering the rest of the motorcycle. Crash bars, fork areas, fairing supports, beak mounts, and lower chassis points all create different demands on the harness.
Fork-mounted or steering-mounted lights require special attention because the harness must tolerate repeated movement through the steering sweep without stretching, pinching, or rubbing. You need enough slack for full lock-to-lock movement, but not so much that the wire loops into sharp edges, hot surfaces, or suspension travel. Frame- or bar-mounted lights may be easier electrically, but they still require careful planning around radiator airflow, bodywork removal, and proximity to suspension hardware.
The Limited trim’s electronic suspension and touring-oriented layout can complicate otherwise simple cable runs. Space that looks available at first glance may already be committed to modules, brackets, bodywork clearance, or service access. That is why experienced installers dry-fit everything before final looming and tie-down. You want to verify that the light housings clear the fairing, that the beams are not blocked through suspension movement, and that the harness can be removed or serviced without disassembling half the motorcycle.
Weather protection also matters. Adventure-touring motorcycles see rain, washdowns, vibration, dust, and temperature swings. Use sealed connectors, abrasion-resistant loom, and secure fastener points. Keep wires away from exhaust heat, oil cooler and radiator edges, and any place where crash-bar flex or vibration can work-harden conductors over time. A well-mounted light can still be a poor installation if the harness routing is an afterthought.
5. What are the most common mistakes riders make when adding auxiliary lights to a 2026 Pan America 1250 Limited, and how can they avoid them?
The biggest mistake is trying to save time by using a factory lighting wire as both the trigger and the power source. That shortcut may appear to work initially, but it can overload a monitored circuit, create fault codes, or cause inconsistent operation once the bike’s electronics start evaluating the load. A close second is skipping proper fuse protection or placing the fuse too far from the battery. If a short develops in an unfused section of wire, the harness itself becomes the fuse, and that is exactly the scenario you want to prevent.
Another common error is underestimating voltage drop and wire sizing. Auxiliary lights, especially high-output units, can be sensitive to supply quality. Long wire runs with undersized conductors can reduce brightness, increase heat, and make premium lights perform like bargain units. Riders also sometimes mix grounding strategies carelessly, creating dimming, flicker, or electrical noise. A clean, intentional ground path is not optional on a modern motorcycle.
Mechanical mistakes are just as frequent as electrical ones. Installers often route harnesses through areas that look tidy with the bike parked but become pinch points once the bars turn, the suspension compresses, or the bodywork is reinstalled. Connectors may be left unsupported, wires may rest against sharp bracket edges, or excess slack may flap in the wind until the insulation fails. These are not cosmetic issues; they are long-term reliability issues.
Finally, many riders fail to think about the full system goal. Auxiliary lighting is not just about making the lights turn on. It is about doing so in a way that respects the motorcycle’s control network, preserves serviceability, survives adventure use, and delivers the beam pattern you actually need. The best installs begin with a wiring diagram, a mounting plan, a load calculation, and





