
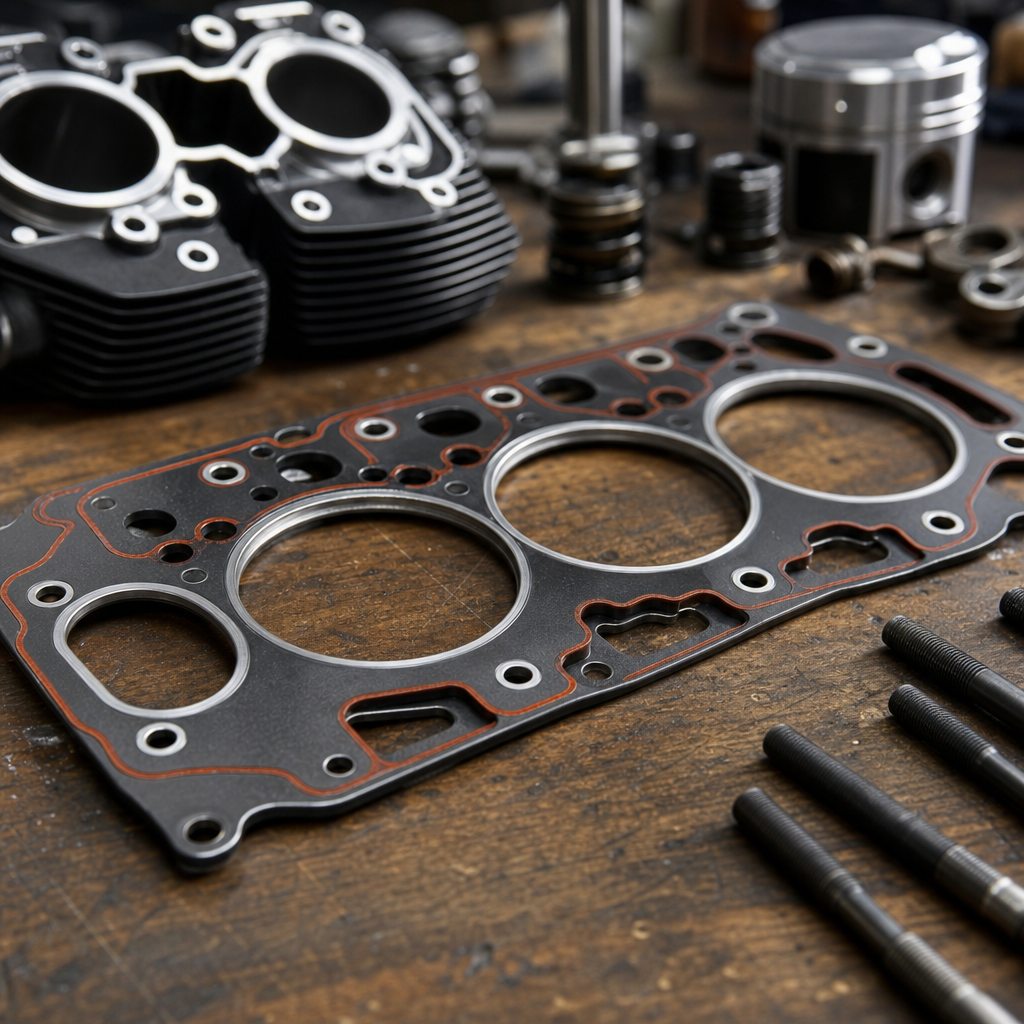
Milwaukee-Eight stage IV head gasket selection determines whether a high-compression Harley-Davidson build becomes a durable torque monster or an expensive teardown waiting to happen. In practical engine-building terms, a “recipe” is the complete combination of parts, measurements, machining choices, and assembly procedures that work together to achieve a target result. For this topic, the target is straightforward: maximize combustion seal in a Stage IV Milwaukee-Eight package, especially when cylinder pressure rises because of larger cams, higher compression ratios, tighter quench, freer-flowing heads, and aggressive tuning. Riders searching for a Milwaukee-Eight stage IV head gasket recipe usually want one clear answer, but the right answer depends on bore size, deck height, piston crown shape, head surface finish, fastener condition, operating temperature, and intended use.
I have built and inspected enough Harley top ends to know that most head gasket failures blamed on “bad gaskets” actually start elsewhere. The common root causes are inconsistent surface prep, reused torque-to-yield hardware, poor torque sequencing, excessive detonation, or a mismatch between gasket thickness and the engine’s real measured geometry. High-compression seal matters because the Milwaukee-Eight responds dramatically to cylinder pressure. When the seal is stable, the engine delivers stronger low-end torque, cleaner combustion, and repeatable dyno numbers. When the seal is unstable, symptoms show up fast: oil misting at the fire ring, unexplained compression loss, persistent pinging, coolant-style soot tracks on air-cooled surfaces, and eventually warped sealing faces or damaged pistons.
As a hub article for model-specific ergonomics and performance recipes, this guide also matters beyond the gasket itself. Every Harley-Davidson performance build is a system. Cylinder pressure changes heat load. Heat load changes tuning tolerance. Tuning tolerance affects rideability, especially on touring bikes that carry passengers, luggage, and taller gearing. Ergonomics enter the picture because a build that feels perfect on a Road Glide may feel abrupt or heat-soaked on a Street Glide used in city traffic, and a Low Rider ST rider may prioritize midrange punch over peak horsepower. The gasket recipe is therefore both a reliability decision and a riding-character decision.
Define the key pieces before choosing parts. “Stage IV” in Harley-Davidson language generally refers to a larger displacement top-end and cam package, often involving big-bore cylinders, matched heads, high-lift camshaft, throttle body upgrades, and injector support. “Head gasket” is the compressed sealing layer between cylinder and head that contains combustion pressure, oil return pathways, and heat transfer interfaces. “High-compression seal” means a seal that survives repeated peak cylinder pressure without combustion leakage, fretting, or clamp-load loss over heat cycles. The best recipe balances compression ratio, quench clearance, fastener preload, and tune quality. That balance is what keeps a Milwaukee-Eight fast, rideable, and together.
What the ideal Milwaukee-Eight Stage IV head gasket recipe includes
The most reliable recipe starts with measurement, not catalog shopping. For a Stage IV Milwaukee-Eight, I want the actual bore diameter, piston-to-deck measurement at true TDC, combustion chamber volume, piston dome or dish volume, and target quench clearance. Only then do I choose gasket thickness. On most serious street builds, the goal is not the thinnest gasket available; it is the gasket that delivers the desired compressed quench while keeping piston-to-head and valve-to-piston clearance safe under heat and rpm. A common target quench range for a modern performance V-twin is approximately .030 to .040 inch, but the exact number depends on rod stretch, intended rpm ceiling, and component stability.
Material and construction matter. Multi-layer steel gaskets are usually the right choice for modern high-compression Milwaukee-Eight engines because they maintain clamp load well, tolerate thermal cycling, and seal effectively when the head and cylinder surfaces are machined to the proper finish. Cometic is the name most builders know, and for good reason: their MLS offerings are widely available in multiple bores and thicknesses, making them useful when a build needs precise compression management. James Gaskets products are also common in Harley shops, though builders often reserve MLS styles for the highest cylinder pressure combinations. What matters more than brand loyalty is using a gasket designed for the exact bore and application, with no fire-ring overhang into the chamber and no restriction of critical oil passages.
Fasteners are inseparable from gasket performance. The Milwaukee-Eight relies on accurate clamping force, and that means new head bolts or approved high-strength studs when the application calls for them. Reusing stretched factory hardware on a Stage IV build is false economy. I have seen engines with excellent machine work fail because one bolt had inconsistent yield, reducing clamp load on one side of the bore. Stud kits can improve preload consistency and serviceability, but they must be installed with the manufacturer’s lubricant and torque specs, not guessed at. The recipe is complete only when gasket, surface finish, and fastener system are chosen as one package.
| Build factor | Best practice | Why it improves seal |
|---|---|---|
| Head gasket type | MLS gasket matched to bore and thickness target | Handles high cylinder pressure and heat cycles |
| Surface finish | Fine RA finish from proper milling equipment | Lets MLS layers conform and hold combustion |
| Fasteners | New bolts or premium studs with correct lube | Creates repeatable clamp load across the deck |
| Quench clearance | Measured, not assumed, typically tight but safe | Reduces detonation risk and improves burn speed |
| Tuning | Verified air-fuel ratio and knock-safe timing | Prevents pressure spikes that lift the head |
Surface finish, deck geometry, and clamp load: the hidden make-or-break details
If there is one place experienced builders separate themselves from parts changers, it is surface prep. MLS gaskets do not forgive rough or wavy sealing faces. Head and cylinder decks need to be flat and machined to a surface roughness compatible with MLS sealing, generally much smoother than what older composite gaskets tolerated. Shops commonly discuss RA, or roughness average, because it indicates whether the microscopic peaks and valleys will let the embossed layers seat correctly. If the finish is too rough, combustion gases can track through the texture. If the head has been hand-cleaned aggressively with abrasive discs, embedded grit and uneven low spots can ruin a new gasket immediately.
Deck geometry is just as important. I always verify that the cylinders are square to the case and that both decks produce consistent piston height side to side. On some big-bore combinations, small machining variations create different quench clearances front and rear. That changes effective compression, combustion speed, and detonation tendency. The rider may only notice that the bike “runs hot” or “likes more fuel in the rear cylinder,” but the underlying problem can be geometric inconsistency. Correcting it before assembly is far cheaper than compensating for it in the tune.
Clamp load deserves more attention than it gets on forums. Torque is only a proxy for preload. Lubricant choice, thread cleanliness, under-head friction, and stud or bolt stretch all change the final clamping force. That is why respected fastener makers publish their own specifications, and why mixing factory torque values with aftermarket hardware is risky. I use calibrated torque tools, clean threads thoroughly, chase damaged threads carefully rather than cutting them oversized without reason, and follow the exact sequence in stages. After the first full heat cycles, I inspect for any evidence of witness marks or seepage rather than assuming the job is finished because the engine started clean.
Compression, cam timing, and tuning strategy for a durable seal
Head gasket life is strongly tied to the pressure curve the engine actually sees, not just the static compression ratio printed on a piston box. A Milwaukee-Eight Stage IV combination with late intake closing can tolerate a higher static ratio than a build with an earlier-closing torque cam, because dynamic compression changes the effective trapped pressure. That is why two engines with the same piston and gasket thickness may behave very differently. If the bike is heavy, geared for highway passing, and ridden two-up in hot weather, I usually choose a recipe with a little more tuning margin instead of chasing every last tenth of compression. Street reliability beats dyno-sheet vanity.
Detonation is the seal killer that many riders do not hear until damage is advanced. The Milwaukee-Eight can mask light knock under exhaust noise, especially with loud pipes. On the dyno, I look for signs beyond audible ping: unstable torque, rising head temperature, peppering on plugs, or timing that must be pulled back harder than expected. Correct quench helps by increasing turbulence and burn efficiency, but it cannot save a poor tune. Fuel quality, intake air temperature, spark advance, injector characterization, and throttle body calibration all affect peak pressure. A tuner using Screamin’ Eagle Pro Street, Dynojet Power Vision, or TTS MasterTune should build a map that respects the compression recipe rather than assuming one canned calibration fits all Stage IV builds.
Real-world example: a touring Milwaukee-Eight 117 with CNC heads, larger injectors, and a high-lift cam came in after repeated head gasket failures. The owner had already replaced gaskets twice. The true problem was a combination of excessive timing in the midrange, marginal fuel for the compression level, and a gasket thickness that tightened quench beyond the safe range after the heads were milled. We corrected chamber volume calculations, selected a slightly thicker MLS gasket, installed new fasteners, and revised the map for realistic hot-oil conditions. The bike lost almost no peak power, gained consistency, and stopped pushing combustion traces past the fire ring.
Model-specific Harley-Davidson recipes: matching seal strategy to riding ergonomics and use
This subtopic sits inside Harley-Davidson because the same engine recipe does not serve every chassis or rider equally. On a Road Glide or Street Glide, the Stage IV rider often wants loaded passing power from 2,500 to 4,500 rpm, smooth heat behavior in summer traffic, and low mechanical drama on multi-state trips. That use case favors a conservative high-compression seal recipe: excellent quench, premium fuel only, stable oil temperature management, and a tune that protects the engine under sustained load. On a Low Rider S or Low Rider ST, riders may accept a sharper hit and a little more vibration character in exchange for stronger midrange response. The gasket strategy still centers on seal integrity, but cam choice and dynamic compression can be a touch more aggressive if the bike is lighter and less burdened by passenger weight.
Baggers also expose a practical ergonomics issue: heat at the rider’s right thigh and seat area. A leaking head gasket or marginal tune can increase perceived heat dramatically because combustion inefficiency raises head temperature. That matters for comfort as much as reliability. Softail riders, by contrast, often notice throttle transition and traction first. A recipe that seals perfectly but delivers abrupt low-speed fueling is still a poor fit for real roads. The best hub guidance is simple: choose compression, gasket thickness, and tune according to how the motorcycle is ridden, not just the maximum number advertised in a catalog.
For readers mapping future builds, this page connects naturally to related subtopics such as Road Glide torque-biased touring recipes, Low Rider ST midrange street recipes, Street Glide heat-management setups, and Milwaukee-Eight cam-and-compression matching guides. The common thread is that ergonomics and performance are not separate decisions. Handlebar reach, seating posture, gearing, wind protection, luggage load, and passenger use all influence how often the engine sees high cylinder pressure. A head gasket recipe that survives those real conditions is the one worth building.
Assembly checklist and common mistakes to avoid
A disciplined assembly process prevents most sealing failures. Dry-fit the cylinders and heads, measure deck height carefully, and confirm quench on both cylinders before final installation. Clean deck surfaces with non-abrasive methods that leave no residue. Verify dowel alignment, inspect oil passages, and confirm that no gasket layer intrudes into the bore. Use the specified lubricant under fastener heads and on threads where required. Torque in the proper pattern, in stages, with a known-accurate wrench. Rotate the engine by hand and recheck for mechanical interference before final startup. On first fire, avoid long idle heat soak; bring the engine to operating temperature under controlled conditions, then inspect for leaks after cooldown.
The most common mistakes are predictable. Builders assume the catalog gasket thickness matches their final compressed dimension without checking. They mill heads for compression but forget the effect on quench. They combine a thin gasket with a domed piston and then chase knock with timing retard, sacrificing the very performance they wanted. They install MLS gaskets on surfaces better suited to composite material. They reuse old bolts. They ignore the tune. None of these are advanced errors; they are process errors. The cure is methodical measurement and honest matching of components.
The Milwaukee-Eight Stage IV head gasket recipe that maximizes high-compression seal is not a mystery part number. It is a measured system built around the correct MLS gasket, proper surface finish, consistent fastener preload, safe quench, and a knock-resistant tune matched to the bike’s chassis and workload. When those elements align, the engine rewards the rider with strong torque, lower drama, and a longer service life. When one element is guessed, the gasket becomes the weak link even if the rest of the parts are premium.
Use this hub as the foundation for every Harley-Davidson ergonomics and performance recipe you plan next. Start with how the motorcycle is ridden, measure everything, and build the top end around real geometry instead of assumptions. If you are speccing a Road Glide, Street Glide, Low Rider ST, or another Milwaukee-Eight platform, carry these sealing principles into the cam, compression, and tuning articles that branch from this page. A well-sealed high-compression engine is not only faster; it is easier to live with, easier to tune, and far more likely to stay on the road where it belongs.
Frequently Asked Questions
What does a “Milwaukee-Eight Stage IV head gasket recipe” actually include?
A Milwaukee-Eight Stage IV head gasket recipe is much more than choosing a single gasket thickness or brand. In real engine-building language, the recipe is the complete sealing strategy for the top end. That includes the cylinder and head surface finish, the exact bore size, piston design, compression target, deck height, squish clearance, fastener choice, torque method, heat-cycle procedure, and the gasket material and thickness that ties all of those parts together. On a high-compression Stage IV combination, the head gasket is not working alone. It is part of a system that has to contain peak cylinder pressure, survive repeated heat cycles, and maintain clamp load over time without letting combustion pressure torch the fire ring or push oil where it does not belong.
For a Milwaukee-Eight specifically, this recipe becomes critical because Stage IV combinations typically raise cylinder pressure significantly through larger displacement, more aggressive cam timing, increased airflow, and compression changes. That means the correct gasket decision depends on measured numbers, not guesses. Builders need to know actual piston-to-deck relationship, chamber volume, the final compression ratio, and whether the tune will be conservative, pump-gas friendly, or pushed harder for maximum output. If any one of those variables is off, even a premium gasket can fail because the underlying combination is not supporting it properly.
In practical terms, a reliable recipe usually starts with perfectly flat, clean mating surfaces, a gasket matched to the bore and intended compression level, and careful verification of quench and piston-to-head clearance. It also includes using the correct torque sequence, proper lubrication or dry-install procedure depending on the gasket manufacturer, and retorquing only if the product and fastener system call for it. The strongest sealing setups are built from measurements and process discipline, not folklore. That is why experienced Harley builders talk about a recipe: success comes from the combination, not from one miracle part.
How do you choose the right head gasket thickness for maximizing seal in a high-compression Milwaukee-Eight Stage IV build?
The right head gasket thickness is chosen by balancing two goals at once: achieving the desired compression ratio and maintaining a safe, effective quench distance. Many people focus only on compression numbers, but high-compression seal depends heavily on proper piston-to-head clearance. If the gasket is too thin, you may gain compression on paper but create mechanical interference risk, unstable combustion under heat expansion, or uneven clamp behavior. If the gasket is too thick, you can lose quench efficiency, soften combustion quality, and actually make the engine more detonation-prone even with slightly lower static compression. Poor combustion control can raise pressure spikes and hurt gasket life just as much as excessive static compression can.
The correct process is to measure the engine as assembled, not rely on catalog assumptions. That means checking deck height at the actual cylinders, confirming piston rock and true top dead center, and measuring chamber volume if compression ratio matters precisely. From there, the gasket thickness is selected to put the final quench in the range appropriate for the build’s intended use, fuel octane, and thermal load. A street-driven Stage IV Milwaukee-Eight usually benefits from a quench target tight enough to promote efficient burn and torque, but not so tight that normal expansion and real-world riding conditions put the piston too close to the head. The exact number depends on components and machining quality, which is why reputable builders always measure instead of defaulting to the thinnest available gasket.
Seal quality also improves when the chosen gasket thickness matches the rest of the setup rather than compensating for poor machining. A gasket should not be used as a bandage for uneven decks, mismatched cylinder heights, or questionable piston clearance planning. If the build requires a certain thickness to hit the target, that is one thing. If it needs an unusual thickness because the machine work is inconsistent, the underlying problem should be corrected first. In a durable high-compression recipe, gasket thickness is a precision tuning choice, not a rescue tool.
Which matters more for head gasket durability on a Milwaukee-Eight Stage IV engine: the gasket itself or the machine work and assembly?
Machine work and assembly matter more, although the gasket still has to be the correct type for the application. A premium head gasket cannot compensate for warped surfaces, poor finish, contamination, bad torque practices, or uncontrolled detonation. In fact, many so-called gasket failures are really clamping or combustion-control failures. If the cylinder deck and head surface are not flat and properly finished for the gasket material being used, the seal is already compromised before the engine ever starts. If threads are dirty, studs or bolts are inconsistent, torque values are rushed, or the pattern is ignored, clamp load becomes uneven and the fire ring gets punished in the hottest part of the chamber.
Surface finish is especially important. Modern gasket designs, including multi-layer steel styles commonly used in performance applications, need the right texture to bite and conform correctly. If the finish is too rough, the gasket cannot settle properly. If it is too smooth in a way that does not match the gasket manufacturer’s recommendation, the layers may not seal as intended. Flatness across the head and cylinder deck is equally important because high-compression Milwaukee-Eight engines create substantial localized pressure. Even slight distortion can allow combustion gases to start leaking, and once that starts, the escaping flame front rapidly damages the sealing area.
Assembly discipline is the other half of durability. Proper cleaning, correct thread preparation, accurate torque tools, the right lubricant or sealant where specified, and a careful tightening sequence all directly affect head gasket life. So does the tune. An engine that is too lean, too advanced, or repeatedly detonating will stress any gasket. The best-performing Stage IV sealing combinations are the ones where the builder treats the gasket as one component in a controlled system: accurate machining, proper fasteners, correct torque strategy, verified quench, and a safe tune calibrated for the real compression and fuel being used.
Are MLS, coated, or performance head gaskets automatically better for a Stage IV Milwaukee-Eight high-compression build?
Not automatically. A more expensive or more “performance-oriented” gasket is only better if it matches the application, the surface finish, and the clamping strategy of the engine. MLS gaskets, for example, are often an excellent choice for high-compression builds because they handle movement and cylinder pressure very well when the surfaces are properly prepared. But they are not magic. They generally require better surface finish control and benefit from very accurate machining. If those conditions are not met, an MLS gasket can perform worse than expected, not better. Likewise, coated gaskets can offer strong sealing in real-world Harley builds, but the coating does not fix deck irregularities or poor tune quality.
The real question is how the gasket behaves in your exact Stage IV package. Bore size has to be correct so the fire ring is positioned properly without shrouding or exposing the chamber edge. Thickness has to support the intended quench and compression target. The material has to tolerate the temperature and pressure of the build. And the gasket has to be compatible with the head and cylinder finish. A strong high-compression recipe often includes a gasket from a trusted manufacturer with proven M8 performance history, but experienced builders select it based on measured fit and sealing needs, not branding alone.
Another overlooked factor is that head gasket choice must align with the rest of the fastener system. If a builder is using upgraded studs or a specific torque method, the gasket should be part of that tested combination. Some setups are known to work reliably because the clamp load, surface prep, and gasket design complement one another. That proven compatibility is worth more than chasing the most aggressive-sounding gasket on the shelf. In other words, the best gasket for a Stage IV Milwaukee-Eight is the one that fits the bore correctly, supports the compression and quench goals, matches the surface finish, and has a proven track record in similar cylinder-pressure conditions.
What are the biggest mistakes that cause head gasket problems in a high-compression Milwaukee-Eight Stage IV build?
The biggest mistake is assuming the head gasket itself is the main variable. In reality, most failures start earlier in the build process. One major error is skipping measurements and selecting a gasket based on what “usually works.” Stage IV Milwaukee-Eight combinations vary enough in deck height, chamber work, piston design, and cylinder preparation that guessing can lead to poor quench, excessive compression, or insufficient mechanical clearance. Another common mistake is poor surface preparation. Even a tiny amount of old gasket residue, oil film, or deck irregularity can weaken the seal where cylinder pressure is highest. When that happens, the leak often starts small and then escalates quickly under load.
Tuning mistakes are another leading cause. A high-compression Harley that is too lean, too hot, or too aggressive on ignition timing can create detonation and pressure spikes severe enough to damage the gasket even if the mechanical assembly is sound. Builders sometimes blame the gasket when the real problem is uncontrolled combustion. Fuel quality also matters. If the compression and cam combination demand better octane than the bike consistently receives, the head gasket can become the first visible casualty of a broader mismatch in the recipe. The same goes for inadequate cooling management and repeated hard use before the tune is fully dialed in.
Assembly shortcuts round out the list. Reusing questionable fasteners,





