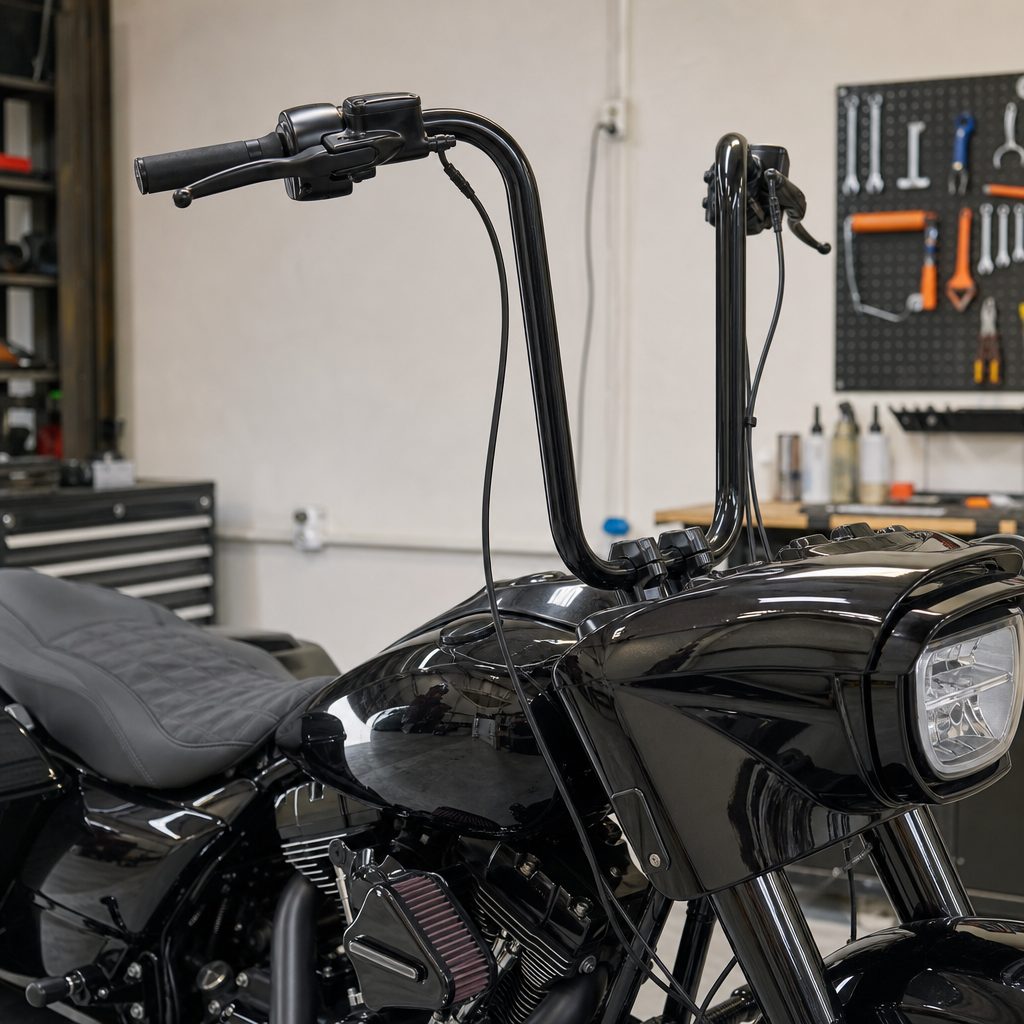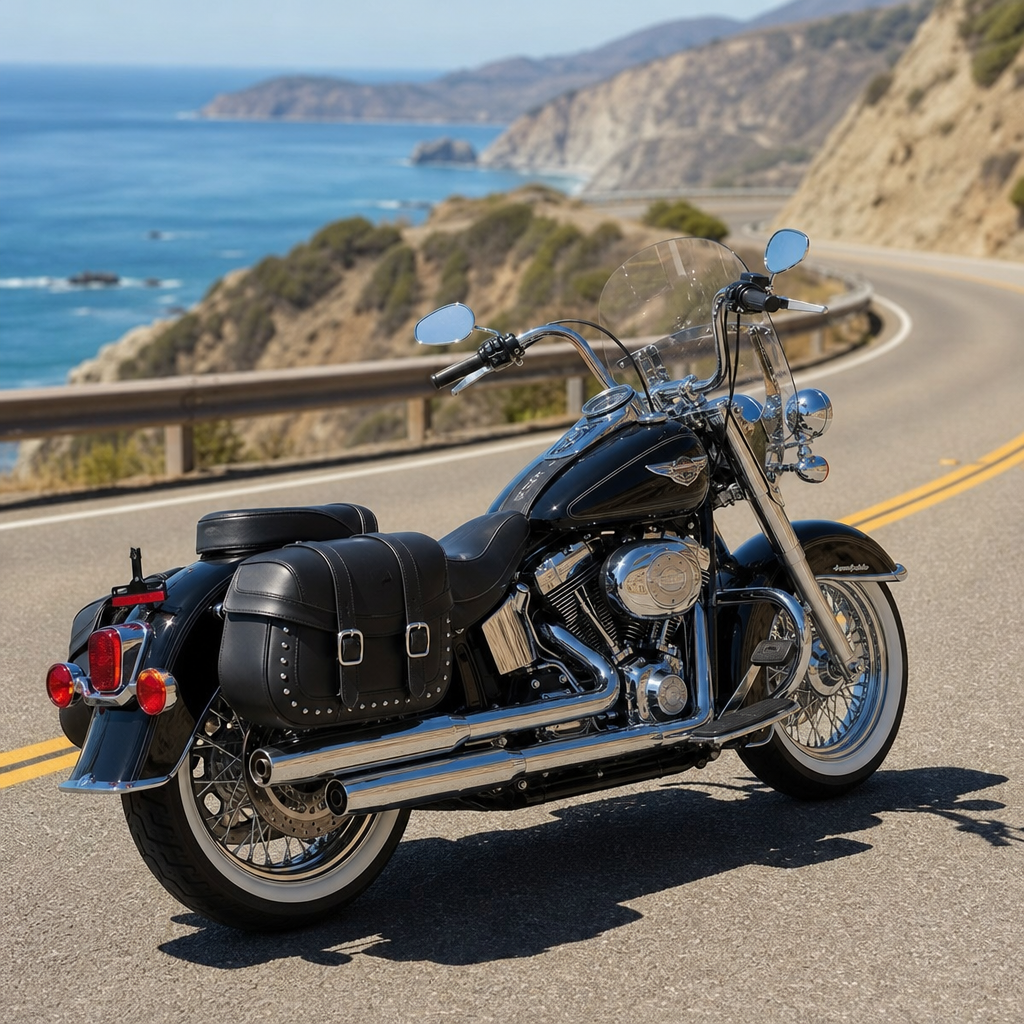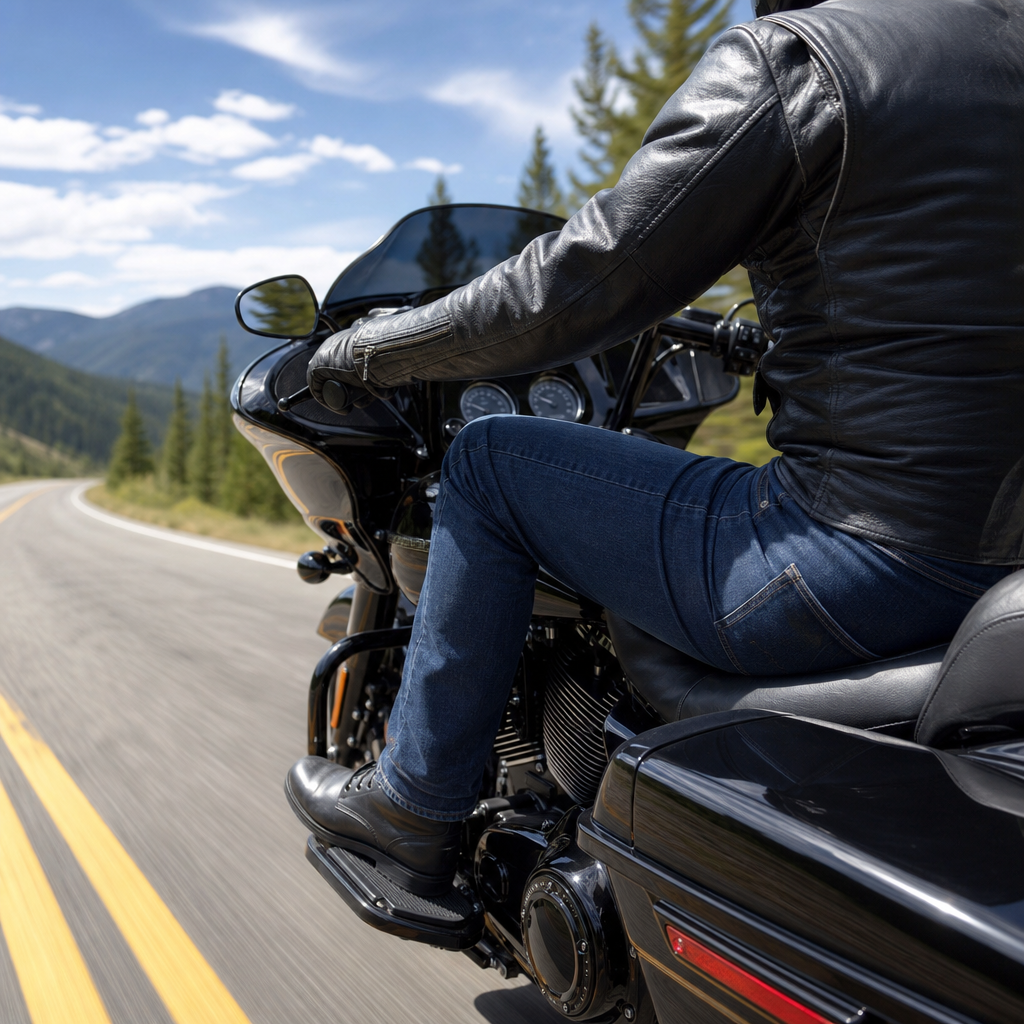
The 2026 Road Glide is built for distance, but even a strong touring platform can punish the rider when highway peg placement is wrong. On long interstate stretches, knee fatigue usually comes from a simple ergonomic mismatch: the angle between hip, knee, ankle, and floorboard changes just enough to load the quadriceps, compress the patellar tendon, and limit circulation. On this motorcycle, where the sharknose fairing, stretched riding triangle, and frame-mounted front end encourage hours in the saddle, peg position matters more than many riders expect.
Highway pegs are auxiliary footrests mounted to engine guards or dedicated supports so a rider can vary leg position beyond the stock floorboards. Knee fatigue is the dull ache, tightness, or burning that appears after holding one bend angle too long, especially when the knees stay partially flexed and unsupported against wind pressure. Ergonomics refers to fitting the machine to the rider’s body so joints stay in a neutral range, weight is distributed properly, and muscle effort stays low over time. For Road Glide owners, this topic matters because comfort is not cosmetic. It affects concentration, braking readiness, lower-back strain, and how many miles you can cover before needing an unscheduled stop.
I have set up touring Harleys for riders from about 5-foot-6 to well over 6 feet, and the same lesson repeats: there is no universally correct highway peg placement on the 2026 Road Glide. The right location depends on inseam, boot sole thickness, seat height, bar reach, floorboard use, and whether the rider likes a relaxed cruiser sprawl or a more active sport-touring stance. A peg position that feels excellent during a five-minute parking lot test can become miserable after forty miles because the knee opens too far, the hips rotate forward, or the rider loses the ability to brace over rough pavement.
As the hub for model-specific ergonomics and performance recipes under the Harley-Davidson category, this article explains how to place highway pegs on the 2026 Road Glide to avoid knee fatigue, what measurements matter, which compromises are acceptable, and how this setup connects to seat choice, suspension sag, bars, boots, and riding technique. If you want a short answer, here it is: place the pegs so your knee angle opens noticeably compared with the stock floorboard position, but not so far that your hips lock, your lower back arches, or you must point your toes to keep contact. The rest of this guide shows exactly how to achieve that result consistently.
Why knee fatigue happens on the 2026 Road Glide
Knee fatigue on a Road Glide is usually not a knee problem first. It is a whole-chain fit problem. When the stock floorboards hold your feet under you for hours, the knee remains flexed in a limited range while the thighs support subtle body tension against wind, acceleration, and road shock. Add a tall touring saddle, heavy boots, or bars that pull you slightly forward, and the quadriceps never fully relax. Riders often describe this as “stiff knees,” but the source may be hip flexor tightness, hamstring tension, or pressure concentrating at the front edge of the seat.
The 2026 Road Glide amplifies these effects because it is designed for stable high-speed touring. You tend to settle into one posture and stay there. The fixed fairing reduces upper-body wind blast, which sounds helpful, but it also means you may not naturally shift around as often as on a naked bike. Less movement equals longer static loading. If the highway pegs are too high, your knees stay bent almost as much as they are on the floorboards, so relief is minimal. If they are too low or too far forward, the knee opens excessively and the pelvis tips, creating lower-back tension that can refer discomfort back into the legs.
The goal is not to create one perfect posture. The goal is to create a second posture that meaningfully changes joint angles without compromising control. Riders who understand that usually solve fatigue faster than riders who chase a stretched-out look.
Baseline rider triangle: the measurements that matter
Before moving any hardware, establish a baseline riding triangle. Measure your inseam in riding pants and boots, because denim thickness and boot soles change effective reach. Then note seat height in its loaded condition, not just brochure height. On touring Harleys, suspension preload and seat foam shape can alter hip position more than half an inch, which is enough to change where highway pegs should land.
Next, sit on the bike on level ground with the motorcycle upright. Have a helper photograph your side profile with feet on the stock floorboards and hands on the grips. Look at four points: hip angle, knee angle, ankle angle, and spine position. In most successful touring setups, the highway peg position opens the knee by roughly 20 to 35 degrees relative to the floorboard posture. Less than that often feels like no real relief. Much beyond that may feel good briefly but reduce stability and create hamstring pull at the back of the knee.
Also measure lateral width. Engine guards on the Road Glide push pegs outward, so the legs are not only extending forward; they are spreading slightly. For some riders, especially those with previous hip issues, a wider peg stance can be as important as forward distance. That is why two riders with identical inseams can prefer different mounts or arm lengths.
Best highway peg placement ranges for long-distance comfort
Most 2026 Road Glide riders find the best highway peg placement in a moderate zone rather than at the extremes. In practical terms, that means the pegs should let you rest the heel or midfoot naturally while keeping a slight bend in the knee and a slight bend in the ankle. Your legs should feel supported, not dangling. You should also be able to return to the floorboards instantly without searching for them.
| Rider profile | Typical peg height | Typical fore-aft position | What it usually fixes |
|---|---|---|---|
| Shorter inseam, 28 to 30 inches | Near mid-bar or slightly above | Closer to rider | Reduces overextension and toe-pointing |
| Average inseam, 30 to 33 inches | Mid-bar | Neutral to moderately forward | Balances knee opening with quick recovery to boards |
| Taller inseam, 34 inches and above | Mid-bar to slightly low | Moderately forward | Creates real leg extension without hip lockout |
These ranges are starting points, not laws. I usually begin with the peg spindle roughly in line with the lower third of the engine guard’s usable section, then adjust in quarter-inch steps. On long-haul setups, the winning position is often closer and slightly higher than riders expect from photos online. That placement preserves leverage through the core and keeps the pelvis from rotating too far forward. It may not look dramatic, but it works for 300-mile afternoons.
A direct rule helps: if you must fully straighten one leg to feel the peg, it is too far. If your knees still look visibly tucked, it is too close. If your toes point downward to maintain contact, the peg is too low. If your knees rise toward your chest, it is too high.
How seat, bars, suspension, and boots change peg placement
Highway pegs cannot be tuned in isolation. A lower-profile seat often moves the hips down and slightly back, which increases effective leg reach and may require pegs to come rearward or upward. A tall comfort seat can do the opposite. On Road Glides, bar changes matter too. Pullback bars can reduce the forward lean at the torso, allowing a slightly farther peg position without stressing the lower back. More forward bars may require pegs to be closer so the rider can still brace the core.
Rear suspension preload changes loaded seat height and hip angle. Increase preload for two-up touring or heavy luggage, and you may sit higher, effectively tightening the knee angle on the floorboards while making the highway pegs feel slightly closer. Boots add another overlooked variable. Thick soles reduce ankle flex demand and can make a lower peg workable. Thin-soled riding shoes often reveal a poor setup quickly because the ankle has to compensate more.
This is why a model-specific ergonomics recipe should be treated as a system. On customer bikes, I never finalize peg placement until the seat, bars, and usual travel load are established. Otherwise the rider ends up adjusting the wrong part for a problem caused elsewhere.
Installation strategy and on-road testing
Mount the pegs securely using hardware matched to the engine guard diameter and torque values specified by the manufacturer of the clamp or mount. On a touring Harley, clamp rotation under load is common when installers reuse worn fasteners, ignore threadlocker guidance, or over-polish a contact area. A peg that slips even slightly ruins the test process because the rider begins compensating unconsciously.
For the first fitment, sit on the bike and place the pegs where your boots contact them with relaxed ankles. Then test three scenarios: smooth highway at 70 mph, broken pavement, and a controlled transition back to the floorboards for braking and corner entry. On-road testing matters because parking lot comfort lies. At speed, the legs interact with wind pressure, seat foam compression, and engine vibration differently.
Use a simple evaluation sequence after every 20 to 30 miles. Ask: Did the knees relax within two minutes? Could you keep contact without pointing the toes? Did your lower back tighten? Could you return to the boards instantly? Did one side feel better than the other? That last question matters because many riders have asymmetries from old injuries, dominant-leg habits, or pelvis rotation. Sometimes the best solution is a tiny adjustment in peg angle rather than peg location.
Common mistakes that create more fatigue
The most common mistake is placing highway pegs as far forward as the hardware allows. Riders often do this because the bike looks longer and the first impression feels luxurious. After an hour, the knees may feel fine, but the hips and lower back begin carrying the cost. Another mistake is copying another rider’s setup. A 6-foot-2 owner with a tall saddle and 34-inch inseam can post a perfect-looking Road Glide fit online that would be terrible for a 5-foot-9 rider with a reach seat.
Another frequent issue is choosing pegs that are too small or too slippery. A broad, grippy surface supports relaxed foot placement and reduces micro-tension in the calves. Angle is important too. Pegs should meet the boot sole naturally, not force the ankle inward or outward. Finally, some riders rely on highway pegs too much. They are for periodic relief, not a permanent primary position when traffic, weather, or road conditions demand immediate control inputs.
The Road Glide ergonomics recipe for all-day mileage
For most solo-touring riders on the 2026 Road Glide, the best all-day recipe is straightforward: start with a seat that supports the pelvis neutrally, set rear preload for actual travel weight, confirm bars allow a soft bend in the elbows, and place highway pegs in a moderate mid-height, moderate-reach position that opens the knees without locking the legs. Add boots with enough sole structure to rest comfortably on the pegs, and rotate among floorboards, pegs, and occasional standing weight shifts every 15 to 20 minutes.
This approach works because it addresses the true cause of knee fatigue: static posture, not simple lack of legroom. When riders vary joint angles and maintain a neutral spine, they stay fresher and more alert. That is the larger benefit of proper highway peg placement on the 2026 Road Glide. It protects comfort, control, and confidence at the same time.
If you are building out your Harley-Davidson touring fit, treat this page as the starting hub for model-specific ergonomics and performance recipes, then test your own setup methodically. Measure first, adjust in small steps, ride enough miles to judge honestly, and refine until your knees stop being the reason the day ends early.
Frequently Asked Questions
What causes knee fatigue on long rides when highway pegs are placed incorrectly on a 2026 Road Glide?
Knee fatigue usually starts with a small ergonomic error that becomes a big problem after an hour or two in the saddle. On the 2026 Road Glide, the riding position is naturally oriented toward distance, but the relationship between the floorboards, seat, bars, and highway pegs still has to fit the rider. If the pegs are mounted too far forward, the knees can lock out or hover near full extension, which puts constant tension into the quadriceps and patellar tendon. If they are too close, the knees remain overly bent, which keeps the joint compressed and limits the relief those pegs are supposed to provide in the first place.
The issue is not just knee angle by itself. Hip rotation, ankle position, lower-back support, and the rider’s ability to shift weight all influence how much stress the knee absorbs. A peg position that forces the toes too high or too low can change ankle flexion enough to pull tension upward into the shin and knee. Likewise, if the hips roll forward because the legs are reaching awkwardly, the rider may brace unconsciously against the floorboards or seat, creating a constant muscular load. On a Road Glide, where the frame-mounted fairing and stretched touring posture invite long interstate miles, these small alignment problems often show up as aching around the kneecap, burning in the thighs, stiffness during fuel stops, or numbness caused by reduced circulation. Correct peg placement restores variation to the riding posture, which is the real key to reducing fatigue.
Where should highway pegs be positioned on a 2026 Road Glide to reduce knee strain most effectively?
The best starting point is to place the highway pegs so that when your feet are on them, your knees remain slightly bent rather than straightened completely. For most riders, that means using the pegs as an alternate leg position, not a full stretched-out lounge position that locks the joints. A slight bend at the knee helps the legs absorb vibration, keeps the quadriceps from staying under static tension, and allows blood flow to continue more naturally through the joint area. On the 2026 Road Glide, that usually translates to a peg location that lets the heel or midfoot rest comfortably while the hips stay neutral and the lower back does not round excessively.
In practical terms, aim for a placement that gives you a relaxed extension from the floorboards without forcing you to scoot forward off the seat pocket. You should be able to transition to the pegs without reaching with your toes or twisting your pelvis. If you feel like you have to point your feet hard to find the pegs, they are often too far away or too high. If your knees flare outward too much, the pegs may be too wide or mounted at an angle that rotates the hips unnaturally. Many experienced touring riders prefer a setup that allows two things at once: a meaningful change in leg angle from the stock floorboard position and an easy return to braking and shifting posture without searching for the controls. That balance matters more than maximum stretch. The right location is the one that creates relief while preserving control, circulation, and a relaxed bend through the entire lower body.
How can I tell if my current highway peg setup is too high, too low, too far forward, or too far back?
Your body will usually tell you, and the symptoms are surprisingly specific. If the pegs are too high, your knees may feel more folded than relaxed, and you may notice tightness at the front of the joint or pinching through the hips. A too-high position can also make your ankles feel cramped because the foot has to dorsiflex aggressively just to stay planted. If the pegs are too low, the legs can feel like they are dropping away from the body without support, which often creates hamstring tension, pressure under the thighs, and instability when the bike moves over uneven pavement. Riders sometimes describe this as feeling like their legs are hanging instead of resting.
If the pegs are too far forward, the most common sign is knee lockout or near-lockout, followed by thigh fatigue and stiffness when returning to the floorboards. You may also feel yourself sliding forward in the seat or bracing through the lower back. If the pegs are too far back, they fail to offer enough posture change, so the knees still stay bent too much and fatigue builds almost as if you were not using highway pegs at all. Another clue is how quickly you can move between positions. On a proper setup, the transition should feel natural and repeatable. On a poor setup, your legs search for the pegs, your feet land inconsistently, or you hesitate because the position does not inspire confidence. After a long ride, evaluate where the discomfort shows up: front-of-knee pain often suggests excessive extension load, while deep stiffness and compression can point to too much bend. Those patterns are useful when fine-tuning placement on a Road Glide intended for all-day travel.
Does rider height, inseam, or seat choice change the ideal highway peg placement on the 2026 Road Glide?
Absolutely. Highway peg placement is never one-size-fits-all, especially on a touring motorcycle where riders often personalize seats, bars, suspension, and even floorboard position. Inseam length changes the knee angle dramatically, so two riders of the same overall height can need very different peg locations. A rider with a longer femur may need pegs positioned differently than someone whose length is more evenly distributed between the thigh and lower leg. Seat shape also matters more than many people expect. A deep-bucket touring seat can hold the hips farther back and lower, while a taller or flatter seat may shift the rider up and forward. Both change the effective distance to the pegs.
That means the correct setup on a 2026 Road Glide has to be judged from the rider’s actual seated position, not just from a catalog description or another owner’s measurements. Even a small change in seat height can alter how much the knees bend on the floorboards and how far the feet must reach toward highway pegs. Riders with shorter inseams often benefit from keeping the pegs slightly closer and easier to access, while taller riders may need more forward extension but still should avoid full lockout. If you have upgraded to a seat that improves back support, you may discover you can run the pegs a bit farther forward because the pelvis is held more neutrally. The key is to evaluate the entire riding triangle as a system. The pegs are not an isolated accessory; they are part of a lower-body support strategy that should match your proportions and your exact seating position on the bike.
What is the best way to test and fine-tune highway peg placement before committing to long-distance rides?
The smartest approach is to test in stages rather than making one dramatic adjustment and assuming it is correct. Start by setting the highway pegs in a moderate position that offers a clear change from the floorboards but keeps a visible bend in the knees. Then do shorter rides of 20 to 40 minutes on steady roads where you can safely alternate between floorboards and pegs several times. Pay attention to how quickly your legs relax once your feet are on the pegs, whether your knees feel supported or strained, and whether your hips stay centered in the seat. A good setup feels natural within minutes. A poor one usually creates fidgeting, ankle adjustment, or the urge to return to the boards almost immediately.
After that, increase ride length and evaluate recovery, not just comfort during the ride. The real test comes when you stop for fuel or walk around after an hour or more. If your knees feel stiff, your thighs are burning, or your first few steps are awkward, the peg location still needs work. Make small adjustments only, because a change of even a small amount in height, angle, or reach can significantly affect joint loading over distance. It also helps to assess control access: you should be able to return to the brake and shifter quickly and predictably without looking down or repositioning your whole body. On a long-range platform like the 2026 Road Glide, the ideal setup is one that encourages movement instead of trapping you in one stretched posture. Fine-tuning should leave you with multiple usable leg positions, smoother circulation, less front-of-knee pressure, and better comfort at the end of the day rather than just during the first few miles.