H-D Carbide Collection Grips bring a distinctive mix of machined style, palm support, and long-distance control, and installing them on the 2026 Integrated Accessory Bus requires more than a simple parts swap. Riders searching for model-specific ergonomics and performance recipes usually want three answers at once: will these grips fit, how does the new electronic architecture change installation, and what setup delivers the best comfort on a given Harley-Davidson platform. This hub article addresses all three by explaining the grips, the 2026 accessory network, and the practical tuning choices that matter after the hardware is bolted on. In Harley-Davidson terms, ergonomics means the relationship among grip diameter, wrist angle, lever reach, seat position, floorboard or peg placement, and bar geometry. Performance recipes are repeatable combinations of parts and adjustments that produce a defined result, such as reduced hand fatigue on a Road Glide, faster wrist transitions on a Low Rider ST, or better standing control on a Pan America. I have installed premium Harley controls on CAN-based touring and cruiser models for years, and the shift to the 2026 Integrated Accessory Bus makes planning more important because electrical accessories now authenticate, communicate, and initialize through a shared digital layer. The good news is that Carbide Collection Grips remain a worthwhile upgrade when installation is approached methodically. They improve tactile feedback, complement matching pegs and shifter components, and can support better riding posture when paired with the correct bars and control adjustments.
This page serves as the hub for the full subtopic because one grip recommendation never fits every bike or every rider. A batwing touring rider with medium gloves, a neutral shoulder angle, and frequent cold-weather miles needs a different solution than a club-style Softail rider who prioritizes leverage during aggressive corner exits. The 2026 platform adds another variable: accessories tied into the bike’s integrated bus must be chosen with compatibility, software state, and current draw in mind. That matters especially when riders are combining grips with heated elements, auxiliary lighting, wireless modules, or adaptive rider controls. The goal here is to give you a reliable starting framework, then point you toward the model-specific logic that should govern your final setup.
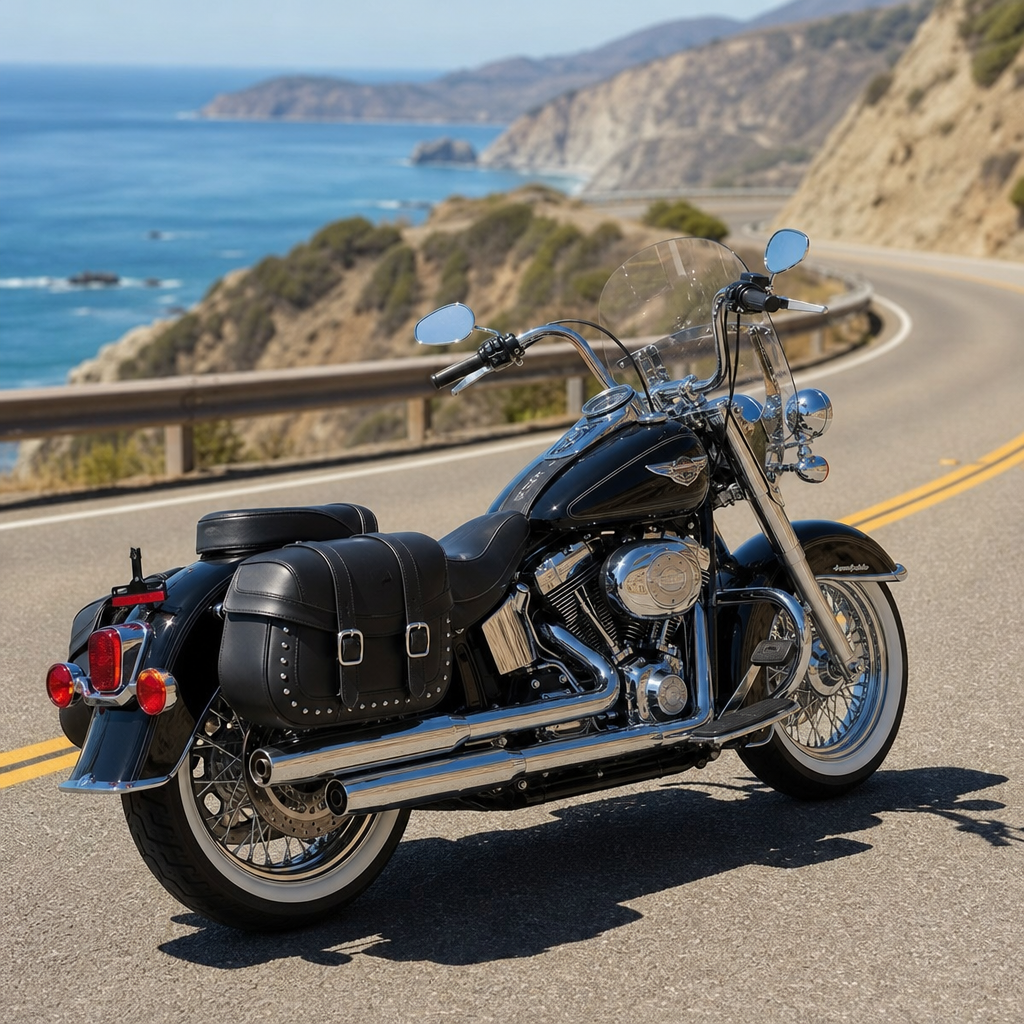
What H-D Carbide Collection Grips Are and Why Riders Choose Them
Harley-Davidson’s Carbide Collection is a coordinated line of premium controls and trim pieces built around a dark, machined aesthetic with high-contrast metallic detailing. The grips in this collection are designed to feel more structured than basic rubber sleeves. In practical terms, that usually means a firmer outer surface, defined traction zones, and a shape that supports the palm without feeling overly bulky. Riders choose them for three primary reasons. First, they provide a more secure interface during vibration, rain, or gloved riding. Second, they visually tie together grips, foot pegs, brake pedal pads, shifter pegs, and floorboards. Third, they can materially improve comfort if the stock grip diameter or texture causes hot spots on the ulnar side of the hand.
Grip performance is not just about softness. A grip that is too soft can force the rider to squeeze harder because the hand sinks into the material. A grip that is too thin increases flexor tendon load over long distances. A grip that is too large slows fine throttle modulation for smaller hands. The best premium grip balances friction, diameter, contour, and vibration transmission. Carbide grips generally appeal to riders who want a more planted feel at the bar without stepping into the extra mass of some heavy bar-end weighted systems. On touring models, I have seen them work best for riders who maintain a relaxed bend in the elbow and use core support rather than hanging weight from the bars.
Understanding the 2026 Integrated Accessory Bus Before Installation
The 2026 Integrated Accessory Bus is best understood as the motorcycle’s managed communication and power pathway for approved add-ons. Instead of treating every accessory as an isolated electrical device, the bike recognizes supported components through a common architecture that coordinates power delivery, configuration, and status reporting. On compatible Harley-Davidson models, this reduces wiring clutter, lowers the chance of poor splices, and gives technicians a clearer diagnostic path through service software. For riders, the main implication is simple: installation is no longer only mechanical. Every accessory decision should be checked against firmware level, harness routing, available ports, and module priority.
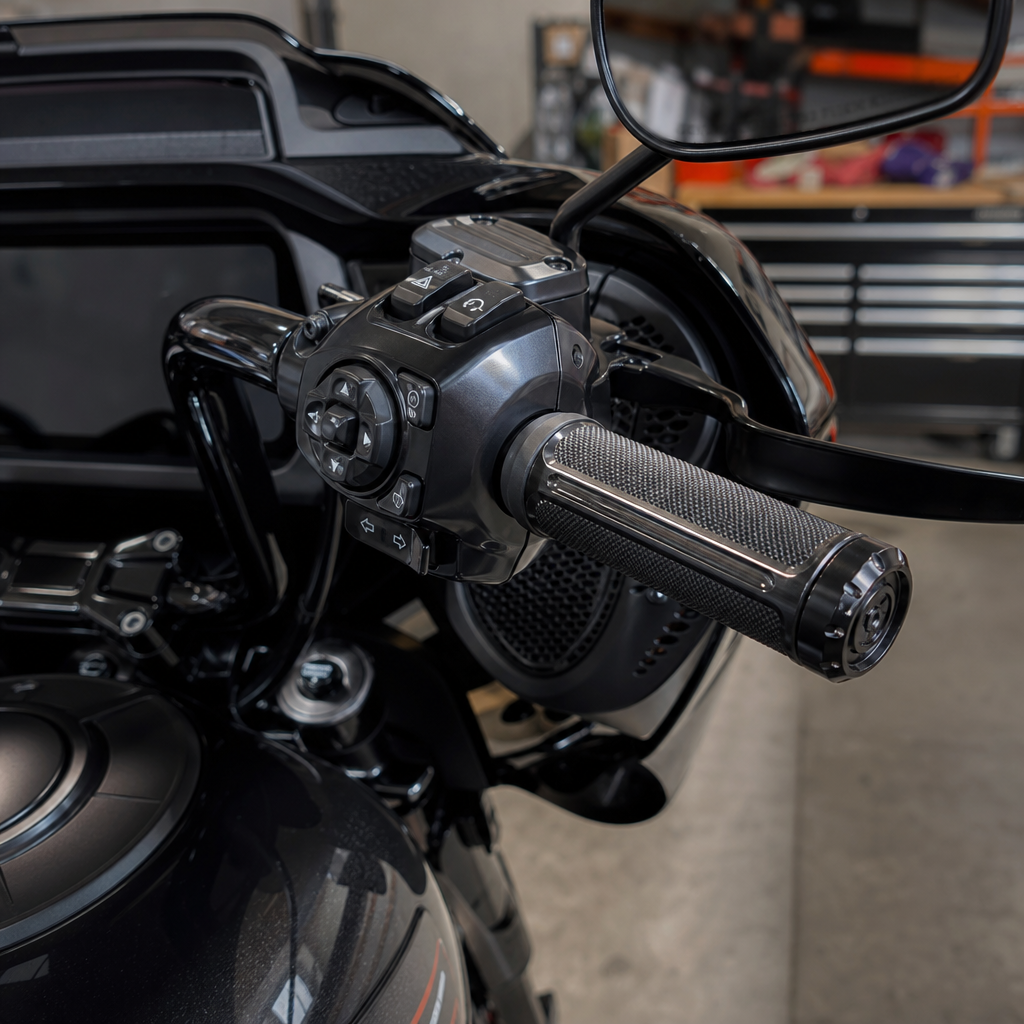
With grips specifically, the bus matters most when the chosen part includes heating, integrated controls, or a companion module. A standard non-heated grip installation may remain largely mechanical, but the presence of ride-mode switches, throttle-by-wire sleeves, bar-end sensors, or heated grip controllers changes the process. The right side on modern Harley-Davidson models is often constrained by the electronic throttle tube, housing alignment pins, and switchgear indexing. The left side may interact with adhesive cure requirements, wiring passage, and hand control clearance. On 2026 machines, any electronically active grip or related component should be validated in the bike’s accessory setup routine after installation, not merely tested by turning the ignition on and hoping it works.
Another important point is diagnostic discipline. If a rider installs grips while also adding a heated seat, extra lamps, and a phone-power module, troubleshooting becomes difficult when the bike throws a fault or an accessory fails to initialize. The best practice is staged installation: update software, install one system at a time, confirm function, and document connector locations. That approach saves hours later and protects expensive painted parts from unnecessary removal.
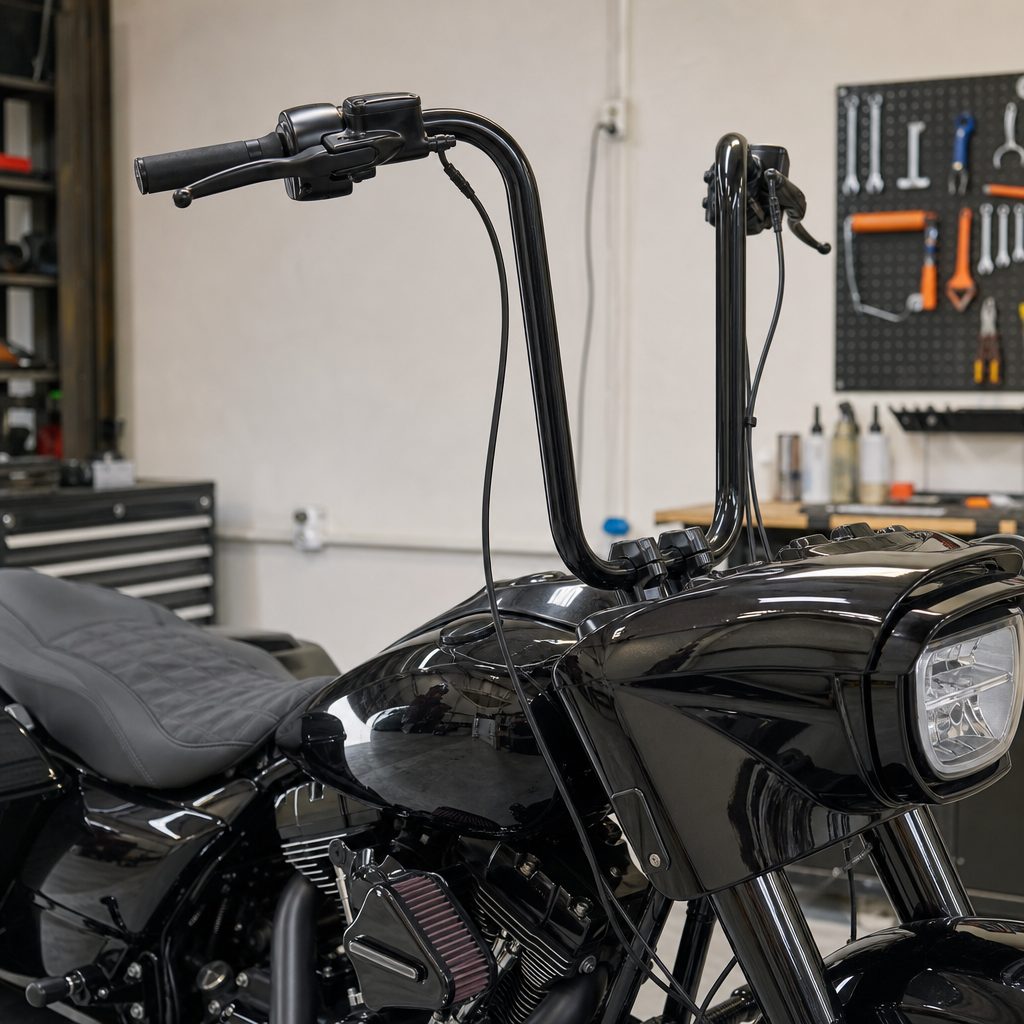
Installation Workflow: Mechanical Fit, Digital Validation, and Common Mistakes
A correct installation starts with confirming the exact model code, bar diameter, throttle assembly type, and whether the bike uses internally routed wiring. Verify the part number against Harley-Davidson fitment data, because “fits 1-inch bars” is not enough information on a 2026 motorcycle with integrated electronics. Gather a torque wrench calibrated for low-range fasteners, non-marring picks, the specified adhesive if required, isopropyl alcohol for bar preparation, and access to dealer-level or approved diagnostic software if the grip package includes electronic functions. Disconnecting the battery may still be recommended during switch housing work, but follow model-specific service guidance because some modules retain learned states or require orderly shutdown.
The mechanical sequence is straightforward when done carefully. Remove mirrors if needed for access, open the switch housings, and support the front brake master cylinder or clutch perch without stressing lines. On throttle-by-wire models, never pry aggressively against the throttle sleeve or let debris contaminate the sensor area. Clean the left handlebar completely before bonding the new grip. Dry-fit both sides before applying adhesive so you can confirm end-play, switch housing closure, and throttle return. Once installed, verify free throttle snap-back at full left and right steering lock. That single check prevents one of the most dangerous post-installation failures.
For electronically integrated grip systems, complete the digital side before reassembling every cosmetic cover. Connect the accessory to the proper bus port, inspect terminal seating, and run the setup or recognition procedure specified for the platform. If the bike allows user-level configuration through the infotainment screen, confirm that menu options appear and persist after a key cycle. If dealer software is required, record any codes before clearing them. Many installation mistakes come from assuming a connector click equals full initialization. It does not.
| Installation Stage | What to Check | Why It Matters |
|---|---|---|
| Pre-fitment | Model year, trim, throttle type, bus compatibility | Prevents ordering and wiring errors |
| Mechanical removal | Switch housing alignment, cable slack, painted surface protection | Avoids cosmetic damage and binding |
| Grip mounting | Bar cleanliness, adhesive use, throttle free play | Ensures retention and safe throttle return |
| Electrical connection | Correct port, terminal lock, harness routing | Prevents intermittent faults and pinching |
| Software validation | Accessory recognition, menu display, fault scan | Confirms the bus sees the new component |
| Road test | Full-lock clearance, vibration feel, hand position comfort | Verifies real-world function under load |
The most common errors are over-gluing the left grip, misaligning switch housings so the throttle drags, pinching a harness at the bar clamp, and skipping software validation. A less obvious mistake is ignoring glove thickness. A grip that feels perfect in the garage with bare hands can feel too large or too angular with insulated gloves. Always assess with your normal riding gear.
Model-Specific Ergonomics and Performance Recipes Across Harley-Davidson Platforms
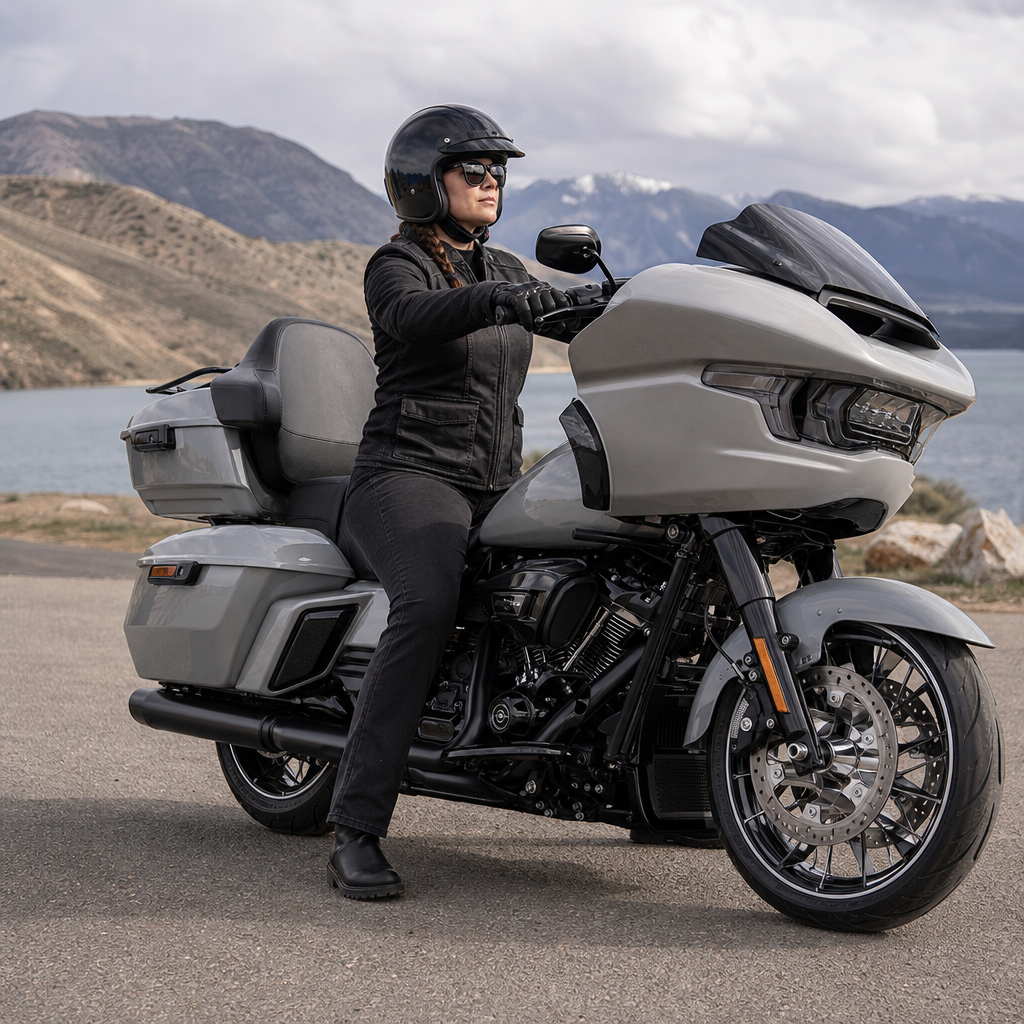
Touring models such as the Street Glide and Road Glide usually benefit from a comfort-first recipe built around neutral wrist angle and reduced sustained grip force. On these bikes, Carbide Collection Grips pair well with bars that bring the hands slightly rearward and upward without exceeding shoulder width. The target is to let the rider rest the heel of the palm on the grip while keeping wrists nearly straight when cruising at highway speed. Add careful brake lever reach adjustment and a seat that prevents sliding toward the tank. This combination reduces numbness more effectively than grips alone. For riders doing 300-mile days, the biggest ergonomic gain often comes from balancing seat support and bar reach so the hands steer rather than carry torso weight.
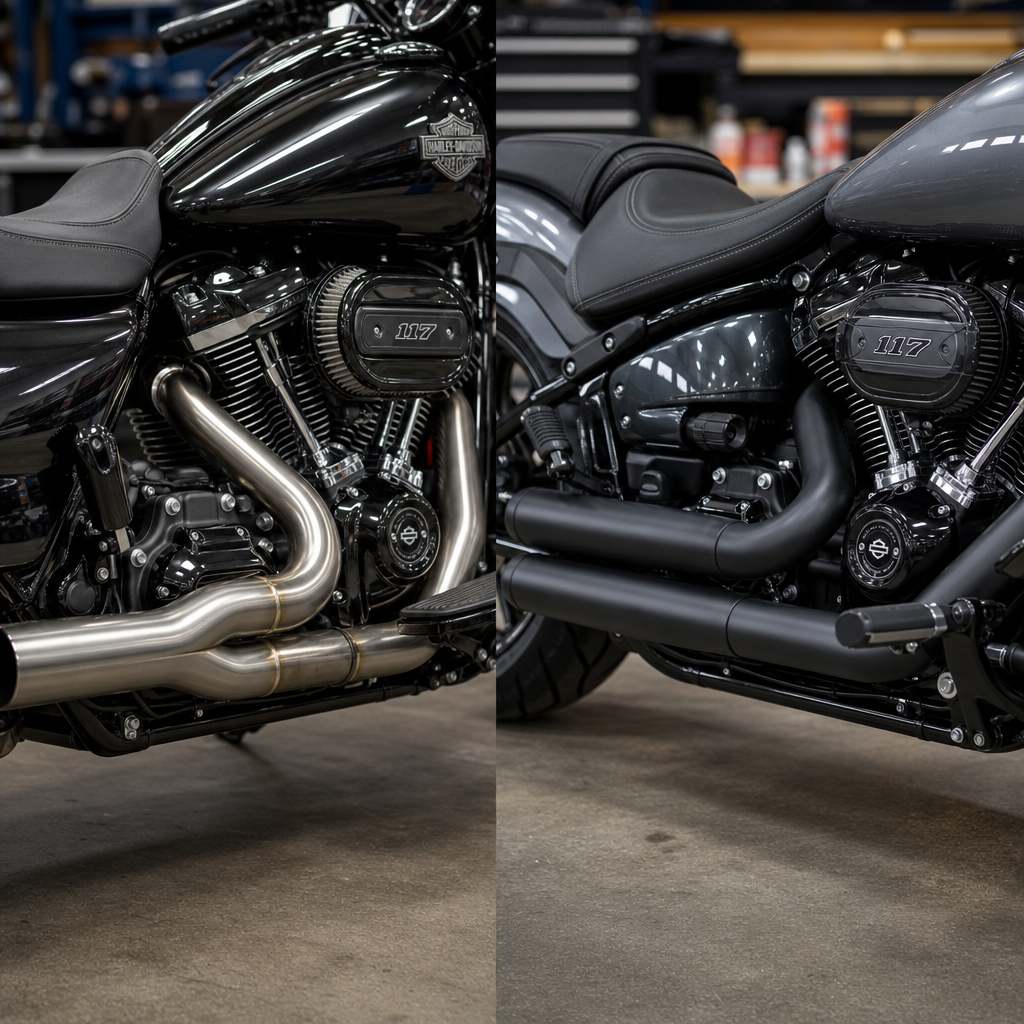
On Softail performance models like the Low Rider ST and Low Rider S, the recipe shifts toward leverage and rapid input. Riders often prefer a firmer, more tactile grip because corner entry and throttle pickup happen more aggressively. Here, Carbide grips work best with a bar bend that keeps elbows slightly out and wrists aligned during a forward-leaning stance. If the rider has smaller hands, prioritize reduced lever reach before changing grip diameter again. In the shop, I have found that many riders blame grips for discomfort when the real issue is excessive wrist extension caused by bar roll position. Rotating the bar a few degrees can transform the feel of the same grips.
For cruiser models such as the Heritage Classic or Breakout, style often drives the initial purchase, but ergonomics still decide whether the upgrade lasts. A feet-forward posture increases the tendency to hang on the bars during acceleration and over rough pavement. That means a grip with strong texture can help, but only if shoulder reach remains relaxed. The performance recipe here is usually simple: moderate-reach bars, a supportive seat pocket, and grips that do not force a death grip. Riders with larger hands often report better comfort when the grip diameter fills the palm enough to reduce finger overlap.
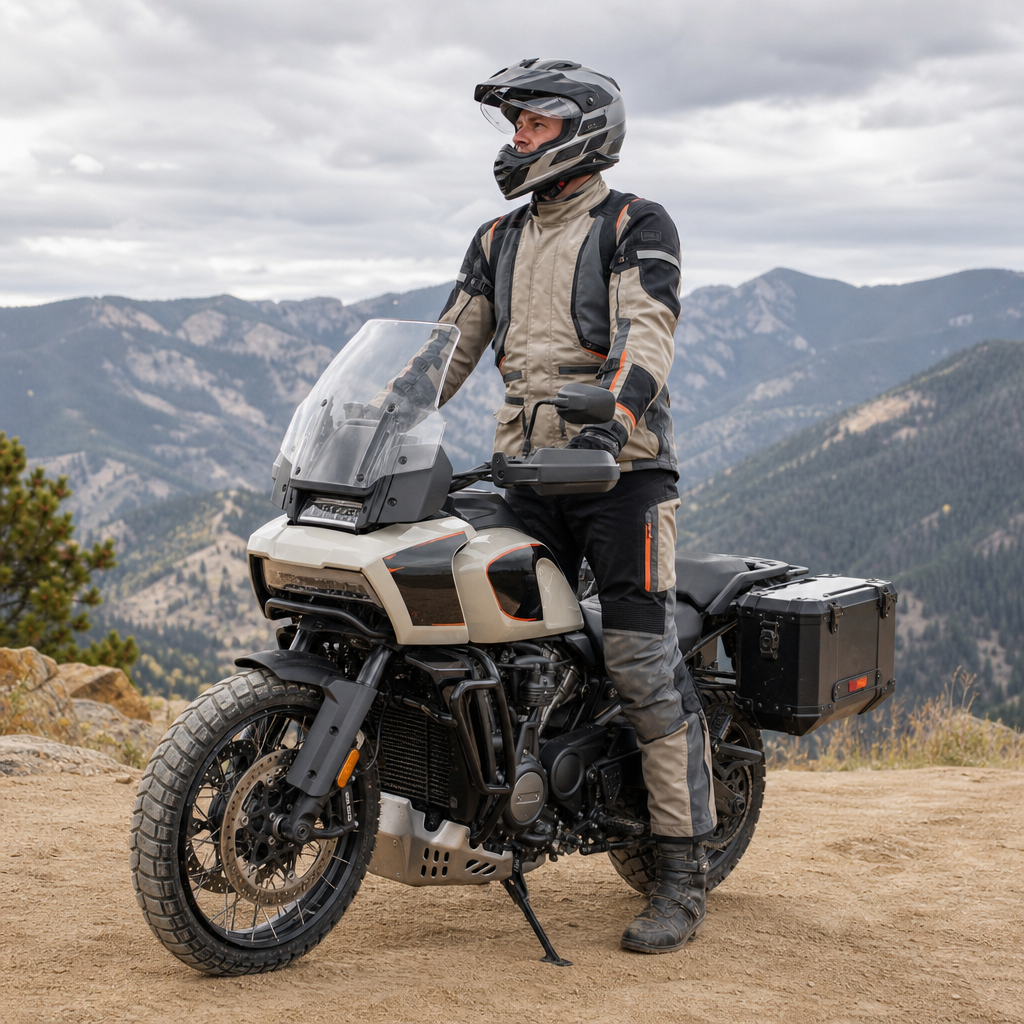
Adventure-touring applications like the Pan America require a different lens. Riders stand, shift weight frequently, and use a lighter touch at the bar off pavement. For them, the right recipe prioritizes control during transitions from seated touring to standing technical sections. If a compatible Carbide-style grip is used, evaluate it for glove traction when wet and for comfort with repeated clutch work. Standing posture magnifies bar rotation errors, so align controls for both seated and standing use, usually by splitting the difference rather than optimizing only one position. This is where model-specific ergonomics becomes real engineering, not accessory fashion.
How to Choose the Right Hub-and-Spoke Setup for This Subtopic
As the hub page for model-specific ergonomics and performance recipes, this article should help you decide which detailed path to follow next. If your primary concern is touring comfort, your next steps should focus on bar geometry, seat support, and heated accessory load planning. If your concern is aggressive riding on a performance cruiser, prioritize throttle-hand precision, lever reach, and chassis feedback at the contact points. If your concern is visual cohesion across controls, compare the full Carbide Collection so grip texture, peg position, and pedal feel evolve together instead of creating mixed sensations under hands and boots.
A practical selection framework starts with your dominant riding use case. Measure your current discomfort honestly. Numb outer palm suggests pressure distribution problems. Finger fatigue suggests diameter or lever reach issues. Tingling at highway speed may point to posture and vibration path rather than grip material alone. Once the symptom is identified, match the fix to the bike family. Touring riders should test support at the seat and lower back before adding more accessory mass to the bars. Softail riders should verify bar roll and riser height. Adventure riders should test standing elbow bend and clutch modulation. The grip is the interface, but the recipe is the system.
The best results come from disciplined sequencing. Install the grips, set control angles, road test, then decide whether bars, seat, pegs, or software-linked accessories need further changes. That order prevents chasing problems with expensive parts that do not address the root cause. On a 2026 Harley-Davidson with the Integrated Accessory Bus, it also keeps digital complexity manageable. One controlled change at a time is still the fastest route to a motorcycle that truly fits you.
H-D Carbide Collection Grips are a meaningful upgrade when riders evaluate them as part of a broader ergonomic and performance recipe rather than a stand-alone cosmetic add-on. The 2026 Integrated Accessory Bus raises the standard for installation by combining mechanical fitment with digital verification, but it also creates a cleaner, more reliable path for compatible accessories when the process is followed correctly. The core lesson is straightforward: confirm fitment, protect throttle function, validate electronic recognition, and tune the surrounding contact points so the grips support your posture instead of compensating for it.
For Harley-Davidson owners, the real benefit is confidence. A well-installed set of Carbide Collection Grips can sharpen control feel, reduce fatigue, and unify the touch points that define every mile. Different platforms need different recipes, and this hub exists to guide those choices with model-aware logic. Use it as your starting map, then build your next upgrade path around how you actually ride. Review your bike’s fitment data, identify your ergonomic goal, and move to the model-specific article that matches your platform.
Frequently Asked Questions
Do H-D Carbide Collection Grips fit every 2026 Harley-Davidson model with the Integrated Accessory Bus?
No. The 2026 Integrated Accessory Bus simplifies how accessories communicate with the motorcycle, but it does not make every grip kit universal. Fitment still depends on the specific handlebar diameter, throttle-side tube design, switch housing layout, ride-by-wire configuration, and the exact electrical provisions built into the motorcycle. On many 2026 Harley-Davidson platforms, Carbide Collection Grips are offered in versions tailored to electronic throttle applications, and in some cases there may be separate part numbers depending on whether the bike uses heated grip functionality, a particular control family, or a model-specific bar and switch arrangement.
The most reliable way to confirm fit is to match the grip kit to the bike’s year, family, and trim level rather than relying on appearance alone. Touring, Trike, Cruiser, and performance-oriented models can share broad design cues while still using different throttle sleeves, different internal bar clearances, or different software recognition requirements through the accessory bus. Riders should also verify whether they are retaining stock handlebars, changing bar diameter or bend, or adding other accessories that occupy the same routing space inside the bars. A grip that fits perfectly on a stock setup may become incompatible if the bar swap changes internal wire passage, switch clamp spacing, or end-cap clearance. In short, the Integrated Accessory Bus helps the electronics side of the installation, but mechanical and model-specific compatibility still matter just as much.
How does the 2026 Integrated Accessory Bus change the installation process compared with older Harley-Davidson grip installs?
The biggest difference is that installation is no longer just a mechanical task involving adhesive, set screws, and basic throttle alignment. On 2026 models using the Integrated Accessory Bus, the grips may need to be recognized as part of a larger accessory ecosystem that includes the throttle assembly, switchgear, heating elements if equipped, and the motorcycle’s control modules. That means the installer has to think beyond “left grip on, right grip on” and consider connector routing, bus-compatible wiring paths, control calibration, and whether the motorcycle requires setup confirmation through the onboard system or dealer-level diagnostic tools.
Older installs often focused on removing stock grips, transferring or replacing the throttle tube, and ensuring smooth twist action. With the 2026 architecture, there is additional attention on preserving connector integrity, avoiding wire pinch points inside the bar, and making sure any accessory harnesses are routed exactly as intended so the bus can communicate cleanly with connected components. If the grips are heated or paired with integrated controls, proper electrical connection becomes critical. A poor mechanical install on an older bike might lead to grip movement or sticky throttle return; on a bus-equipped 2026 bike, an improper install can also trigger communication faults, non-functioning accessories, or inconsistent operation. That is why the process should be approached as both a hardware installation and a system integration job.
Can I install H-D Carbide Collection Grips myself, or is dealer installation recommended?
That depends on your experience level, your motorcycle configuration, and whether your specific grip kit interacts with the bike electronically beyond the basic throttle interface. A confident home mechanic who is comfortable removing switch housings, handling ride-by-wire components, routing wires through handlebars, and reassembling controls to factory specifications may be able to complete the job successfully. However, the 2026 Integrated Accessory Bus raises the stakes because installation errors can affect more than comfort and appearance. They can interfere with throttle smoothness, accessory communication, or feature recognition if the kit includes electrical integration.
Dealer or qualified shop installation is strongly recommended when the bike has internal handlebar wiring, heated grip provisions, model-specific software requirements, or multiple layered accessories already connected to the bus. A professional installer is more likely to have access to current fitment data, service procedures, torque specifications, and any necessary post-install setup steps. They can also verify throttle snap-back, control housing alignment, and accessory functionality before the bike goes back on the road. If you do install the grips yourself, treat the process with the same seriousness you would give any ride-by-wire control work: disconnect power as required by service procedures, protect wiring from abrasion, avoid forcing connectors, inspect all clearances carefully, and verify proper operation with the bars turned fully left and right before riding. The job is very manageable for the right person, but it is not a casual cosmetic swap on 2026 bus-equipped models.
What setup delivers the best comfort and control when using Carbide Collection Grips on a 2026 Harley-Davidson?
The best setup balances grip diameter, palm support orientation, glove choice, bar position, and riding style. Carbide Collection Grips are popular because they blend a machined look with a shape that can improve hand support on longer rides, but they perform best when the rest of the cockpit supports a neutral wrist angle. If the bars are too high, too low, too far back, or too far forward, even an excellent grip design will not solve pressure points by itself. Riders should evaluate the complete triangle of seat, bars, and foot controls when chasing comfort. On Touring and long-distance cruiser setups, the goal is usually reduced palm fatigue and a relaxed wrist with dependable leverage for slow-speed maneuvering and highway corrections. On more aggressive performance-oriented setups, riders may prioritize direct feel, a secure hold under braking, and predictable throttle modulation.
Grip comfort also depends on matching the material feel and contour to the rider’s hand size and typical trip length. A palm-support style can be excellent for reducing fatigue on long highway days, but it needs to be oriented correctly and paired with a bar angle that does not force the wrist into extension. If the bike is equipped with heated functionality, make sure the grip choice and installation preserve even heat transfer and do not create pressure ridges from improper wire routing. Many riders get the best result by pairing Carbide Collection Grips with carefully adjusted lever reach, correctly positioned switch housings, and a bar setup that lets the hands rest naturally rather than carry upper-body weight. In practical terms, the most comfortable recipe is rarely just “install the grips.” It is “install the grips on the right bar position, with the right control angle, and verify the throttle side turns freely without forcing the rider to overgrip.”
What are the most common installation problems with Carbide Collection Grips on 2026 Integrated Accessory Bus motorcycles, and how can they be avoided?
The most common issues are incorrect fitment assumptions, damaged or pinched wiring, sticky throttle operation after reassembly, and incomplete electrical integration. Riders sometimes assume that if the grips physically slide onto the bars, the kit must be correct for the bike. That is not enough on a 2026 Harley-Davidson platform. The throttle-side interface, bar-end clearance, switch housing geometry, and bus-related connectors all have to match the intended application. Another frequent problem is poor wire management inside the bars or near the control housings. Even a small routing mistake can lead to interference, damaged insulation, or communication problems with electronically supported accessories.
Throttle drag after installation is another major concern and must be taken seriously. The right-side grip and throttle tube assembly need proper spacing and alignment so the throttle returns cleanly under all steering positions. If the bar ends, switch housings, or grip components are slightly mispositioned, the result can be binding, inconsistent return, or a throttle that feels heavier than normal. On electrically integrated versions, installers can also run into issues if connectors are not fully seated or if the motorcycle requires a setup confirmation step after installation. The best way to avoid problems is to start with verified model-specific parts, follow the current service instructions exactly, keep wiring paths clean and protected, torque the controls correctly, and test every function before riding. That includes checking throttle snap-back, accessory operation, steering lock-to-lock movement, and any heated or bus-connected features. A careful installation prevents the vast majority of headaches and ensures the grips deliver the comfort and control riders are actually buying them for.