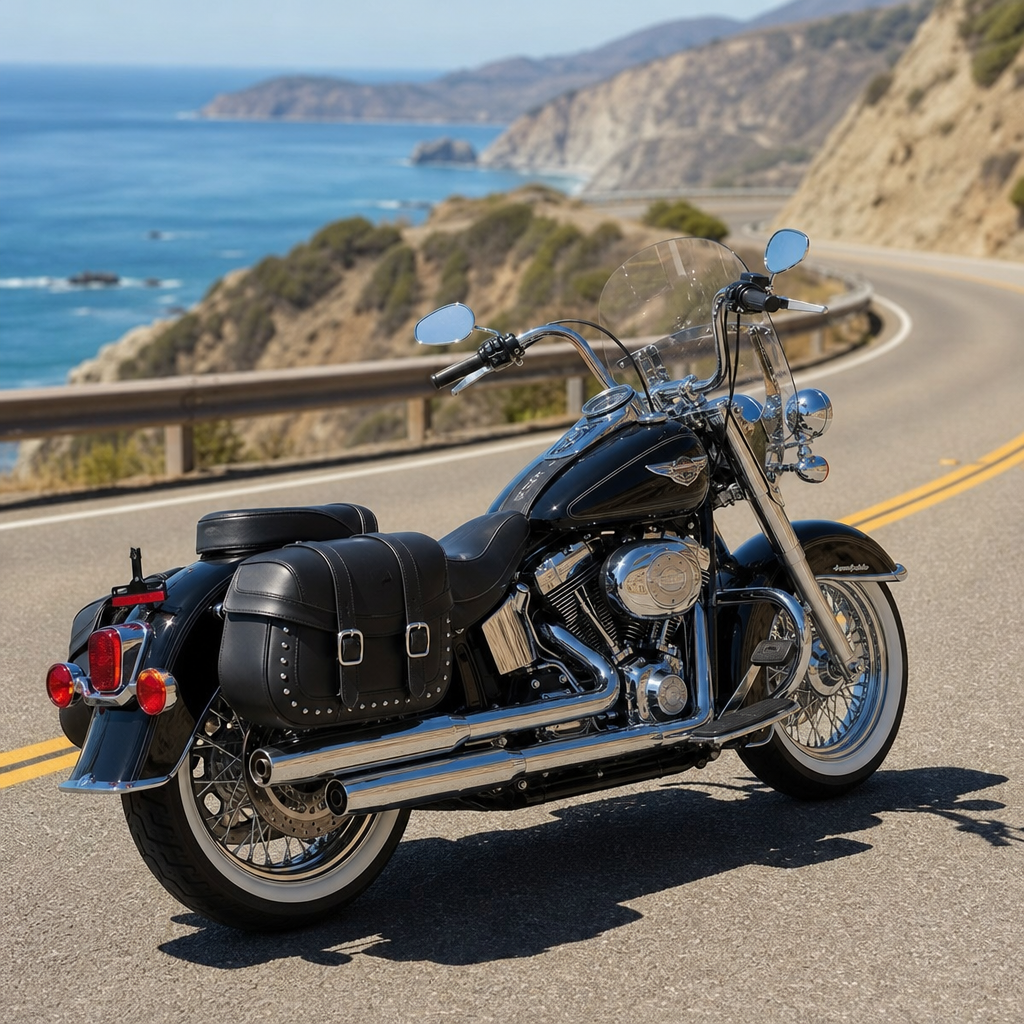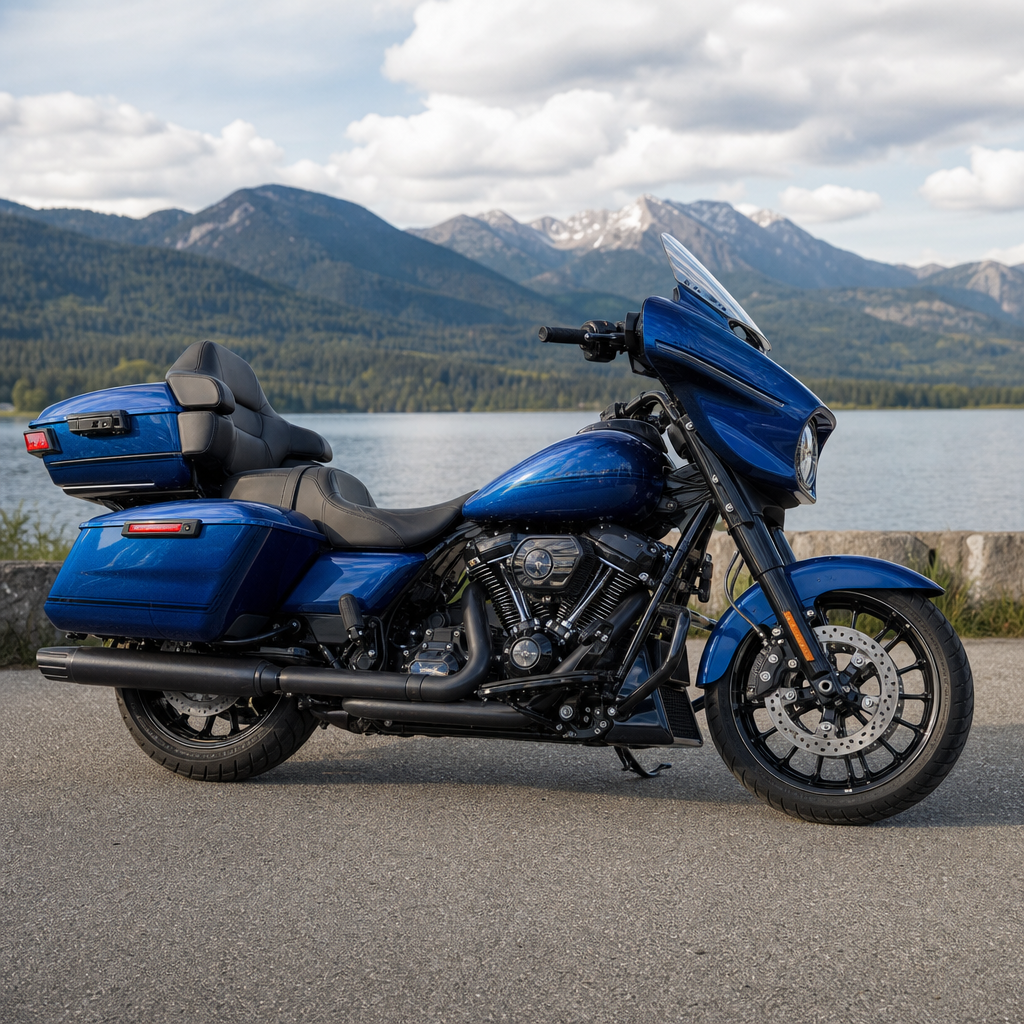
Dropping the seat height on a 2026 Street Glide Limited is not just a styling choice; it is a practical ergonomics decision that changes confidence at stops, low-speed control, passenger comfort, and even long-distance fatigue. On Harley-Davidson touring models, seat height describes the vertical distance from the ground to the top of the seat under a specified load condition, while a lowering kit usually refers to suspension components, linkage changes, shorter shocks, revised fork internals, or coordinated parts packages that reduce ride height. For riders with shorter inseams, aging hips, or a preference for a flatter-footed stance, lowering can transform the motorcycle from intimidating to intuitive. For taller riders, the same modification can create knee bend, reduce cornering clearance, and alter chassis balance if done carelessly. That is why the 2026 Street Glide Limited deserves a model-specific approach instead of generic advice.
I have set up enough Harley touring bikes to know that the wrong lowering recipe often solves one problem and creates three more. A bike that feels perfect in the showroom can squat under luggage, wallow in sweepers, or scrape boards exiting a driveway after a poorly chosen kit. The Street Glide Limited, as a fully dressed touring platform, carries substantial curb weight, fairing mass, and luggage capacity, so ride-height changes interact with suspension travel and load rating more dramatically than they do on a lighter cruiser. This hub article explains how lowering kits work on the 2026 Street Glide Limited, what measurements matter, which tradeoffs are non-negotiable, and how to choose a complete ergonomics and performance recipe that fits rider size, passenger use, and road conditions.
Used correctly, lowering is one tool inside a broader fit strategy that also includes seat shape, shock spring rate, sag setup, floorboard position, handlebar reach, and boot sole thickness. Riders often ask a simple question: how can I get both feet down more securely without ruining touring comfort or handling. The honest answer is that you can usually gain confidence, but every millimeter comes with a cost somewhere else. The best setups are balanced, reversible, and measured rather than guessed. If you treat this page as the starting point for your Street Glide Limited fit plan, you can make smarter decisions before buying parts, cutting bump travel, or compromising the motorcycle’s intended touring performance envelope.
Why the 2026 Street Glide Limited Responds Differently to Lowering
The 2026 Street Glide Limited belongs to Harley-Davidson’s heavyweight touring family, where wheelbase, steering geometry, luggage capacity, and passenger use all amplify the effects of suspension changes. On this platform, lowering the rear by an inch does more than reduce static seat height. It changes swingarm angle, available shock stroke, anti-squat behavior under throttle, and the lean angle before hard parts touch down. Lowering the front compounds those changes by affecting rake and trail. If front and rear changes are not coordinated, the bike can steer slower, feel nervous, or pitch excessively under braking depending on which end moved more.
Model-specific tuning matters because a Street Glide Limited is expected to do several jobs at once: urban traffic, interstate cruising, two-up travel, and loaded weekend trips. A lowering kit that feels acceptable for solo boulevard rides may bottom out over bridge joints when saddlebags are full. In the workshop, I treat this model as a package, not a pair of isolated suspension ends. I measure loaded seat height, rider sag, passenger sag, static lean on the jiffy stand, floorboard clearance, and shock travel before recommending parts. Those baseline numbers tell you whether you need actual lowering hardware or simply better spring support and a different seat contour.
Another reason this bike is sensitive to lowering is weight transfer at low speed. Heavy touring Harleys reward predictable chassis behavior. Riders often assume a lower bike is always easier to balance, but if the rear suspension becomes underdamped or the front loses support, parking-lot control can actually get worse. The motorcycle may feel settled while stopped yet awkward during U-turns because the geometry no longer matches the bike’s mass distribution. That is why the best Street Glide Limited recipes preserve support first, then chase a lower reach to the ground.
The Main Lowering Methods and What Each One Changes
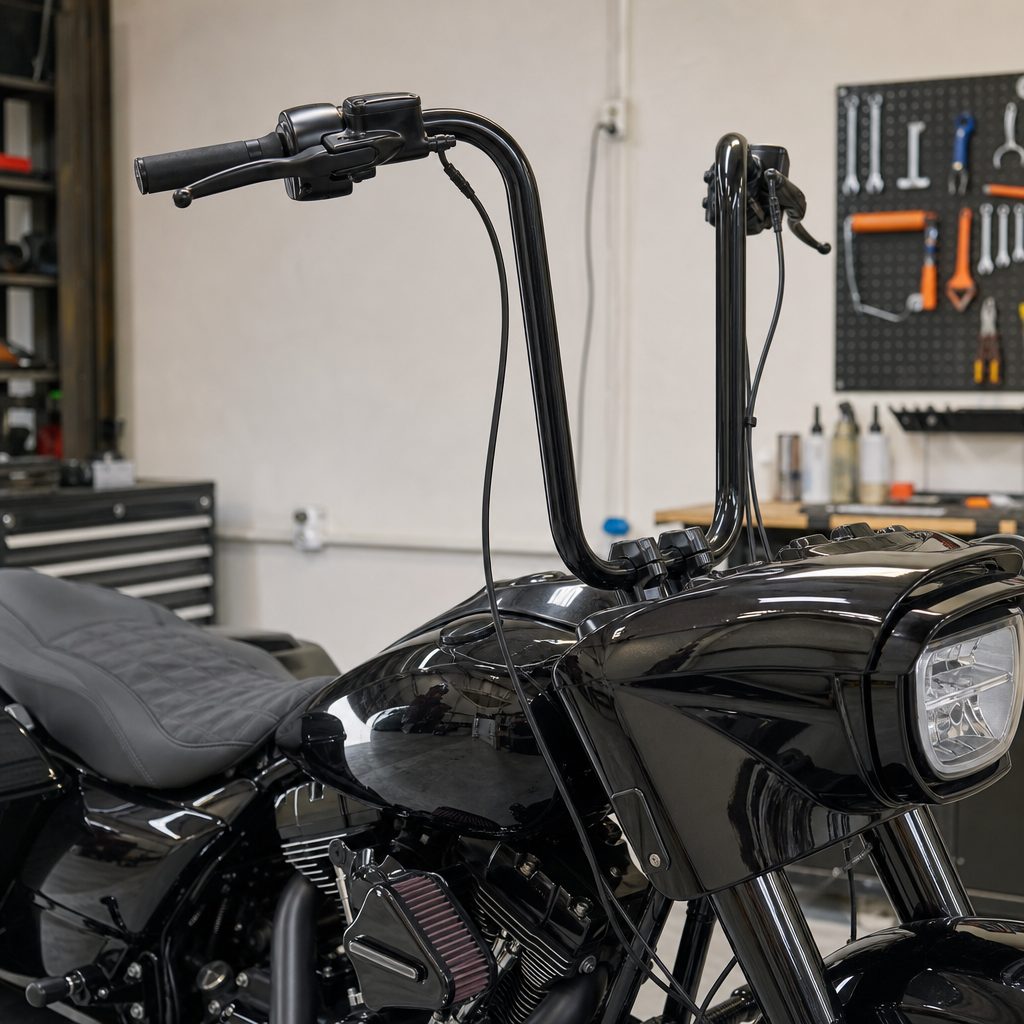
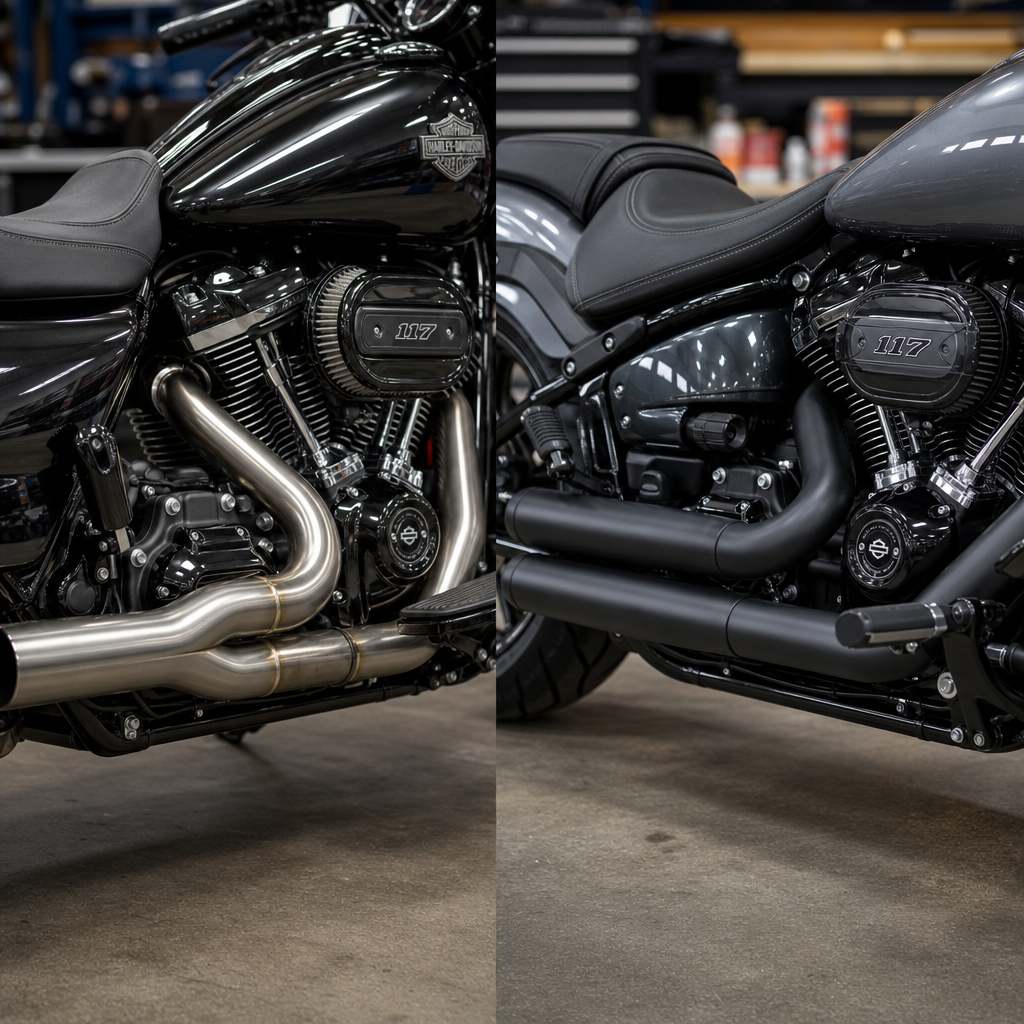
There are four common ways to lower a touring Harley: shorter rear shocks, rear lowering brackets or relocation kits, front fork lowering components, and reduced-profile seats. Each method changes the motorcycle differently. Shorter rear shocks are usually the cleanest mechanical solution because they directly reduce ride height while allowing a matched spring and damping package. Premium options from companies such as Öhlins, Legend Suspensions, Progressive Suspension, and Fox often include spring-rate choices for rider weight and luggage use. The downside is cost, and if the shock is too short, available travel drops enough to harm ride quality.
Rear lowering brackets are cheaper, but they deserve caution. By changing mounting position instead of shock length, they alter leverage ratio and motion progression. That can make the suspension softer through part of the stroke and increase bottoming risk. On some bikes, these brackets are acceptable for modest drops and light-duty use, yet they are rarely my first recommendation for a heavy touring model intended for distance riding. A budget kit can deliver the visual drop a rider wants while quietly making the bike less controlled over sharp bumps and mid-corner pavement seams.
Fork lowering kits can be internal spacers, shortened springs, revised cartridges, or complete fork assemblies. Used properly, they keep the chassis level after a rear drop. Used poorly, they reduce bump absorption and front-end compliance. Touring Harleys benefit from front-end support because braking forces and fairing weight load the fork heavily. If you lower the front, maintaining correct oil height, spring rate, and damping character is essential. A harsh or underdamped fork on a heavy bagger becomes tiring quickly and can upset the chassis on rough roads.
Seats deserve equal attention because they are often the highest-value first move. A low-profile seat can reduce effective reach by narrowing the nose where the rider’s legs pass downward, sometimes improving touch-down more than a raw suspension drop would suggest. Saddlemen, Mustang, Le Pera, and Harley-Davidson accessory seats all shape rider position differently. In practice, I often recommend seat changes before major suspension changes when a rider only needs a little more confidence at stops.
| Method | Typical Benefit | Main Tradeoff | Best Use Case |
|---|---|---|---|
| Shorter rear shocks | Controlled height reduction with matched damping | Less travel if drop is aggressive | Riders wanting a complete, durable solution |
| Rear lowering brackets | Lower cost and quick installation | Changed leverage ratio and greater bottoming risk | Light solo use with modest drop goals |
| Front fork lowering | Restores chassis balance after rear changes | Can reduce compliance if poorly tuned | Balanced front and rear lowering packages |
| Low-profile seat | Improves reach without major geometry change | May reduce foam thickness and support | Riders needing slight reduction first |
Ergonomics Recipes for Different Riders
The most useful way to plan a Street Glide Limited fitment is to think in recipes. A recipe combines seat, suspension, and control positioning around a real rider profile. For a shorter solo rider, around a 28- to 30-inch inseam, a mild low-profile seat plus premium rear shocks in a modest lowered length usually works better than an extreme drop. The goal is to improve one-foot and near-flat-foot confidence while preserving enough suspension travel for potholes and expansion joints. Pair that with correctly set preload and a handlebar position that keeps the rider upright at stops, and the bike feels lighter than the scale suggests.
For a shorter rider who travels two-up, the formula changes. Passenger load magnifies every weakness in a lowering setup. Here I prefer high-quality shocks with spring rates chosen for combined rider and passenger weight, plus a seat narrowed at the front rather than excessively low in the pan. If the rider insists on a larger drop, I strongly recommend checking fender-to-tire clearance at full compression and confirming that hard bags, exhaust components, and floorboards still maintain practical road clearance. On touring bikes, two-up comfort lives or dies by suspension support, not static seat height alone.
Average-height riders often lower their bikes for style, but style-only setups are where regrets begin. If your inseam already allows secure stops, a large drop can create cramped knee angle, reduce long-haul comfort, and make the machine drag parts earlier in curves. A smarter recipe for these riders is often a reshaped seat, dialed sag, and possibly a very mild rear drop only if visual stance is the priority. Tall riders are usually better served by staying near stock height and improving foothold through boot choice or seat contour rather than sacrificing suspension travel they will actually use.
There is also a use-case recipe based on terrain. Riders in cities with broken pavement need more compliance than riders on smooth suburban roads. Mountain riders need lean angle and damping control. Highway-focused riders need support under sustained load and crosswind stability. When I map a recipe, I ask where the bike spends 80 percent of its time. That answer guides whether we prioritize lowest possible stance, passenger stability, or preserving full touring capability.
Performance Tradeoffs You Must Accept Before Installing a Lowering Kit
The first unavoidable tradeoff is reduced suspension travel. Less travel means the shock and fork have fewer millimeters available to absorb impacts before hitting the end of their stroke. Bottoming is not just uncomfortable; repeated hard bottoming can damage components, unsettle the chassis, and shorten tire life by overloading contact patches on rough surfaces. The second tradeoff is reduced cornering clearance. On a Street Glide Limited, floorboards and other hard parts are already part of the handling conversation. Lowering moves the motorcycle closer to the ground and makes early scraping more likely, especially with a passenger or luggage compressing the suspension further.
The third tradeoff is altered geometry. Rear-only lowering generally increases rake and trail relative to chassis attitude, which can slow steering and increase effort in transitions. Front-only lowering does the opposite and can quicken steering at the expense of stability if taken too far. Balanced changes can keep handling neutral, but balance requires measuring and tuning, not eyeballing. The fourth tradeoff is stand angle and parking stability. Lowered bikes may sit more upright on the jiffy stand, especially if both ends are reduced. That can become a practical issue on crowned roads, hot asphalt, or uneven parking surfaces.
Ride quality is the fifth major tradeoff. Many riders expect a lower bike to feel plusher because they associate low stance with custom comfort. In reality, a poorly lowered touring Harley often rides harsher because it reaches the firmer parts of the spring and damper curve sooner, or because there is simply less travel available. The best premium shock packages partly offset this with better valving, but physics still applies. You cannot remove a meaningful amount of travel and expect the same big-hit compliance.
These limitations do not mean lowering is a mistake. They mean a successful setup starts with realistic expectations. If the benefit you value most is stronger footing and confidence at every stop sign, a measured drop can absolutely be worthwhile. If your priority is maximum cornering clearance and all-day plushness on rough roads, stock or near-stock height remains the benchmark.
How to Choose Parts, Verify Fitment, and Set the Bike Up Correctly
Start with fitment discipline. The 2026 Street Glide Limited may share architecture with other Harley touring models, but part numbers, clearances, and weight assumptions still need verification through the manufacturer’s application guide. Reputable suspension companies publish model-specific compatibility charts and rider-weight recommendations. Use them. Do not buy a kit based only on internet forum anecdotes from a different year or trim. A supplier that asks your weight, passenger habits, baggage load, and target drop is usually a supplier worth trusting.
Next, establish baseline measurements before changing parts. Measure current seat height with the bike upright, then loaded seat height with the rider in full gear. Record rider sag front and rear. Many street setups target roughly 25 to 35 percent of total suspension travel as rider sag, though exact numbers depend on the shock design and intended use. Also note lean angle on the stand, current floorboard scraping frequency, and any bottoming events. These details turn subjective complaints into solvable setup decisions.
Installation quality matters as much as the parts themselves. Torque fasteners to specification, confirm belt and wheel clearance through the suspension stroke, inspect brake line routing after front-end work, and recheck fasteners after the first ride. If you lower both ends, align the change as a system. If you lower only the rear, test for slower steering and earlier board contact. If you lower only the front, watch for excessive dive. After installation, set preload for actual load, not imagined average use. Touring bikes punish lazy preload habits.
Finally, test on the roads you actually ride. Use a parking lot for full-lock turns, then rough secondary roads, then highway speeds with and without passenger load. If the bike touches down too early, bottoms over known bumps, or feels vague mid-corner, the recipe needs revision. Lowering works best when treated as chassis tuning, not decoration.
Building a Long-Term Harley-Davidson Ergonomics Hub Around This Page
As a sub-pillar hub under Harley-Davidson, this page should anchor a broader library focused on model-specific ergonomics and performance recipes. The Street Glide Limited is an ideal centerpiece because it sits at the intersection of comfort, weight, touring utility, and customization. From here, related pages should branch into low-profile seat guides, shock spring-rate selection, two-up suspension setup, fork cartridge upgrades, floorboard clearance strategies, handlebar reach adjustments, boot and inseam fit tips, and comparisons between Street Glide, Road Glide, Road King, and Ultra-style touring ergonomics. That structure helps riders solve fit problems in a sequence instead of buying random parts.
The real value of this hub approach is decision clarity. Riders rarely need one answer; they need the next correct answer. Someone searching lowering kits may actually need seat reshaping first, premium shocks second, and control repositioning third. By organizing content around recipes rather than isolated products, you make it easier to match the motorcycle to the rider without losing sight of performance. That is especially important for Harley-Davidson touring owners, who often personalize their bikes over years rather than all at once.
Lowering the seat height on a 2026 Street Glide Limited can improve confidence, accessibility, and day-to-day enjoyment when the change is tailored to rider size, load, and road use. The key lessons are straightforward: start with measurements, consider seat shape before extreme suspension drops, use model-specific parts from established suspension brands, and accept that every reduction in ride height affects travel, clearance, and geometry. The best outcomes come from balanced recipes, not the lowest possible stance. If you are planning your Street Glide Limited setup, use this page as your foundation, then map the next upgrades in a logical order and test each change with real-world riding.
Frequently Asked Questions
What does a lowering kit actually change on a 2026 Street Glide Limited?
A lowering kit changes the motorcycle’s ride height by altering the suspension rather than simply reshaping the seat. On a 2026 Street Glide Limited, that usually means shorter rear shocks, modified rear mounting geometry, lowering links where applicable, revised fork internals, fork spring changes, or spacers that reduce front suspension length. The goal is to bring the bike lower to the ground so the rider can place more of both feet down at stops, which can noticeably improve confidence during parking lot maneuvers, uneven pavement stops, backing the bike, and low-speed traffic situations.
It is important to understand that seat height and suspension height are related, but they are not identical. A seat can be narrowed or reshaped to improve reach without changing chassis geometry, while a lowering kit changes how the entire motorcycle sits and moves. That affects more than just inseam reach. It can influence steering response, cornering clearance, suspension travel, passenger comfort, and the way the bike behaves under load with luggage or a passenger. On a heavy touring motorcycle like the Street Glide Limited, even a modest drop can make a meaningful ergonomic difference, but it also needs to be approached as a complete setup decision rather than a cosmetic bolt-on.
How much can I lower a 2026 Street Glide Limited without hurting ride quality?
For most riders, a mild drop is the safest and most practical range if preserving touring comfort is a priority. In real-world terms, that often means around 1 inch, sometimes slightly more depending on rider weight, passenger use, luggage habits, and the quality of the suspension components being installed. A small reduction in ride height can deliver a noticeable improvement in footing at stops without dramatically reducing suspension travel or causing the bike to feel harsh over expansion joints, potholes, or broken pavement.
The reason ride quality can suffer when a bike is lowered too much is simple: less available suspension travel means the suspension has less room to absorb bumps before it reaches the end of its movement. On a touring Harley, that can translate into a firmer, more abrupt ride, especially when carrying a passenger or full cargo. The rear suspension may bottom out more easily, and the front end may also feel less compliant if fork changes are not balanced correctly. In addition, lowering too aggressively reduces lean angle, so floorboards and other hard parts can touch down sooner in turns.
The quality of the kit matters as much as the amount of drop. A well-engineered premium shock designed specifically for the Street Glide Limited will usually ride better than a bargain setup that simply shortens the bike without accounting for damping, spring rate, and load capacity. If the motorcycle is regularly used for two-up touring, a conservative lowering approach is usually the smartest choice. The best result typically comes from matching the amount of drop to the rider’s actual needs rather than chasing the lowest possible stance.
Will lowering the bike affect handling, cornering, and long-distance touring comfort?
Yes, lowering the bike will affect all three, although the severity depends on how much the bike is lowered and how well the suspension is tuned afterward. In terms of handling, lowering the rear, front, or both changes chassis attitude and weight distribution. If the rear is lowered significantly more than the front, steering can become slower and the bike may feel more reluctant to turn. If the front is dropped too much relative to the rear, steering may feel quicker but stability can be reduced. A properly matched front-and-rear setup helps maintain predictable touring-bike manners.
Cornering clearance is one of the most noticeable tradeoffs. The Street Glide Limited is already a large touring platform, and lowering it reduces the distance between the road and hard parts such as floorboards, exhaust components, or frame-related hardware. That means parts may scrape earlier in curves, highway ramps, or driveway transitions. For riders who cruise conservatively, this may be an acceptable compromise. For riders who regularly carry speed through sweepers or encounter uneven mountain roads, it can become a limiting factor.
As for long-distance comfort, the answer is mixed. Lowering can improve comfort if the rider previously felt tense at stops or struggled to stabilize the bike when fully loaded. That reduction in stress can absolutely reduce fatigue over a long day. However, comfort may decline if the lower suspension becomes too firm, bottoms out on rough roads, or transmits more impact to the rider and passenger. Touring comfort depends heavily on preserving enough suspension travel and using components designed for the actual load the bike carries. In short, a moderate, thoughtfully installed setup can improve the ownership experience, but an overly aggressive drop often makes a touring motorcycle less enjoyable over distance.
Is a lowering kit better than getting a lower seat for shorter riders?
Not always. A lower seat is often the first and smartest solution because it can improve reach to the ground without changing the motorcycle’s suspension geometry, lean angle, or available suspension travel. On many Harley touring models, a seat with a narrower front profile allows the rider’s legs to drop more vertically, which can make the bike feel significantly easier to manage at stops even if the published seat height changes very little. For riders who only need a modest improvement, that can be enough.
A lowering kit becomes more appealing when a seat alone does not provide enough confidence or when the rider wants the bike itself to sit lower under load. This can help with balancing the motorcycle in parking lots, mounting and dismounting, and controlling the bike when it is loaded for travel. That said, lowering the suspension introduces tradeoffs that a seat swap does not. You are changing chassis dynamics, reducing travel, and potentially affecting passenger comfort and cornering clearance. Because of that, many experienced Harley owners try a seat change first, then move to a mild suspension drop only if needed.
In many cases, the best result is a combination approach rather than relying entirely on one solution. A carefully selected seat plus a modest lowering kit often achieves better ergonomics than an extreme suspension drop by itself. That approach can preserve more ride quality and clearance while still helping the rider get secure footing. For shorter riders, the right answer is usually the one that improves confidence without compromising the core touring capability that makes the Street Glide Limited appealing in the first place.
What should I check before and after installing a lowering kit on a 2026 Street Glide Limited?
Before installation, confirm exactly how much drop you need and what type of riding the bike actually does. A solo rider who cruises locally has different suspension needs than a rider who tours two-up with a tour pack full of luggage. Review the kit’s stated drop amount, load rating, compatibility with the 2026 Street Glide Limited, and whether front and rear components are meant to be used together. You should also verify whether the setup requires a shorter jiffy stand, modifications to fork internals, changes to preload settings, or adjustments for accessories such as saddlebag guards, exhaust, or floorboard hardware.
It is also wise to think through secondary effects before the parts go on. Lowering can affect belt guard clearance, fender clearance, shock travel, passenger comfort, and the angle at which the bike rests on its side stand. If the bike has advanced rider-assistance systems, linked braking behavior, or electronically adjustable suspension features depending on trim and equipment, compatibility matters. A high-quality installer will also inspect current suspension wear, tire condition, and alignment issues, because lowering a bike with already tired suspension components can magnify problems rather than solve them.
After installation, check sag, preload, and overall stance with the actual rider on the motorcycle, and ideally with passenger and luggage if that is how the bike is commonly used. Then test for practical clearance: driveway entrances, speed bumps, full-lock steering, and suspension compression over rough pavement. Pay attention to whether the bike bottoms out, scrapes earlier than expected, or feels unsettled in turns. Recheck fastener torque after the initial break-in period and inspect tire wear patterns over time. The best lowering setup is not just one that looks right in the garage; it is one that remains stable, comfortable, and predictable in the exact real-world conditions the Street Glide Limited was built to handle.