
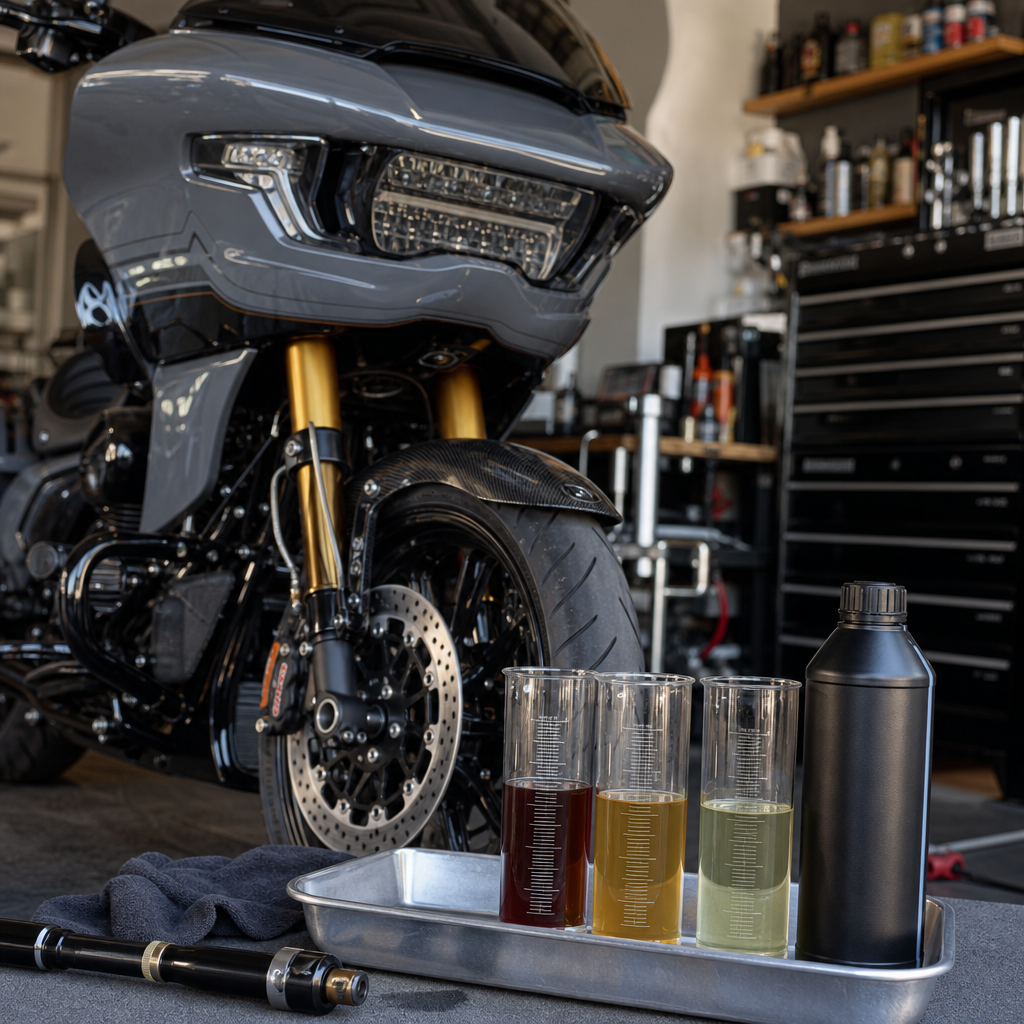
The CVO Road Glide ST inverted fork oil recipe for tuning 2027 damping starts with a simple reality: suspension feel is not created by oil weight alone, and riders who treat fork setup like a one-number adjustment usually end up chasing harshness, dive, or vague steering. On Harley-Davidson performance baggers, especially a CVO Road Glide ST with inverted forks, the correct recipe means balancing oil viscosity, oil height, spring rate, rider sag, clicker position, tire pressure, and rider ergonomics so the chassis works as a system. In this hub, “recipe” means a repeatable setup baseline for a specific use case, while “2027 damping” refers to the practical tuning targets riders are using now for modern touring-performance expectations: flatter braking, better mid-corner support, less wallow with luggage, and clean feedback on imperfect pavement. This matters because a fast bagger carries real mass, often adds a passenger or gear, and still gets ridden aggressively on ramps, sweepers, and back roads. I have tuned enough Harley forks to know that comfort complaints often mask damping imbalance, and performance complaints often begin with ergonomics. Riders search for fork oil answers, but the real solution is a model-specific setup process.
For the CVO Road Glide ST, that process begins with understanding what the front end is being asked to do. Inverted forks increase rigidity compared with conventional units, reducing flex under braking and improving steering precision, but they also reveal poor setup more clearly. Too much low-speed compression damping makes the bike skate over patchy pavement and transmit sharp hits through the bars. Too little rebound damping lets the fork extend too quickly after a bump, which feels loose and can unsettle the chassis on corner exit. Oil height changes the air spring effect near the end of travel, so a few millimeters can matter when trying to prevent bottoming without making the initial stroke punishing. Because this article sits at the center of model-specific ergonomics and performance recipes, it also frames how bar reach, seat shape, floorboard position, and rider posture influence front-end loading. A rider sitting rearward with a high torso angle often reports different fork behavior than a rider leaning slightly forward with firmer grip support through the core. That is why a useful damping article must also work as a hub for broader Harley-Davidson fit and handling setup.
What a fork oil recipe actually includes on a CVO Road Glide ST
A proper fork oil recipe is a package, not a bottle. On this bike, I define the recipe with seven inputs: oil viscosity in centistokes at 40 degrees Celsius, oil level measured from the top with springs removed and fork compressed, spring rate, preload setting or spacer length, compression damping position, rebound damping position, and target laden sag. Riders often talk in “5W” or “10W” terms, but fork oil labeling is not standardized across brands. Maxima, Motul, Öhlins, Bel-Ray, and Spectro can all label products similarly while delivering different actual viscosities. That means the correct way to compare oils is by published viscosity data, ideally at 40 degrees Celsius, not by the number on the bottle alone. For a heavy touring-performance Harley, small changes in centistokes can materially alter rebound control, especially with stock-style valving.
The baseline purpose of the recipe is straightforward. Compression damping controls the fork’s resistance to being compressed. Rebound damping controls how quickly it extends after compression. Oil height affects the progression near the bottom of the stroke because trapped air acts like a rising-rate spring. Spring rate supports load and establishes ride position. Sag is the measurement that tells you whether the fork sits in the right part of its travel under rider weight. If any one of those is badly off, the others are forced to compensate. I regularly see bikes with overly heavy oil used to mask weak springs, or excessive preload used to hide too-soft damping. Both approaches create new problems, including chatter, reduced compliance, and vague turn-in.
For a CVO Road Glide ST used mainly for spirited solo street riding, a dependable starting point is medium-viscosity oil from a premium brand, oil height set conservatively to preserve bottoming resistance, and sag near 30 to 35 percent of total front travel with the rider in normal gear. If the bike carries a passenger regularly, stiffer springs are usually a better fix than heavier oil. If the rider attacks rough canyon pavement, lighter rebound control may improve front tire contact, but only if the fork is not already underdamped. The point of the recipe is repeatability: one change at a time, documented carefully, with road impressions tied to objective measurements.
Baseline damping targets for 2027 riding expectations
Modern bagger riders expect a motorcycle that can tour all day and still brake hard into a decreasing-radius corner without collapsing the front end. That expectation defines today’s damping target. The front fork should use travel under braking, but not rush through it. It should absorb expansion joints without punching the rider in the palms. It should settle after one movement, not oscillate. And it should preserve steering accuracy when the fairing, bags, rider, and fuel load are all influencing mass distribution. In practical terms, the target is controlled low-speed compression, enough rebound to prevent pogoing, and sufficient end-stroke support from spring and air gap rather than from excessive viscous drag.
On a CVO Road Glide ST, I generally separate symptoms into four categories. Harsh over square-edge bumps usually points to too much compression damping, too much preload, too high an oil level, or tire pressure that is simply too high for the load. Brake dive with acceptable comfort usually points first to spring rate or preload, not necessarily to oil weight. Mid-corner wallow often indicates inadequate rebound control at one end of the bike, and on Harley-Davidson touring models the rear shocks are frequent contributors. Nervous turn-in can come from rear ride height changes, tire profile, or bar ergonomics just as easily as from the fork itself. That is why front-end tuning must be read within the full chassis context.
| Riding use | Front fork priority | Common adjustment direction | Main caution |
|---|---|---|---|
| Solo canyon riding | Brake support and steering precision | Slightly more compression, verify sag, moderate oil height | Do not over-thicken oil to fix dive |
| Long-distance touring | Compliance and fatigue reduction | Softer clickers where available, correct spring support | Avoid excessive preload that masks soft springs |
| Two-up with luggage | Travel control under extra load | Increase spring support, recheck rear balance | Front changes alone cannot cure rear squat |
| Rough urban pavement | Initial stroke sensitivity | Reduce harshness before chasing support | High tire pressure can imitate damping problems |
Those priorities reflect what riders actually feel. A bagger ridden briskly on smooth roads can tolerate more support. The same setup on frost-heaved pavement may feel punishing. For 2027-level expectations, the winning setup is not the firmest one; it is the one that lets the front tire stay loaded predictably. That predictability creates confidence, and confidence is what most riders mean when they say a bike “handles better.”
Oil viscosity, oil height, and spring balance explained in plain terms
Fork oil viscosity primarily influences damping because it flows through valves and orifices. Thicker oil generally increases damping force, especially rebound, although the exact effect depends on valve design and temperature. On many street Harleys, riders notice heavier oil most clearly as slower fork return. That can feel more controlled at first, but if it becomes excessive the fork packs down over repeated bumps, riding lower in the stroke and becoming harsher. Lighter oil can restore compliance and tracking, but if taken too far it allows bounce and imprecision. The best practice is to choose oil based on the damping hardware in the fork, not on guesswork or forum folklore.
Oil height is different. Raising the oil level reduces the air chamber, which increases end-stroke progression. In simple terms, the fork resists bottoming more strongly near the end of its travel. Lowering the oil level increases the air chamber and softens that final progression. This is useful because it lets you tune bottoming resistance without dramatically changing early-stroke feel. On a heavy Harley-Davidson performance bagger, oil height is often the cleaner tool for managing hard-braking support than jumping to a much heavier oil viscosity. I have used this approach repeatedly when a rider wanted better reserve travel but liked the existing small-bump comfort.
Spring balance is the foundation under both decisions. If springs are too soft for rider weight and use, the bike will sit too deep in the travel, dive heavily, and rely on damping to do support work it cannot do cleanly. If springs are too stiff, the bike rides high, loses grip on irregular surfaces, and pushes feedback into the rider. Proper springs paired with measured sag make oil changes meaningful. Without that foundation, damping adjustments become expensive noise. This is why every model-specific recipe should include rider weight, luggage habits, road type, and whether the bike still uses stock rear shocks or an upgraded set from companies such as Öhlins, Fox, Legend, or Progressive Suspension.
Ergonomics and chassis balance in Harley-Davidson performance recipes
Ergonomics is not a comfort side note; it is a handling variable. On a CVO Road Glide ST, seat pocket depth, handlebar pullback, grip angle, and foot position all influence how much body weight naturally reaches the front tire. A rider who is stretched too far rearward often braces against the bars during braking, then complains about fork harshness and front-end vagueness. A rider with a supportive seat and neutral reach can relax the hands, load the pegs and core, and let the fork move more freely. In workshops, I have seen a bar change fix symptoms that riders assumed required cartridge kits.
This is why the subtopic of model-specific ergonomics and performance recipes matters across Harley-Davidson platforms. A Road Glide, Street Glide, Low Rider ST, and Road King Special may all respond to suspension tuning, but each places the rider differently and shifts perceived front-end behavior. Tall riders often need more room without losing forward weight bias. Shorter riders may prioritize a seat that improves reach while preserving support during braking. Even windshield height can matter because turbulence changes upper-body tension, and tension changes how impacts are interpreted. The best setup sheets include ergonomic notes right beside sag and clicker values.
Chassis balance also means front and rear must be tuned together. If rear preload is too low, the motorcycle squats, increases rake and trail, and makes the front feel lazy or disconnected. Riders then stiffen the fork to recover feel, which can create a harsh but still poorly balanced machine. If the rear is too tall or overdamped, the bike may tip in quickly yet feel nervous. On a CVO Road Glide ST, any serious fork oil recipe should therefore be treated as one chapter in a full chassis recipe. That is exactly how this hub should be used: start with the front, but validate every change against rear ride height, tire condition, and rider position.
How to test, document, and refine your setup safely
The safest and fastest path to a good setup is disciplined testing. Measure static and rider sag first. Record tire pressures cold. Note current fork oil brand, viscosity, oil height, spring specification, and clicker positions if your fork has external adjusters. Use one repeatable road loop that includes smooth pavement, braking zones, mid-corner bumps, and low-speed urban impacts. Change one variable at a time. Ride the same loop at the same pace. Write down what improved, what worsened, and where on the road you felt it. This sounds basic, but it prevents the classic mistake of changing preload, tire pressure, and damping together, then not knowing what caused the result.
For riders doing their own service, follow the factory service manual torque values and disassembly sequence exactly. Fork work on inverted units requires care with clamping force, seal handling, oil measurement, and alignment. Use a proper fork oil level tool, a calibrated torque wrench, and clean containers. Bleed cartridges thoroughly if the design requires it. If the bike has electronic rider aids, maintain wheel and brake component alignment exactly as specified. A small assembly error can create symptoms that mimic bad damping. If you are uncertain about internal valving, let a suspension specialist handle that part; the money saved by guessing is usually lost in repeated tear-downs and wasted fluid.
The final refinement step is honesty about use case. If most miles are interstate touring, tune for control and reduced fatigue, not hero-run firmness. If the bike is ridden aggressively on technical roads, accept a little more feedback in exchange for support and precision. There is no universal best recipe. There is only the best documented recipe for your weight, roads, speed, and ergonomic position. Use this hub as the starting framework, then branch into specific Harley-Davidson setup guides for seats, bars, rear shocks, and model-by-model suspension combinations. That is how you turn a fork oil question into a complete performance solution.
The right CVO Road Glide ST inverted fork oil recipe for tuning 2027 damping is a measured setup, not a myth: choose oil by actual viscosity data, set oil height for end-stroke control, match springs to load, confirm sag, and evaluate the front end in the context of ergonomics and rear suspension balance. Riders who approach the bike as a system get better braking support, clearer steering, more comfort on broken pavement, and more confidence everywhere from city streets to fast sweepers. Just as important, they stop wasting time on random changes that hide the real issue instead of solving it.
As the hub for model-specific ergonomics and performance recipes under Harley-Davidson, this page should guide every related adjustment you make. Start with the front fork because it defines feel, but do not stop there. Review your seat, bar reach, rear ride height, tire pressures, and luggage habits with the same discipline. Build a written baseline, test carefully, and refine one variable at a time. If you want your Road Glide ST to feel planted, responsive, and less tiring over real roads, begin with a documented suspension recipe and use it to connect fit and performance into one coherent setup.
Frequently Asked Questions
What does “fork oil recipe” really mean on a CVO Road Glide ST with inverted forks?
On a CVO Road Glide ST, a fork oil recipe is not just a choice between one oil weight and another. It is the complete setup strategy that determines how the front suspension moves through its travel under braking, corner entry, mid-corner load, pavement chatter, and high-speed compression events. In practical terms, that recipe includes oil viscosity, oil height, spring rate, preload or installed spring condition, rider sag, compression and rebound clicker settings if the fork is adjustable, tire pressure, and even the rider’s weight distribution and bar position. All of those variables influence what riders describe as plushness, support, steering accuracy, and confidence.
That matters because inverted forks on a performance bagger are sensitive to setup balance. If the oil is too thick, rebound may slow down too much, making the fork feel packed down and harsh over repeated bumps. If the oil height is too high, the air spring effect ramps up sooner and can make the last part of travel feel abrupt or unforgiving. If the springs are too soft, the bike may dive excessively under braking no matter what oil you choose. If sag is wrong, the fork may ride too low or too high in the stroke, which changes geometry, steering feel, and available travel.
So when riders ask for the “right oil recipe” for 2027 damping tuning, the best answer is that there is no single magic number. There is a target balance. The front end should settle predictably when braking, recover cleanly after bumps, stay composed over rough pavement, and hold a clear line through corners without feeling nervous or lazy. The correct recipe is the one that delivers those behaviors for your rider weight, pace, road conditions, and rear suspension setup.
Is heavier fork oil the best way to make the front end feel more controlled?
No, and this is one of the most common mistakes riders make. Heavier fork oil can increase damping resistance, but that does not automatically create better control. In many cases, it simply masks another issue while introducing new problems. A front end that feels loose, dives too much, or lacks confidence may actually need spring support, sag correction, clicker adjustment, or oil height refinement rather than thicker oil.
When oil viscosity goes up, damping circuits usually resist flow more strongly, especially during rebound. That can make the fork return too slowly after compressing, which causes a packed-down feel over a series of bumps. Instead of tracking the road, the fork begins riding lower in its travel, and the bike can feel harsh, vague, and reluctant to turn. Riders sometimes interpret that as “firmer” or “more planted” at first, but over real roads it often reduces grip and comfort.
On the other side, oil that is too light may let the fork move too quickly, creating excessive dive, wallow, or a springy rebound sensation. The solution is not to automatically go thicker or thinner by habit. It is to choose a viscosity that works with the fork’s valving design and then fine-tune the rest of the system. For a CVO Road Glide ST, the most effective approach is usually to start with the fork manufacturer’s or tuner’s recommended fluid range, set sag correctly, verify tire pressures, establish a baseline clicker setting, and then test one change at a time. That process delivers real control instead of the false fix that comes from chasing oil weight alone.
How important is oil height when tuning 2027 damping characteristics?
Oil height is extremely important because it changes the amount of air volume inside the fork, and that air volume acts like a secondary spring. As the fork compresses, the trapped air gets squeezed and becomes progressively more resistant. Raising oil height reduces air volume, which increases bottoming resistance and makes the fork ramp up more aggressively later in the stroke. Lowering oil height increases air volume, which softens that end-stroke ramp and allows fuller travel with a more linear feel.
For a heavy, performance-oriented touring platform like the CVO Road Glide ST, oil height can have a major effect on braking support and impact control. If the fork feels good in the first half of travel but becomes sharp or unforgiving on bigger hits, oil height may be too high. If the fork blows through travel too easily during aggressive braking or hard compressions even though spring rate is close, oil height may be too low. This is why oil height should be treated as a precision adjustment rather than a fill-it-and-forget-it number.
The key is to separate what oil height does from what viscosity does. Viscosity primarily affects damping flow characteristics. Oil height primarily affects the air spring and end-stroke support. Riders often mix those concepts together and then tune the wrong variable. A good tuning process is to establish the correct spring rate first, set sag, use an appropriate oil viscosity for the valving, and then use oil height to shape bottoming resistance and late-stroke feel. Small changes can be meaningful, so methodical adjustment is far more effective than large jumps.
What baseline setup steps should I follow before changing fork oil on a CVO Road Glide ST?
Before changing fork oil, start with the fundamentals because many front-end complaints are caused by setup errors outside the fork itself. First, confirm tire pressures with an accurate gauge and set them for your actual load and riding use. Low or inconsistent front tire pressure can mimic suspension problems by making steering feel heavy, vague, or unstable. Second, inspect the fork mechanically. Make sure there is no stiction from misalignment, damaged bushings, bent components, or improper axle and pinch bolt installation. A perfectly tuned fork will still feel bad if it cannot move freely.
Next, measure rider sag. This is one of the most important checkpoints because it tells you whether the bike is riding in the correct part of the travel. If sag is excessive, the front end may dive too much and steer slowly because it is already sitting low. If sag is insufficient, the front may feel tall, nervous, and unwilling to absorb smaller bumps. Once sag is verified, record your current clicker settings if the fork offers external adjustment. Count clicks from fully closed or fully open according to the tuner’s method and write everything down.
Then evaluate rider ergonomics and load. Your handlebar reach, seat position, luggage, windshield setup, and body posture all influence how much weight is carried by the front tire. On a performance bagger, those details matter more than many riders realize. Finally, compare the front setup with the rear suspension. A poorly matched rear shock can transfer weight awkwardly and make the fork seem like the problem when the chassis balance is actually off. Only after those baseline checks should you begin changing oil viscosity or oil height. That way, any improvement you feel is real and repeatable rather than the result of compensating for another problem.
How do I know if my fork setup is balanced for comfort, braking support, and sharp steering?
A balanced setup feels predictable in several different riding situations, not just one. Under normal braking, the fork should compress smoothly and with control, without collapsing too quickly or hanging up before settling. Under hard braking, it should use travel decisively but still maintain composure and chassis stability. Over rough pavement, the front tire should stay connected and the bars should not transmit every sharp edge as a jab or deflection. In corners, the bike should turn in with intent, hold a line naturally, and avoid the vague drifting sensation that happens when the fork is either too soft or too slow to recover.
You can also diagnose balance by paying attention to patterns. If the front end feels plush on a single bump but harsh over repeated bumps, rebound damping may be too slow or oil may be too heavy. If the bike dives dramatically under braking and then recovers too quickly when the brakes are released, you may need more low-speed compression control, more spring support, or a revised oil strategy depending on the fork design. If steering feels lazy and the bike resists direction changes, the fork may be riding too low from excess sag or soft springs. If the front is twitchy and skips across imperfect pavement, it may be riding too high, too stiff, or carrying excessive compression damping.
The best method is structured testing. Ride the same loop with the same tire pressures and note behavior in braking zones, sweepers, tight turns, and rough sections. Change one variable at a time and document it. A truly balanced CVO Road Glide ST front end will feel settled yet responsive, supportive without harshness, and precise without becoming nervous. That is the goal of a proper 2027 damping tune: not simply a stiffer fork, but a front suspension that works as a coordinated system with the rest of the motorcycle.





