
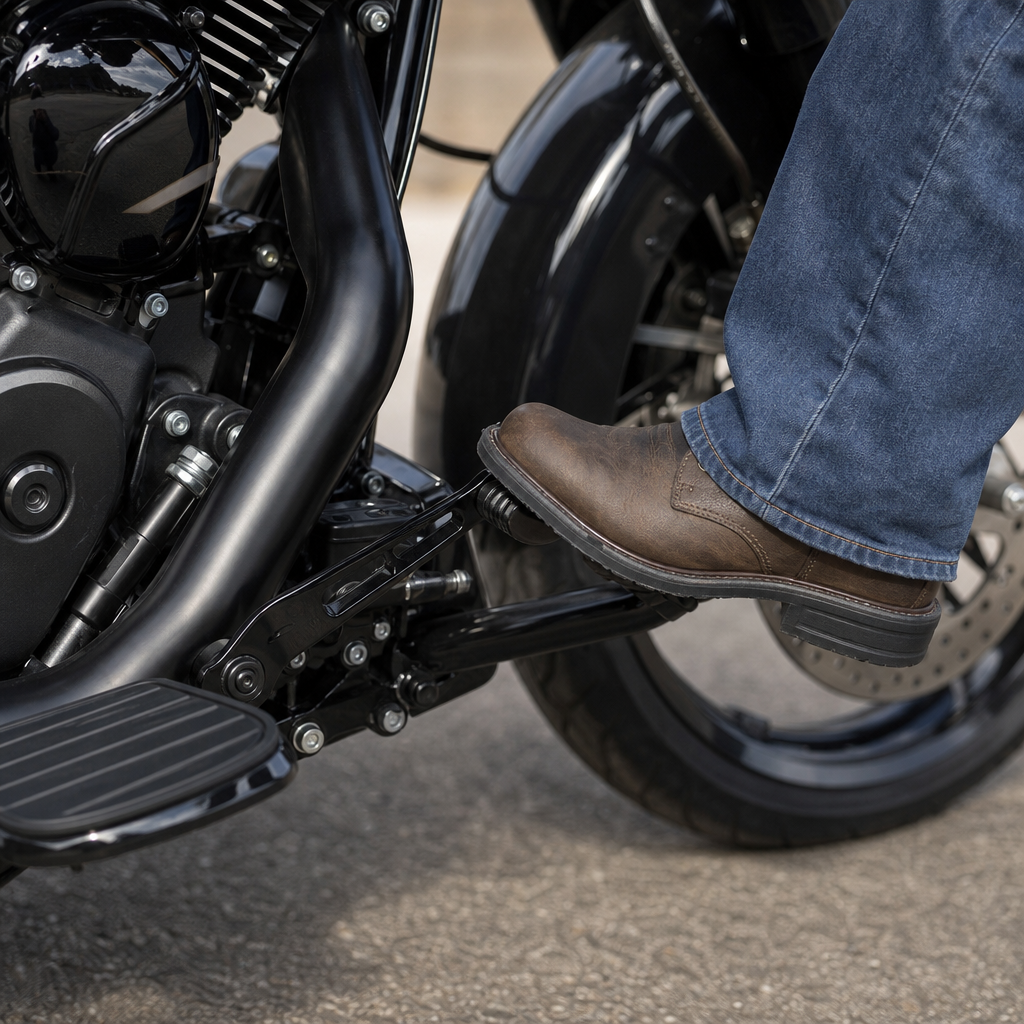
The 2026 Street Glide Limited heel shifter recipe for adjusting larger boots starts with a simple truth: touring comfort depends on millimeters. On Harley-Davidson touring bikes, a “recipe” is a repeatable setup method that combines parts choice, measurement, adjustment sequence, and test riding. Ergonomics means how the rider’s body interfaces with controls, floorboards, seat, bars, and wind protection. For riders wearing wider adventure-touring boots, insulated winter boots, or work-style leather boots in sizes 11 through 15, the stock heel-toe shifter layout can feel cramped, vague, or slow. I have set up dozens of touring Harleys for riders with larger footwear, and the pattern is consistent: when boot volume increases, shift accuracy drops unless the linkage, peg spacing, and footboard technique are corrected together.
This matters because poor heel shifter setup affects more than convenience. It can create delayed upshifts, false neutrals between gears, ankle strain on long rides, and uneven wear on shifter bushings. On a heavy touring motorcycle such as the Street Glide Limited, every control input should be predictable at parking-lot speed, in stop-and-go traffic, and after eight hours in the saddle. The 2026 model year continues Harley-Davidson’s emphasis on rider comfort, but no factory setting can fit every inseam, ankle mobility range, sole thickness, or boot width. A rider with a 30-inch inseam and low-profile riding shoes needs a different toe gap than a rider with a 34-inch inseam wearing insulated size 13 boots with lugged soles.
As a sub-pillar hub for model-specific ergonomics and performance recipes, this guide covers the full method for setting up the 2026 Street Glide Limited heel shifter for larger boots while also showing how the same logic applies to linked topics such as seat height tuning, handlebar reach, brake pedal angle, floorboard positioning, and suspension sag. If you are asking, “How do I adjust a Harley heel shifter for big boots?” the direct answer is this: set the bike upright, measure current clearance, level the toe lever to your natural foot angle, position the heel lever so your boot contacts it without lifting your foot off the board, verify full transmission engagement, then road test and fine-tune in one-spline or small-linkage increments. That sequence produces the cleanest result and prevents chasing one discomfort by creating another.
Know the Street Glide Limited control layout before touching the linkage
The Street Glide Limited uses a rider triangle built around seat height, floorboard location, and bar reach, and the heel shifter sits inside that larger system. Riders often try to solve boot interference by rotating the rear lever alone, but that can mask the real issue. On Harley touring platforms, the left-side shift system includes the toe lever, heel lever, shift shaft interface, linkage hardware, pivot points, and floorboard relationship. If any one element is out of alignment, the rider compensates with ankle rotation, hip movement, or lifting the leg off the board, which increases fatigue.
Start with the bike secured upright, ideally on a lift or wheel chock so the suspension is settled and the bars are straight. Wear the exact boots you ride in most often. Thick soles change ankle angle, and wide toe boxes alter how far inward the foot can rest on the board. I mark the current lever positions with painter’s tape and take photos from the side before loosening anything. That baseline matters if the first revision feels worse. Harley service literature emphasizes maintaining proper lever travel and spline engagement, and that guidance should be followed closely because stripped splines or over-rotated arms create expensive problems quickly.
The key question here is not “Where should the lever look level?” but “Where does your foot naturally land when cruising?” For larger boots, most riders place the ball of the foot slightly farther outward on the floorboard to create toe-box space. That changes the arc needed for both the front and rear shift contacts. If your setup forces your foot inward just to reach the rear lever, the bike is adjusted to the machine, not to the rider. Proper ergonomics reverse that priority.
The core heel shifter recipe for larger boots
The most reliable adjustment recipe uses four passes. First, neutral setup: place your left foot on the board in its relaxed cruising position and note where the boot naturally sits relative to the heel lever. Second, front lever indexing: adjust the toe shifter so the front pad aligns with the upper edge of the boot sole without requiring excessive ankle lift. Third, rear lever reach: rotate or position the heel pad so you can upshift by pressing down with a short, controlled heel motion while keeping your forefoot in contact with the board. Fourth, confirmation: cycle the transmission through gears with the engine off and then validate under load on the road.
For most larger-boot riders, the mistake is setting the heel pad too close. That sounds intuitive, but it causes accidental contact and clumsy 1-2 upshifts. A better target is a small but deliberate gap that allows the rider to pivot the heel down on command. In practical fitting sessions, I usually aim for enough space to slide a finger between the back of the boot and the heel pad while the foot is relaxed. Then I test whether a deliberate heel press still completes the shift without the rider lifting the knee. This creates a distinct “rest” zone and a distinct “shift” zone.
Toe lever height matters just as much. If the front pad sits too high, larger boots wedge under it and make downshifts awkward. If it sits too low, the rider must rotate the entire leg inward to hook the toe. On touring Harleys, slight changes at the shift arm translate into meaningful differences at the boot contact point, so move in small increments. After each adjustment, tighten to specification, articulate the lever through full travel, and verify that nothing binds against the floorboard trim or primary-side hardware.
How boot size, sole thickness, and riding style change the ideal setting
Boot size alone does not determine the best heel shifter adjustment. Volume, stiffness, tread pattern, and rider technique all matter. A size 12 performance riding boot with a slim sole can fit a stock setup better than a size 10 work boot with a thick welt and block heel. Waterproof cold-weather boots often reduce ankle flexion, so those riders benefit from a lower-effort heel shift and a slightly more open spacing to avoid dragging the sole edge. Riders who cover interstate miles tend to prefer more separation between resting and shifting positions, while urban riders often want quicker access because they shift more frequently.
I also account for inseam and seat choice. A taller seat or firmer aftermarket saddle changes knee angle and can move the foot rearward on the board. That single change can make a previously correct heel lever feel too close. The same applies when adding highway pegs: riders alternate foot positions more often, and when they return to the boards, they need an easy-to-find shift contact point. This is why model-specific ergonomics recipes should never isolate one part. Seat, suspension preload, and control reach always interact.
| Rider factor | Typical effect on heel shifter | Recommended adjustment trend |
|---|---|---|
| Wide size 12-15 boots | Reduced room between toe box and heel pad | Increase resting gap; confirm deliberate heel reach |
| Thick lugged soles | Less ankle articulation, more sole drag | Lower front pad slightly; avoid overly close rear pad |
| Tall aftermarket seat | Opens knee angle, shifts foot rearward | Recheck rear lever distance after seat install |
| Short inseam | More bent knee, tighter ankle angle | Keep front pad accessible without lifting whole leg |
| High-mile touring use | Fatigue amplifies small ergonomic flaws | Prioritize neutral rest position over aggressive quick shifts |
Real-world example: one rider I worked with wore insulated size 14 boots on winter trips and standard size 13 touring boots in summer. The winter setup needed the rear lever opened up and the front pad lowered a touch because the thicker sole changed the contact arc. Instead of compromising year-round, we marked a reference position on the linkage and created a seasonal adjustment routine that took under ten minutes. That is what a good recipe should do: produce repeatable results, not one-time guesswork.
Common adjustment mistakes and how to avoid them
The first common mistake is chasing comfort without checking full shift travel. A lever can feel great in the garage but still fail to move the transmission cleanly under engine load. Always test actual gear engagement. False neutrals are not just annoying; repeated incomplete shifts can damage dogs and wear shifting components prematurely. The second mistake is ignoring fastener torque and spline seating. Harley controls are robust, but loose shift hardware creates slop that riders misinterpret as a transmission problem.
The third mistake is overcompensating for large boots by placing the heel lever extremely far rearward. That forces the rider to stomp instead of press, and heavy inputs reduce finesse. Touring bikes reward smooth, short control motions. The fourth mistake is fixing the left side while neglecting the rear brake pedal on the right. If larger boots require one foot position on the left and a completely different one on the right, the rider’s hips stay uneven. Over long distances, that asymmetry shows up as lower-back or knee discomfort.
Another issue is using aftermarket parts without checking geometry. Extended or custom heel-toe shifters can help, but some change leverage or pad placement in ways that reduce ground clearance or feel vague. Choose components from established suppliers, compare lengths against stock, and confirm compatibility with the 2026 touring platform. Kuryakyn, Harley-Davidson Genuine Motor Parts, and other recognized touring-focused brands generally publish fitment data that should be reviewed before ordering. Parts solve some ergonomic problems, but poor setup can make a premium part perform worse than stock.
Supporting recipes: floorboards, brake pedal, seat, bars, and suspension
The best hub pages connect the heel shifter topic to the rest of the motorcycle. On the Street Glide Limited, floorboard posture is the foundation. If your arch is not supported well on the board, your foot floats, and every shifter setting feels inconsistent. Brake pedal angle should let the right foot hover naturally without lifting the thigh. Seat shape should support the pelvis so the rider is not sliding forward into a cramped knee bend. Handlebar reach should allow relaxed shoulders; if the rider is stretched out, the lower body braces and foot movement becomes less precise.
Suspension sag is the sleeper variable. When rear preload is too soft for rider and luggage weight, the bike settles lower, changing knee angle and effective reach to the boards. I have seen riders blame the heel shifter when the real problem was under-sprung rear ride height during two-up touring. Set preload correctly first, then adjust controls. The same principle applies after changing shocks, adding a taller seat, or swapping to different floorboards. Any modification that changes rider triangle geometry should trigger a fresh control setup session.
For subtopic coverage across Harley-Davidson model-specific ergonomics and performance recipes, the related pages that naturally pair with this hub are: Street Glide Limited brake pedal adjustment for larger boots, seat selection for short and tall touring riders, handlebar reach tuning after bar swaps, floorboard position strategies for wide boots, highway peg placement for lower-back relief, and suspension preload recipes for loaded touring. Together, these topics create a complete fitment system rather than isolated fixes.
Road-test protocol and long-term maintenance
A proper road test has three phases. First, slow-speed neighborhood riding confirms basic shift access and whether the rider can upshift and downshift without looking down or repositioning the whole leg. Second, moderate-speed mixed riding checks shift timing under load, especially the 1-2 and 2-3 transitions where awkward geometry usually appears. Third, a longer highway segment reveals whether the rest position remains comfortable after forty-five minutes, when numbness and muscle compensation start to show.
After the first 100 to 200 miles, inspect all adjusted hardware again. New positions sometimes settle, especially if the bike had prior wear in bushings or pivot points. Look for polished spots on boot soles, scraped lever pads, or witness marks on floorboards. Those signs tell you where unintended contact is happening. Periodic lubrication and inspection of pivots keep feel consistent. If the shifter becomes notchy after a correct ergonomic setup, investigate linkage wear, bushing play, or drivetrain issues rather than continuing to move the lever around.
The main takeaway is straightforward: the 2026 Street Glide Limited heel shifter recipe for larger boots works best when treated as a measured ergonomic system, not a random lever tweak. Start with your real riding boots, adjust the front and rear contacts in small deliberate increments, verify full transmission engagement, then road test long enough to expose fatigue-related flaws. From there, connect the result to floorboards, brake pedal, seat, bars, and suspension so the whole motorcycle fits your body. Do that once, document the settings, and every mile becomes easier, cleaner, and more confident. If your shifts still feel compromised, use this hub as your next step and tune the rest of the rider triangle methodically.
Frequently Asked Questions
What does a “heel shifter recipe” mean on a 2026 Street Glide Limited, and why does it matter for larger boots?
On the 2026 Street Glide Limited, a heel shifter recipe is simply a repeatable setup method for making the shift system work with your body, your boots, and your riding style. Instead of randomly moving the toe or heel lever and hoping for improvement, the recipe approach uses a consistent order: confirm boot size and shape, evaluate floorboard space, measure current lever positions, make one adjustment at a time, and then test ride under real conditions. That matters because touring comfort is rarely about big changes. It usually comes down to a few millimeters of clearance, a few degrees of lever angle, and whether your ankle can move naturally without lifting your foot off the floorboard.
For riders wearing larger footwear, the stock heel-toe arrangement can feel crowded. Wide adventure-touring boots, insulated winter boots, and work-style leather boots often have thicker soles, more toe box height, and less flex through the ankle. On a touring Harley, that changes how your foot enters the space between the toe shifter, heel lever, floorboard edge, and primary side area. If the spacing is too tight, you may upshift or downshift awkwardly, drag your boot during stops, or end up rotating your foot in a way that creates fatigue over long miles.
The reason the recipe matters is that comfort and control are linked. When the heel shifter is positioned correctly, you can shift without thinking about it. Your boot lands where it should, your foot stays planted on the floorboard, and your ankle movement feels efficient rather than forced. That reduces missed shifts, makes stop-and-go traffic easier, and improves long-distance comfort. On a touring bike designed for all-day riding, those small ergonomic wins add up quickly. A well-set heel shifter is not just a convenience feature for larger boots; it is part of the bike’s overall control layout and a real contributor to confidence, consistency, and reduced lower-body strain.
What is the best adjustment sequence for setting up the heel shifter for bigger boots?
The best adjustment sequence starts with the rider, not the linkage. First, wear the exact boots you actually ride in most often. That may sound obvious, but boot shape changes everything. A slim touring boot and a bulky insulated boot can require noticeably different lever spacing. Sit on the bike in your normal riding posture, with the bike upright and stable, and place both feet naturally on the floorboards. At this stage, do not force your feet into a shifting position. Just observe where your boots want to rest when your hips, knees, and ankles are relaxed.
Next, identify interference points. Check whether the toe box is contacting the front shifter too early, whether the heel section crowds the rear lever, and whether your foot must slide too far forward or backward to operate both levers. It helps to note the natural resting point of the ball of your foot and compare that with the lever positions. If your boot is large, you may find that the stock setup places the toe lever too close to the front of the boot or the heel lever too near the back edge of your floorboard stance.
After that, measure the existing setup before making changes. Even a simple reference like lever angle relative to the floorboard, or the distance from the rubber pad to a known point on the board, gives you a baseline. Then begin with small adjustments. In most cases, riders with larger boots benefit from creating a little more fore-aft room rather than making dramatic vertical changes. Move one variable at a time, re-tighten properly, and check operation through the full range. Avoid changing multiple things at once, because it becomes difficult to identify which adjustment actually improved the fit.
Once you have a promising static setup, test it in realistic riding conditions. Shift while stopped, in low-speed traffic, during normal acceleration, and while wearing the boot thickness you plan to tour in. Pay attention to whether you can upshift and downshift without lifting your foot excessively, twisting your knee, or searching for the lever. The final step is refinement. Touring-bike ergonomics are cumulative, so if the heel shifter is close but not perfect, you may also need to consider floorboard position, seat relationship, or even how your bars affect lower-body posture. The best recipe is the one that delivers natural movement every time, not just a setup that looks symmetrical in the garage.
How do I know if my Street Glide Limited heel shifter is adjusted incorrectly for wide or bulky boots?
The most common sign is that shifting feels like a deliberate foot maneuver instead of a natural movement. If you have to lift your whole foot off the floorboard to catch the toe lever, or if you must roll your ankle excessively to use the heel lever, the setup is probably not matched to your boot size. Riders with larger boots often compensate without realizing it. They start changing their leg position at stops, moving their hips in the seat, or sliding their foot around the floorboard between every shift. Those workarounds usually indicate that the controls are asking too much from the rider.
Another clue is inconsistent shift quality. If the bike shifts fine in thin footwear but feels vague, clumsy, or delayed in larger boots, the issue is likely ergonomic rather than mechanical. Wide boots can contact both levers too easily, especially if the spacing is tight. That can lead to accidental pressure on the heel lever while setting up for a toe shift, or the opposite problem where the toe box cannot get cleanly under or against the front lever. In practical terms, that means missed shifts, partial lever engagement, and an overall feeling that your foot is fighting the layout.
Hot spots and fatigue also tell a story. If your ankle, shin, knee, or outer hip begins to ache during longer rides, the shifter may be forcing an unnatural motion pattern. Touring motorcycles are meant to support a neutral lower-body position. If the heel shifter setup makes you point your toes downward, pull your heel up too aggressively, or slide your foot far out of its natural resting zone, the strain eventually shows up as discomfort. That becomes even more obvious with stiff winter or work boots that do not flex easily.
There are visual indicators too. Look for scuff marks on the side of the boot, unexpected wear on the sole edge, or repeated contact points on the shift pegs. Those marks often reveal where the boot is hitting before the foot has properly aligned with the lever. If you see that kind of wear and also feel cramped on the floorboard, the adjustment likely needs attention. A correct setup should allow clean, repeatable access to both shift points with minimal foot repositioning and no sense of crowding.
Should I change parts, or can the stock heel shifter usually be made to work for larger boots?
In many cases, the stock heel shifter can be made to work very well, especially if the issue is mainly one of lever position and rider adaptation. Harley touring controls offer enough adjustability for a large percentage of riders once the setup is approached methodically. Before buying anything, it makes sense to optimize what is already there. A careful adjustment of the heel-toe relationship, combined with realistic test rides in the boots you actually use, often solves the problem. Many riders discover that what felt like a parts problem was really a measurement and setup problem.
That said, parts changes become worthwhile when the stock setup cannot create enough space or leverage for your specific boot shape. If your footwear has an unusually tall toe box, a very thick lugged sole, or a broad forefoot, aftermarket shift pegs, longer pads, differently shaped pegs, or related ergonomic parts may help create cleaner contact and better spacing. The goal is not to make the bike look customized for the sake of it. The goal is to make the shifting motion more natural while keeping operation positive and predictable.
It is also important to think of the heel shifter as one part of a system. Floorboards, seat height, riding boot sole thickness, and rider inseam all influence how much room you really have. A rider may blame the heel shifter when the actual limitation is that the foot is being pushed into a cramped angle by another component. On a touring motorcycle, a slight change in seat position or lower-body posture can alter how the boot meets both shift levers. That is why experienced riders and fitters look at the entire control triangle rather than isolating only one part.
If you do decide to change parts, prioritize function over novelty. Use components that preserve dependable shifting feel, proper hardware fit, and secure fastening. Any modification should still allow smooth operation through the full range of motion without introducing interference or looseness. The best outcome is simple: whether you stay stock or add parts, your larger boots should be able to shift cleanly without crowding, scraping, or forcing your foot into an awkward path.
What should I pay attention to during the test ride after adjusting the heel shifter?
During the test ride, focus first on whether the bike lets you shift instinctively. You should not have to think through every movement. Starting from a stop, rolling through the lower gears, and making routine upshifts and downshifts should all feel clean and predictable. If you catch yourself hunting for the heel lever, overreaching





