
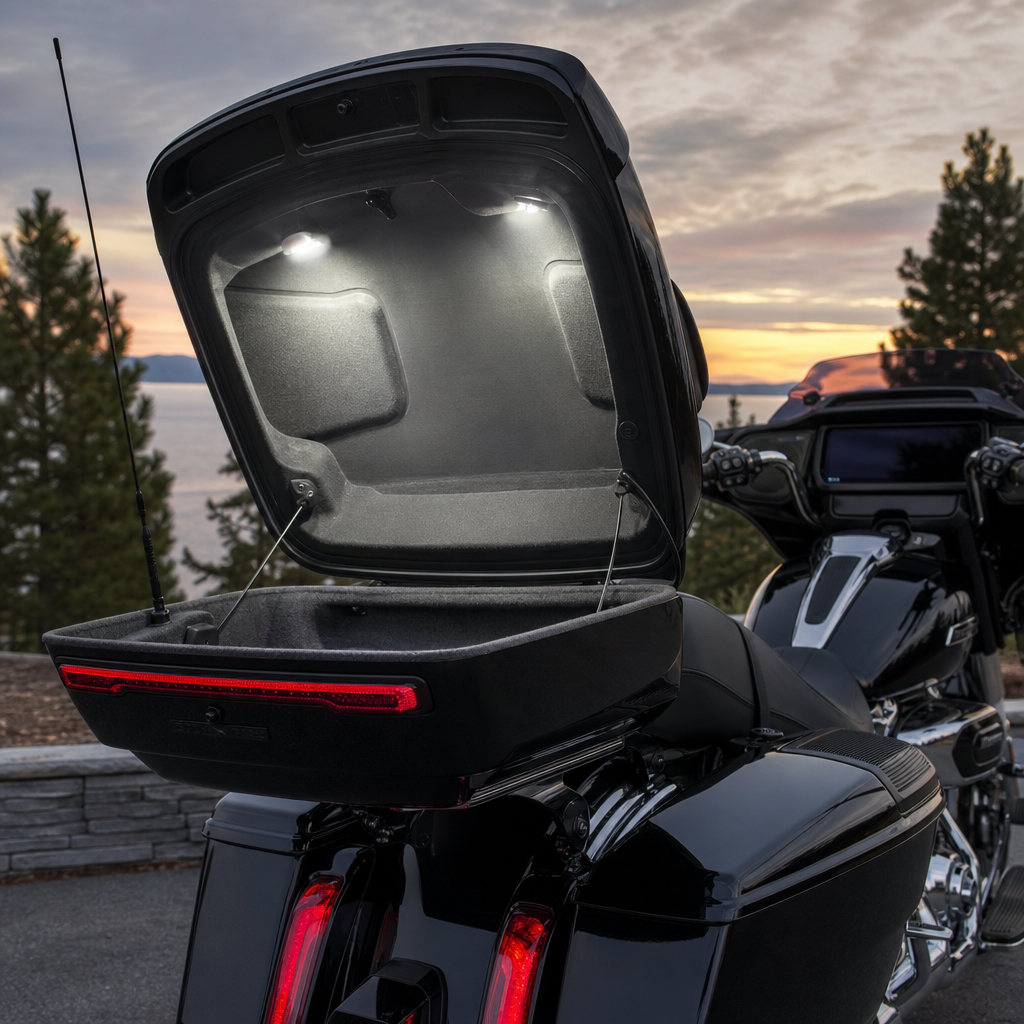
The 2026 Street Glide Limited Grand Tour-Pak Internal LED Lighting Recipe starts with a simple truth: touring upgrades work best when they solve a daily-use problem without creating new ones. In this case, the problem is familiar to any Harley-Davidson rider who packs for weekend trips, rally runs, or multi-state tours. The Tour-Pak is deep, useful, and secure, but in low light it becomes a black box. Internal LED lighting fixes that pain point, yet the right recipe for a Street Glide Limited is not just about adding brightness. It must respect model-specific ergonomics, preserve electrical reliability, avoid rattles and water intrusion, and support the broader goal of making the motorcycle easier to live with on the road.
In Harley-Davidson touring language, a recipe is a repeatable upgrade pattern: parts, placement, wiring method, mounting strategy, and use-case logic bundled into one practical plan. Model-specific ergonomics refers to how a component interacts with the rider and passenger on a particular platform, including reach, loading angle, latch access, seat back clearance, and the way luggage is actually handled in real touring conditions. Performance, in this context, is not limited to horsepower. It includes electrical efficiency, durability, visibility, serviceability, and the speed with which a rider can load or retrieve gear at a fuel stop, hotel, or roadside pull-off.
I have installed cargo-area lighting on multiple Harley-Davidson touring bikes, and the difference between a generic accessory job and a model-specific solution is immediate. A poorly placed strip creates glare, snags soft luggage, and peels off after summer heat. A well-planned setup illuminates the entire cavity, switches on when the lid opens, stays invisible when closed, and draws so little current that it is effectively a non-event for the bike’s charging system. For riders building out a 2026 Street Glide Limited, this article serves as the hub for that broader family of ergonomics and performance recipes, showing how one small upgrade reflects the principles behind smarter, more useful touring modifications.
Why internal Tour-Pak lighting matters on the 2026 Street Glide Limited
The Street Glide Limited sits in a category where comfort and convenience directly affect trip quality. Riders use the Grand Tour-Pak for rain gear, heated layers, gloves, chargers, tools, medication, and passenger items that need frequent access. In practical terms, internal lighting reduces search time, prevents forgotten items, and lowers the chance of dropping keys, cards, or small hardware in dim parking lots. On a heavy touring motorcycle, minimizing fumble time matters. Fast, confident access keeps stops shorter and reduces the distractions that accumulate over a long day in the saddle.
This model also deserves a tailored approach because its premium touring mission means the Tour-Pak often carries more than casual cargo. Many owners pack with organizers, liner bags, camera cubes, and small electronics. A broad, diffused light source makes these systems usable after sunset. Bright point sources are less effective because they create shadows behind bags and can shine directly into the rider’s eyes when standing at the rear of the motorcycle. The best recipe favors side or upper-perimeter placement with diffusion, producing even illumination across the full storage volume instead of a harsh hotspot in one corner.
There is also a safety and reliability angle. Internal LEDs can be tied to a mercury-free tilt switch, plunger switch, or low-current lid-activated sensor so the lights are only active when needed. That matters because a manually switched light is easy to forget, especially on a travel day. Modern LED strips draw modest current, often under 5 watts for an entire enclosure, but parasitic drain over many hours still matters if the bike is parked. Touring riders who use battery tenders, added GPS units, heated gear harnesses, and phone chargers already understand the value of disciplined electrical load management.
The core recipe: parts, placement, and wiring logic
A dependable Street Glide Limited Grand Tour-Pak internal LED lighting recipe uses five elements: a sealed 12-volt LED strip or low-profile LED modules, a diffused lens or factory-style encapsulation, an automatic switching method, adhesive plus mechanical strain relief, and protected wiring routed through an existing hinge or grommet path. Color temperature between 4000K and 5000K works best for cargo visibility because it renders black fabric, wiring, and small labels more clearly than warm amber light while avoiding the icy glare of many 6500K strips. For output, around 150 to 300 lumens is usually sufficient inside a Tour-Pak if the light is evenly distributed.
Placement should follow the shape of the Tour-Pak lid and side walls, not the instinct to mount one bright strip on the floor. Floor lighting gets blocked by luggage immediately. The strongest layouts place LEDs high on the inner lid perimeter or along the upper side edges, aimed downward and inward. That geometry reduces shadowing and keeps the strip away from abrasion from helmets, boots, and duffel bags. On bikes used two-up, this also protects the lighting from contact with passenger backrest hardware and the loading patterns common when one rider opens the Tour-Pak while the passenger remains seated.
Wiring logic is simple but important. Pull power from an accessory circuit with appropriate fuse protection, not from an overloaded random feed. Use a dedicated inline fuse sized close to the actual draw, commonly 1 to 3 amps for this application. If the motorcycle has a recognized accessory distribution block, use it. If not, a relay-triggered accessory feed can isolate the lighting from sensitive circuits. Harley-Davidson touring bikes increasingly integrate electronics that owners should not probe casually. A clean install avoids CAN-related issues, protects warranty discussions, and makes later troubleshooting straightforward.
| Component | Best practice for this bike | Why it works |
|---|---|---|
| LED type | Sealed diffused strip or low-profile modules | Handles vibration, humidity, and cargo contact better than exposed chips |
| Color temperature | 4000K to 5000K | Improves visibility of dark gear without harsh blue glare |
| Switching | Lid-activated plunger or tilt sensor | Prevents accidental battery drain and adds convenience |
| Mounting | 3M VHB plus clips or anchors | Survives heat cycles and vibration better than adhesive alone |
| Power source | Fused accessory circuit | Protects the bike and keeps troubleshooting simple |
| Wire protection | Split loom, grommets, heat-shrink | Prevents chafing at hinge and pass-through points |
Ergonomics: how lighting supports loading, access, and passenger use
Good ergonomics on a touring Harley means reducing awkward movements around a loaded motorcycle. Internal Tour-Pak lighting helps because riders no longer need to hold a phone flashlight in one hand while searching with the other. That sounds minor until you do it repeatedly in gloves, rain, or roadside wind. On the Street Glide Limited, where the rear trunk area is central to travel convenience, a lit cargo space reduces torso twist, cuts search time, and makes it easier to separate rider essentials from passenger items. The payoff is less frustration at every stop.
The passenger experience matters too. On many long trips, the passenger accesses the Tour-Pak more often than the rider. A properly lit interior supports quick retrieval of glasses, water, snacks, and extra layers without unloading half the trunk. In real-world use, that convenience changes packing behavior. Riders can use pouches and vertical organizers because the light reveals what is stored in each zone. Without lighting, owners often overpack in clear bags or leave critical items near the top only, wasting the available volume. Better visibility effectively improves usable storage capacity.
Another overlooked ergonomic factor is latch and hinge clearance. Strips that are too thick, mounted too close to the seal, or routed with exposed wire loops can interfere with closure or abrade over time. The right recipe accounts for opening angle, seal compression, and the way liner bags brush the inside walls. I treat the lighting as part of the storage system, not a decoration. If the rider notices it only when the lid opens and never when loading gear, the design is doing its job.
Performance considerations: electrical load, durability, and weather resistance
Internal LED lighting is a low-draw upgrade, but low draw does not excuse poor electrical practice. A typical high-quality strip for a Tour-Pak may consume 2 to 4 watts. On a healthy touring charging system, that is trivial when the engine is running, yet the installation still needs proper fuse protection, secure ground integrity, and vibration-resistant connections. Crimp connectors without adhesive lining often fail in motorcycle service. I prefer marine-grade heat-shrink terminals or soldered joints with adhesive-lined heat-shrink where serviceability and strain relief are planned correctly.
Durability starts with materials. The inside of a Tour-Pak experiences vibration, temperature swings, humidity, occasional condensation, and impact from shifting cargo. IP-rated lighting, 3M VHB tape, alcohol-prepped surfaces, and mechanical anchors at wire transitions prevent the common failures seen in bargain kits. Wire routing must avoid pinch points at hinges and lid supports. Where the wire passes through a drilled opening, a rubber grommet is mandatory. Silicone can help seal an opening, but it should not be the primary abrasion barrier. The grommet does that job.
Weather resistance is often misunderstood because the light sits inside a trunk. The inside is still a harsh environment. Wet gloves, rain suits, and temperature changes bring moisture into the enclosure. That is why exposed copper pads and unsealed cut ends on LED tape frequently corrode. Quality kits seal end caps and maintain polarity markings clearly enough for future service. When riders ask why some installations look fine for three months and fail by winter, the answer is usually not the LED chips. It is poor sealing, poor adhesion, or unsupported wiring.
How this article fits the larger hub of Harley-Davidson ergonomics and performance recipes
This page is the hub because the Tour-Pak lighting recipe illustrates the larger logic behind model-specific Harley-Davidson upgrades. The same method applies across related articles covering handlebar reach optimization, seat and backrest fit, floorboard positioning, windshield tuning, suspension setup for combined rider-passenger load, and luggage organization. Each recipe begins with the actual use case, identifies the model’s physical constraints, then selects parts and installation methods that improve the motorcycle without compromising reliability or comfort. That is the difference between random accessorizing and coherent touring setup.
For example, handlebar changes on a Street Glide Limited should be evaluated with the same discipline used here: wrist angle, steering clearance, brake hose routing, switch housing compatibility, and long-distance fatigue reduction. Windshield swaps should be judged by rider height, helmet turbulence, passenger buffeting, and wet-weather visibility, not by appearance alone. Suspension preload choices should reflect payload, road quality, and cornering goals. Internal Tour-Pak lighting belongs in that ecosystem because it improves daily interaction with the motorcycle while reinforcing a standard for smart, durable modification decisions.
As you build out this subtopic, connect this page conceptually with future model-specific guides on rider triangle tuning, luggage access strategies, heated gear power planning, and two-up touring setup. Readers shopping within the Harley-Davidson category often begin with a single accessory problem, then realize the bigger issue is system design. A hub page should help them move from one-off fixes to an integrated setup where ergonomics and performance support each other. Better cargo lighting is a small win, but it teaches the right upgrade mindset for the entire motorcycle.
Common mistakes and the best upgrade path
The most common mistake is buying the brightest universal kit available and sticking it anywhere it fits. Excess brightness inside a small enclosure creates glare and hard shadows rather than useful visibility. The second mistake is relying on adhesive alone. Touring bikes vibrate, and trunk interiors heat-soak in summer. The third mistake is tapping an unknown wire because it is nearby. That shortcut can create intermittent faults that are difficult to diagnose later. On modern Harley-Davidson touring models, disciplined wiring is not optional.
The better upgrade path is straightforward. First, map how you actually use the Tour-Pak: helmets only, daily commuter storage, or full-distance touring with layered gear. Second, choose lighting output and color temperature for visibility, not novelty. Third, use an automatic switch. Fourth, route and protect wiring as if the bike will cross states in heat and rain, because it probably will. Fifth, test the installation with the trunk fully loaded, opening and closing it repeatedly to confirm nothing rubs, peels, or interferes with the seal.
If you want the strongest result, treat this recipe as one step in a larger touring optimization plan. Pair it with liner bags, small-item organizers, a battery maintenance routine, and accessory circuit management. On a 2026 Street Glide Limited, those details add up fast. The real benefit is not the light itself. It is the smoother ownership experience: less fumbling, less wear, fewer electrical surprises, and a motorcycle that works with you every mile. Use this hub as your starting point, then build the rest of your Harley-Davidson ergonomics and performance recipes with the same level of precision.
Frequently Asked Questions
Why add internal LED lighting to a 2026 Street Glide Limited Grand Tour-Pak?
Internal LED lighting solves one of the most common touring frustrations: trying to find gear inside a deep Tour-Pak when the light is poor. On a 2026 Street Glide Limited, that storage space is designed for real travel use, which means riders often pack gloves, rain layers, tools, chargers, small electronics, and overnight items all in the same compartment. Without lighting, the inside can quickly become a dark, hard-to-search space, especially at gas stops, hotel arrivals, early-morning departures, and nighttime roadside breaks. A properly planned LED setup turns the Tour-Pak from a dark storage cavity into a practical, visible, easy-to-use touring compartment.
Just as important, internal LED lighting is one of those upgrades that improves convenience without changing the motorcycle’s core character. It does not affect luggage capacity in any meaningful way, it does not interfere with normal packing when installed correctly, and it adds visibility exactly where riders need it. The best recipe is not simply about making the inside brighter. It is about creating useful, even illumination that helps you locate items quickly, reduces fumbling, and makes daily touring routines smoother. For riders who use the Tour-Pak regularly, it is a functional upgrade that pays off every time the lid opens.
What is the best LED lighting recipe for a 2026 Street Glide Limited Tour-Pak?
The best recipe combines clean light output, reliable switching, weather-resistant components, and wiring that does not create future problems. In practical terms, that usually means a low-profile LED strip or compact LED modules mounted around the upper interior edge of the Grand Tour-Pak, positioned to spread light across the full storage area rather than creating a single bright hotspot. A warm-white or neutral-white tone is often preferred because it provides strong visibility without looking harsh or overly blue. Riders who want a factory-clean result should focus on components designed specifically for motorcycle luggage or touring applications, not generic automotive strips with questionable adhesive and poor long-term durability.
A strong setup also includes an intelligent activation method. Many riders prefer a lid-activated switch so the lights turn on automatically when the Tour-Pak opens and turn off when it closes. Others use a manual switch for more control, especially if they want the option to keep the lights off during daylight loading. The ideal recipe also includes fused power, carefully routed wiring, secure mounting, and enough slack at hinge points to prevent pinching or fatigue over time. In short, the right approach is not just about brightness. It is about building a dependable system that looks neat, operates predictably, and stands up to real-world touring use.
Will installing internal LED lights drain the battery or create electrical issues?
When designed properly, internal Tour-Pak LED lighting uses very little power and should not place a meaningful strain on the electrical system of a 2026 Street Glide Limited. LED technology is inherently efficient, which is one reason it is so well suited for luggage lighting. The real concern is not the lights themselves, but how they are wired. A poor installation can create parasitic draw, intermittent connections, blown fuses, pinched wires, or switch failures. That is why the lighting recipe matters more than the idea alone. Good electrical planning is what keeps a simple convenience upgrade from becoming a maintenance headache.
To avoid problems, the system should be tied into an appropriate power source, protected with proper fusing, and installed with secure connections rather than temporary shortcuts. If the lights are set up to switch off automatically when the Tour-Pak closes, battery drain becomes even less of a concern. Riders who leave the bike parked for extended periods should still make sure the system truly powers down when not in use. In general, if quality components are used and the install is done cleanly, internal LED lighting is a low-risk, low-draw accessory that fits well within the practical needs of a touring Harley-Davidson.
Can the lighting be installed without damaging the Tour-Pak or making it look cluttered?
Yes, and that should be a priority. The best internal LED lighting setups are the ones you barely notice until the lid opens and the space lights up. On a 2026 Street Glide Limited Grand Tour-Pak, this means using low-profile lighting, careful wire routing, and mounting locations that stay out of the way of luggage, liners, and day-to-day loading. Lighting should complement the interior, not intrude into it. Components that are too bulky, poorly placed, or attached without a layout plan can make the compartment feel smaller and less refined. A clean install preserves the premium touring feel of the bike.
To avoid damage, installers typically choose mounting points that do not compromise structural integrity and use methods appropriate for the interior material and surface shape. Wires should be tucked along seams, edges, or hidden paths wherever possible, especially near the hinge area where movement occurs. Adhesive-backed LED strips can work well if the surface is properly cleaned and the strip is designed for vibration-prone environments, but some riders prefer more secure purpose-built kits that include brackets, channels, or integrated wiring solutions. The key is restraint and planning. A neat, OEM-style result comes from choosing the right hardware and placing it with long-term use in mind.
Should riders choose a universal LED kit or a setup made specifically for Harley-Davidson touring models?
For most riders, a setup designed specifically for Harley-Davidson touring models is the better choice, especially when the goal is a dependable, clean-looking internal Tour-Pak lighting recipe. Model-aware kits are usually engineered around the size, shape, wiring realities, and vibration environment of touring bikes. That often means easier fitment, cleaner routing, more appropriate wire lengths, and hardware that makes sense for the application. On a 2026 Street Glide Limited, that can save time during installation and reduce the likelihood of frustrating trial-and-error adjustments.
Universal kits can still work, but they require more planning and more attention to detail. The buyer must evaluate brightness, color temperature, adhesive quality, moisture resistance, wire flexibility, switch compatibility, and mounting options independently. That is fine for experienced DIY riders who want a custom layout, but it increases the odds of an uneven result if the components are not well matched. For a touring motorcycle where convenience and reliability matter, purpose-built solutions usually offer the best balance of fit, finish, and durability. If a rider does go universal, the smartest approach is to choose premium components and treat the install like a long-term electrical project rather than a quick add-on.





