
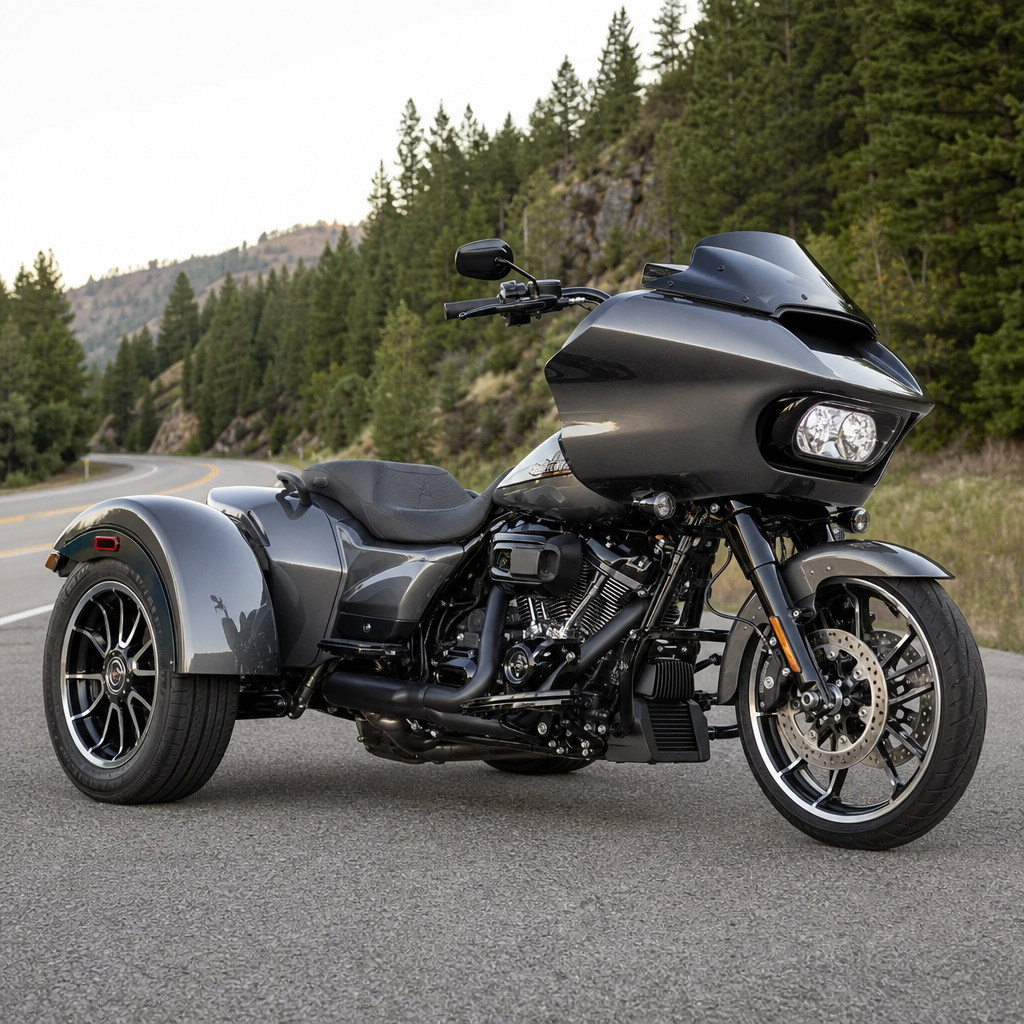
The 2026 Road Glide 3 preload adjuster recipe starts with a simple truth: the de Dion rear suspension only works as well as its spring preload setting. Preload is the amount of initial spring compression applied before the suspension carries rider, passenger, luggage, and trailer tongue weight. On the Road Glide 3, getting that baseline right affects ride height, steering feel, comfort, braking stability, and how confidently the trike tracks through sweepers, broken pavement, and crowned roads. I have set up dozens of Harley touring suspensions, and preload is the single adjustment riders most often ignore, then blame the chassis for problems the spring setting created.
This article is the hub for model-specific ergonomics and performance recipes within the Harley-Davidson lineup, using the 2026 Road Glide 3 as the anchor example. A recipe is a repeatable setup process: identify total load, measure static change, choose a preload direction, test on familiar roads, and document the result. That matters because trikes magnify setup errors. Unlike a two-wheeled touring bike that can lean to absorb mid-corner forces, the Road Glide 3 relies on rear axle geometry, tire contact patch consistency, and rider position to remain composed. An under-preloaded rear end can wallow and push wide; an over-preloaded one can skip across sharp edges and reduce traction over patchy asphalt.
The Road Glide 3 uses Harley-Davidson’s trike chassis architecture with a frame-mounted fairing and a de Dion-style rear arrangement. In plain terms, the rear wheels are linked by a beam that helps keep track width stable while allowing controlled suspension movement. That design brings predictable handling and cargo capacity, but it also makes spring setup more load sensitive than many riders expect. Add a passenger, fill the Tour-Pak and saddlebags, or mount a hitch rack, and the rear suspension starts in a very different part of its travel. The preload adjuster exists to put the shocks back into their intended operating window.
Because this page is a hub, it also sets the method for every related Harley-Davidson ergonomics and performance recipe: seat-to-peg fit, bar reach, wind protection, brake lever positioning, trunk loading, tire pressure strategy, and shock tuning all follow the same principle. You begin with how the motorcycle or trike is actually used, not how the brochure imagines it. The best setup is rarely “full soft” or “factory stock.” It is balanced for your weight, your roads, your speed range, and your tolerance for firmness. When preload is correct, every later adjustment becomes easier to judge because the chassis is no longer compensating for a basic ride-height error.
What the preload adjuster changes on the 2026 Road Glide 3
Preload does not make the spring stiffer in rate; it changes how much force is required before the suspension settles into sag. That distinction matters. Riders often say, “I cranked in preload and made the shocks harder.” What they actually did was raise the operating point in the travel, which can feel firmer because the suspension now has more room to absorb compression before approaching the bump zone. On the Road Glide 3, that affects rear ride height, driveshaft and belt relationship, steering response, and the trike’s tendency to feel planted or lazy at turn-in.
A correct preload setting keeps the rear suspension near the center of its useful travel under normal cruising load. In practical terms, that means enough support to resist excessive squat under acceleration and enough extension travel to keep the tires following uneven pavement. If preload is too low, the rear sits down, the front feels lighter, and steering can become vague. If preload is too high, the rear may top out over crests and chatter over expansion joints. Neither condition is ideal for a heavy touring trike that may spend hours on interstate concrete one day and rough county roads the next.
Harley-Davidson equips touring models with owner-focused adjustability because rider load varies dramatically. A solo rider of 160 pounds and half a tank needs a different setting than a 220-pound rider carrying a passenger, camping gear, and a packed trunk. Suspension companies such as Öhlins, Fox, and Progressive Suspension all use the same logic when they publish setup instructions: establish sag, then tune behavior. The Road Glide 3 recipe follows that standard because it is reliable, measurable, and easy to repeat after service, tire replacement, or seasonal travel changes.
The Road Glide 3 recipe: measure load, set baseline, test, repeat
The fastest way to dial in the 2026 Road Glide 3 preload adjuster is to treat it like a service procedure, not a guessing game. Start by defining your most common use case. If 80 percent of your riding is solo with an empty trunk, set the baseline there. If the trike is primarily a two-up touring machine, build the setup around rider, passenger, and normal luggage. Wear full riding gear during setup because boots, jacket, hydration packs, and cold-weather layers change total system weight more than many owners assume.
Next, inspect the basics. Set tire pressures to Harley-Davidson’s specification for your load condition, confirm both rear tires match in brand and wear state, and check that cargo is secured low and centered. A preload adjustment cannot mask a mismatched rear tire pair or a trunk loaded high with dense tools. I have seen riders chase handling complaints for weeks when the real problem was sixty pounds of gear stacked high and aft, effectively acting like a lever on the rear suspension. Establish the simple variables first, then turn the adjuster.
Use a repeatable reference point to evaluate ride height change. One practical method is measuring from a fixed point on the rear bodywork or frame to the ground, then comparing unloaded and fully loaded values on level pavement. Another is observing visible suspension position against a marked reference. The exact number matters less than consistency from one setup session to the next. Your goal is to reduce excessive rear sag without lifting the trike so far that it feels skittish on frost heaves, bridge joints, or sharp pavement steps.
| Use case | Typical load description | Preload direction | Expected result |
|---|---|---|---|
| Solo light | Rider only, mostly empty storage | Lower baseline setting | Better compliance and less harshness |
| Solo touring | Rider plus tools, rain gear, weekend luggage | Moderate increase | Stable ride height with full travel available |
| Two-up day ride | Rider, passenger, partial luggage | Noticeable increase | Less wallow and improved steering precision |
| Two-up loaded travel | Passenger, full trunk, saddlebags, travel gear | High but not max by default | Controlled squat and better bump recovery |
After the baseline is set, ride a test loop that includes the conditions you actually care about: low-speed turns, a rough patch, a 55 to 70 mph sweeper, a braking zone, and one section of patched or rippled pavement. Evaluate four sensations only: steering effort, bump absorption, stability during throttle changes, and lateral movement over uneven surfaces. Make one preload change at a time. Small increments matter. Riders get lost when they change preload, tire pressure, and cargo placement all at once, then cannot identify which move improved or worsened the chassis.
Symptoms of too little or too much preload
Too little preload on a Road Glide 3 usually announces itself in familiar ways. The rear feels settled deep in the travel, the front seems reluctant to take a precise line, and the trike may require more steering input to hold a clean arc through a medium-speed corner. Over big pavement seams or undulating road surfaces, the rear can oscillate instead of taking one motion and recovering. Under acceleration from a stop, especially with passenger and luggage, the chassis may squat enough to make the front end feel light and delayed in response.
Braking can also expose low preload. When the rear is already riding low, weight transfer during deceleration changes the chassis attitude more dramatically, and the machine may feel less level than it should. That does not mean the trike is unsafe; it means the suspension is using too much travel just to carry the load. The result is less reserve travel for road inputs. Riders often describe this as “floating,” “boaty,” or “busy” without realizing those words point directly to insufficient support at the rear.
Too much preload produces a different set of clues. The trike may feel tall at the rear, quick to react, and less willing to absorb sharp-edged bumps. Instead of one controlled compression and recovery, the rear can hop or skate briefly across broken pavement. On a de Dion trike, that sensation is especially noticeable when both rear tires cross offset joints or patched sections because the suspension has less droop available to keep the assembly settled. Excess preload can also increase rider fatigue because impacts transmit more directly through the seat.
The trick is not chasing an abstract “sporty” feel. A touring trike should be composed, not brittle. If the Road Glide 3 tracks cleanly, absorbs mid-corner imperfections without a second bounce, and remains calm under throttle and brake transitions, preload is close. When riders tell me the trike feels boring in the best possible way, that is usually the sign we landed in the right window.
Ergonomics and performance recipes beyond preload
As the hub for Harley-Davidson model-specific ergonomics and performance recipes, this page needs to connect preload to the broader fit-and-function picture. Suspension does not operate in isolation. Seat height relative to floorboards influences hip angle and how forcefully a rider braces through bumps. Handlebar reach affects shoulder tension, which changes steering smoothness. Windshield height alters buffeting, and buffeting often gets mistaken for instability. Even passenger backrest position changes how weight is distributed over the rear axle and therefore how much preload the trike needs to maintain the same ride attitude.
For Road Glide 3 owners, the most important linked recipes are rider triangle setup, load management, and tire strategy. A rider who sits too far back and locks elbows tends to make any chassis feel harsher and less precise. A trunk packed with heavy items high and behind the axle amplifies pitch and roll reactions. Rear tire pressure that is too high can mimic over-preload by making the trike skip over small sharp impacts; too low can mimic under-preload through sluggishness and excess carcass movement. That is why every good setup article in this subtopic starts with the same chain: fit, load, tires, then suspension.
This hub also frames how owners should think about upgrades. Aftermarket shocks can improve damping control, thermal consistency, and adjustability, but they are not a substitute for correct spring preload. I have installed premium units that felt mediocre until the owner’s luggage pattern and baseline setting were sorted out. Conversely, a properly adjusted stock system can outperform a poorly tuned aftermarket one on real roads. Spend money only after you have data from your current configuration: load state, tire settings, common routes, and the exact symptoms you want to cure.
Real-world tuning scenarios for solo and two-up riding
Consider a solo rider weighing about 175 pounds who uses the Road Glide 3 for commuting and weekend breakfast rides. Storage usually holds rain gear, a tool roll, and a small camera bag. In that case, a lighter preload baseline often delivers the best comfort and tire contact on rough suburban pavement. The rider should still test at highway speed because a setting that feels plush in town can become vague in faster sweepers. If the trike needs frequent steering corrections in crosswind-exposed areas, add a small amount of preload and retest the same route.
Now take a two-up touring pair with a combined rider and passenger weight around 360 pounds, plus thirty to forty pounds of travel gear. This is where many Road Glide 3 setups fall apart because owners forget how rapidly total rear load increases. The correct response is not automatically maximum preload, but it is usually a substantial increase from the solo setting. The target behavior is simple: the trike should launch from stops without excessive rear squat, track through long curves without feeling like it is rolling onto the outside rear tire, and recover from bridge joints in one motion.
A third scenario involves seasonal variation. Winter layers, heated gear, extra tools, and denser luggage for longer trips can add enough weight to justify a documented “cold season” preload position. I recommend owners keep a small setup log in the trunk or phone notes: date, rider load, passenger status, tire pressures, preload position, and ride impression. That habit turns subjective tuning into repeatable maintenance. Over time, the Road Glide 3 stops being mysterious. It becomes a machine with known settings for known jobs, which is exactly how a touring platform should be managed.
The best 2026 Road Glide 3 preload adjuster recipe is not complicated: define the real load, set tire pressures first, increase or decrease preload to restore proper ride height, then verify the result on the roads you actually ride. On a de Dion trike, that one adjustment shapes comfort, steering confidence, and stability more than most owners realize. It is the foundation for every other ergonomics and performance recipe in the Harley-Davidson touring universe because a chassis that starts in the wrong part of its travel forces every other system to compensate.
For this Harley-Davidson sub-pillar hub, the larger lesson is consistency. Model-specific setup works when you follow a process and document what changes. Rider triangle, cargo placement, wind management, tire pressure, and shock preload are connected. Adjust them in the right order and the Road Glide 3 becomes easier to steer, calmer over rough pavement, and less tiring on long days. Skip the process and even expensive parts may disappoint because the machine was never balanced around its actual operating load.
If you own a 2026 Road Glide 3, start with one measured baseline this week. Load the trike as you normally use it, set pressures correctly, adjust preload deliberately, and ride the same test loop twice. Then save the setting. That single habit will improve comfort and control today, and it will make every future Harley-Davidson ergonomics or performance recipe on your list more accurate, faster, and more worthwhile.
Frequently Asked Questions
What does the preload adjuster actually do on a 2026 Road Glide 3 with de Dion shocks?
The preload adjuster changes the amount of initial compression in the rear spring before the suspension takes on the real-world load of the rider, passenger, luggage, and any trailer tongue weight. On the 2026 Road Glide 3, that matters because the de Dion rear suspension is highly sensitive to starting ride height. Preload does not make the spring “stiffer” in the same way a spring-rate change would, but it does determine where in the suspension travel the trike sits at rest and how much travel remains available for bumps, dips, braking transitions, and cornering loads. If preload is too low, the rear can sit down in the stroke, feel soft and wallowy, use up travel too quickly, and make the front end feel light or vague. If preload is too high, the rear can ride too tall, feel choppy over broken pavement, skip across uneven surfaces, and reduce comfort and traction.
Because the Road Glide 3 uses a de Dion layout, preload has a major influence on overall composure. A correct baseline helps the trike stay flatter, steer more predictably, and maintain a more planted feel through sweepers and crowned roads. It also improves braking stability by keeping chassis attitude more controlled when weight transfers forward. In practical terms, the preload adjuster is your main tool for matching the rear suspension to how the trike is actually being used on a given ride day. Solo cruising, two-up touring, heavy cargo, and towing all place different demands on the rear suspension, and preload is what allows you to restore the intended balance each time the load changes.
Why is correct preload so important for ride quality, handling, and stability on the Road Glide 3?
Correct preload is important because it sets the foundation for every other aspect of suspension behavior. The Road Glide 3 can only steer, brake, and track well if the rear suspension is operating in the proper part of its travel. When preload is set appropriately, the trike maintains a healthy ride height that supports the chassis without topping out or riding too deep into the suspension. That translates into better comfort over expansion joints and broken pavement, more consistent steering effort, and less tendency for the rear to feel unsettled when the road surface changes mid-corner.
On a touring trike, that baseline has especially big consequences. Too little preload often shows up as excess rear squat, a sluggish or heavy steering sensation, and a tendency to bottom or crash into the bump zone over large hits. It can also make the trike feel less confident in long sweepers because the suspension is already compressed before cornering forces even build. Too much preload creates the opposite set of problems: a harsh ride, reduced compliance on rough pavement, and a “busy” rear end that transmits more road shock into the chassis. That can hurt traction and make the trike feel nervous over seams, ripples, or off-camber surfaces.
The de Dion arrangement rewards a careful preload setting because it directly affects how the rear assembly supports the machine under load. The result is not just about comfort. It is about preserving enough suspension travel in both directions so the shocks can absorb irregularities instead of merely reacting to them. A well-set preload adjuster helps the Road Glide 3 feel settled under braking, less sensitive to cross-slope pavement, and more trustworthy when carrying touring gear or a passenger. In short, preload is the recipe step that makes the entire chassis work as intended.
How do I know if the preload is set too low or too high on my 2026 Road Glide 3?
The signs are usually clear once you know what to look for. If preload is too low, the rear suspension tends to sag excessively under the trike’s actual load. You may notice that the back of the machine sits lower than expected, the steering feels slower or less precise, and the rear can feel soft when accelerating, braking, or crossing dips. On rough pavement, the suspension may blow through travel too quickly and hit the bump zone, which feels like a sharp thud or a heavy, overloaded reaction rather than a controlled absorption of the impact. A low-preload setup can also make the Road Glide 3 feel less composed on crowned roads because the chassis is already running deep in the travel and has less room left to manage pavement variation.
If preload is too high, the symptoms usually shift toward harshness and a lack of compliance. The rear may feel overly firm even on relatively small road imperfections, and instead of absorbing bumps cleanly, it can seem to skate or chatter across them. The trike may also feel taller in the rear, which can change steering feel and make the ride less relaxed over long distances. On washboard or broken pavement, excessive preload can reduce the suspension’s ability to settle into the surface, which hurts comfort and may reduce confidence in fast sweepers or uneven transitions.
A practical way to diagnose preload is to evaluate the trike in the exact configuration you ride most often. Pay attention to how it behaves solo versus two-up, with empty storage versus fully loaded luggage, or with and without trailer tongue weight. If a load change causes the rear to squat noticeably and steering or braking stability suffers, preload likely needs to go up. If the trike feels abrupt and unforgiving after increasing preload, you may have gone too far. The goal is a balanced feel where the rear neither wallows nor pounds, and where the Road Glide 3 tracks cleanly with a planted, predictable attitude.
What is the best preload adjuster recipe when switching between solo riding, two-up touring, luggage, and trailer weight?
The best recipe is to treat preload as a repeatable setup step based on actual load, not as a one-time setting you never revisit. Start with your true baseline: the configuration you use most often. For many owners, that may be solo with minimal cargo. Set preload so the trike feels level, compliant, and controlled in that condition. Then build a reference for heavier use by adding preload in measured steps as passenger weight, luggage mass, or trailer tongue weight increases. The key is consistency. Make one change at a time, test it on familiar roads, and note how it affects ride height, comfort, steering response, braking stability, and cornering confidence.
When you move from solo riding to two-up touring, the rear suspension has to support a much larger static and dynamic load. That typically means more preload is required to restore proper ride height and preserve suspension travel. The same applies when the trunk and storage areas are packed for a trip. If you add trailer tongue weight, preload becomes even more important because tongue load can significantly increase rear suspension demand and alter the chassis attitude. In that case, the goal is not just comfort, but keeping the trike composed and stable under acceleration, braking, and long highway sweepers.
The smartest approach is to create your own preload map. For example, note your preferred setting for solo day rides, solo with loaded luggage, two-up light touring, two-up fully packed touring, and towing. That way, you are not guessing each time the load changes. Instead, you are returning to proven settings. The “recipe” is less about chasing a perfect universal number and more about matching preload to the specific mission. On the Road Glide 3, that method delivers a trike that feels predictable and confidence-inspiring whether you are heading out for a short local ride or loading up for a cross-country tour.
Can preload adjustment fix every rear suspension problem on the Road Glide 3?
No. Preload is essential, but it is not a cure-all. It can dramatically improve chassis balance, ride height, comfort, and stability when the issue is simply that the suspension is not matched to the load being carried. However, preload cannot compensate for worn shocks, damaged components, incorrect spring rates for your typical use, tire issues, alignment problems, or loading practices that place too much weight in the wrong location. If the suspension still feels uncontrolled, harsh, unstable, or inconsistent after careful preload adjustment, it is worth looking beyond the adjuster itself.
For example, if the shocks are weak or deteriorated internally, increasing preload may lift the rear but still leave the suspension underdamped and poorly controlled over repetitive bumps. Likewise, if the spring rate is fundamentally wrong for how the trike is used, preload may only partially mask the mismatch. Too-soft springs may require excessive preload just to maintain ride height, which can compromise compliance. On the other hand, a setup carrying extreme weight or frequent towing may expose the limits of the stock arrangement even when preload is set correctly. In those cases, a broader suspension evaluation may be necessary.
It is also important to remember that rear suspension feel is influenced by the whole chassis. Tire pressure, tire condition, road crown sensitivity, load placement, and even how evenly cargo is distributed can affect what the rider perceives. That said, preload remains the first and most important adjustment because it establishes the operating position of the de Dion shocks. Think of it as the foundation rather than the whole house. Get preload right first, then evaluate what remains. On the 2026 Road Glide 3, that sequence gives you the best chance of achieving the comfort, braking stability, steering confidence, and composed tracking the platform is capable of delivering.





