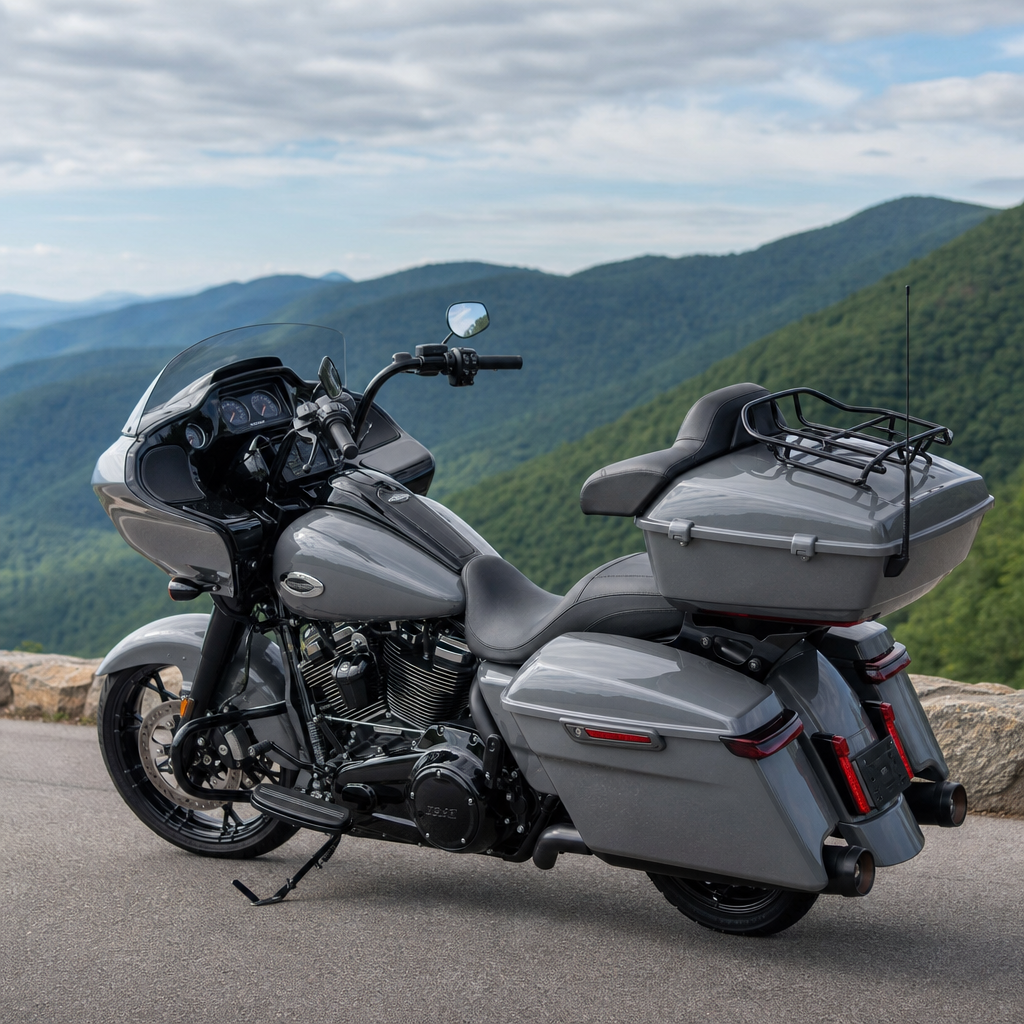
The 2026 Road Glide 3 luggage rack recipe starts with one core goal: integrate the Grand Tour-Pak so the trike gains real carrying capacity without compromising passenger comfort, rear access, or the stable touring character that defines Harley-Davidson’s sharknose three-wheeler. On this platform, a “recipe” is more than a parts list. It is a repeatable fitment plan that combines the right luggage rack, mounting hardware, backrest geometry, load strategy, and handling checks for one exact model. That precision matters because the Road Glide 3 is not a standard touring bike. Its chassis, trunk profile, rear bodywork, seat relationship, and passenger perch create unique packaging constraints that owners ignore at their expense.
I have worked through enough Harley touring fitments to know that luggage systems fail for predictable reasons: racks sit too high and push the passenger forward, hardware loosens because installers reuse incompatible spacers, lids open into poorly placed cargo, or rear weight piles up until low-speed steering effort increases noticeably. The Grand Tour-Pak solves part of the touring problem by adding secure, weather-resistant storage and a passenger backrest position many riders prefer on long days. The luggage rack extends that utility by creating a top platform for soft bags, bedrolls, rain gear, or lightweight camp equipment. When integrated correctly, it turns the 2026 Road Glide 3 into a more effective long-distance machine. When integrated poorly, it creates leverage, rattles, and awkward ergonomics.
This hub article covers the complete decision framework for model-specific ergonomics and performance recipes under the Harley-Davidson umbrella, using the 2026 Road Glide 3 with a Grand Tour-Pak as the anchor example. You will learn what to measure before buying parts, how rack placement changes passenger space, which load types belong on the rack versus inside the Tour-Pak, how weight affects trike dynamics, and what installation standards prevent failures over time. If you are building a luggage setup for distance touring, daily travel, or two-up weekend runs, the right recipe begins with fit, not accessories. Everything else follows from that.
Understand the 2026 Road Glide 3 Packaging Before Choosing a Rack
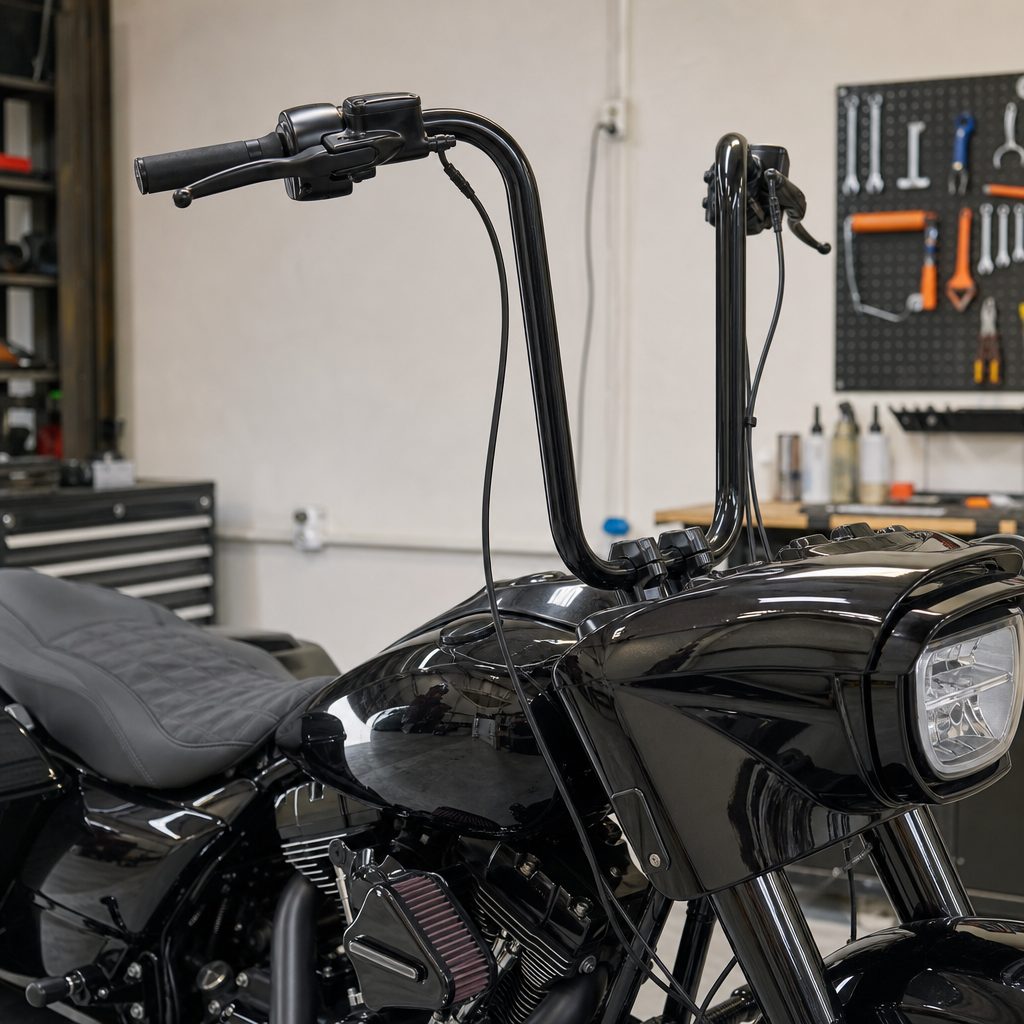
The Road Glide 3 uses Harley-Davidson’s trike architecture paired with the Road Glide fairing and touring cockpit, but the rear bodywork and trunk arrangement make accessory selection more specialized than many owners expect. Unlike a two-wheel Road Glide, the trike’s rear section introduces a wider visual tail, a fixed rear axle assembly, and different luggage access patterns around the trunk and passenger area. Any Grand Tour-Pak integration has to respect four clearances: Tour-Pak lid opening arc, passenger back contact point, rack-to-body visual balance, and the space needed to strap cargo without rubbing painted surfaces.
In practical terms, owners should measure the rear seat-to-backrest distance, the height of the Tour-Pak relative to the passenger pelvis, and the usable width above the Tour-Pak lid. On most Harley touring applications, comfort problems appear when the backrest face moves too far forward or when a top rack encourages oversized loads that extend beyond the passenger’s helmet line. I recommend treating the rack as a lightweight utility platform, not as a second trunk. The Grand Tour-Pak should remain the primary enclosed storage zone for dense items such as tools, chargers, locks, and electronics. The rack is best reserved for compressible, low-mass cargo.
Another overlooked issue is center-of-mass placement. A trike is more tolerant of static cargo than a two-wheeler at parking-lot speeds because it does not need to be balanced at a stop, but that does not make high rear weight harmless. Elevated load placement can still influence steering feel, suspension response, and rider confidence in crosswinds. On a Road Glide 3, that means the packaging decision is both ergonomic and dynamic. Choose a rack that fits the Tour-Pak cleanly and supports disciplined loading, not the biggest platform available.
What the Grand Tour-Pak Adds to the Road Glide 3 Recipe
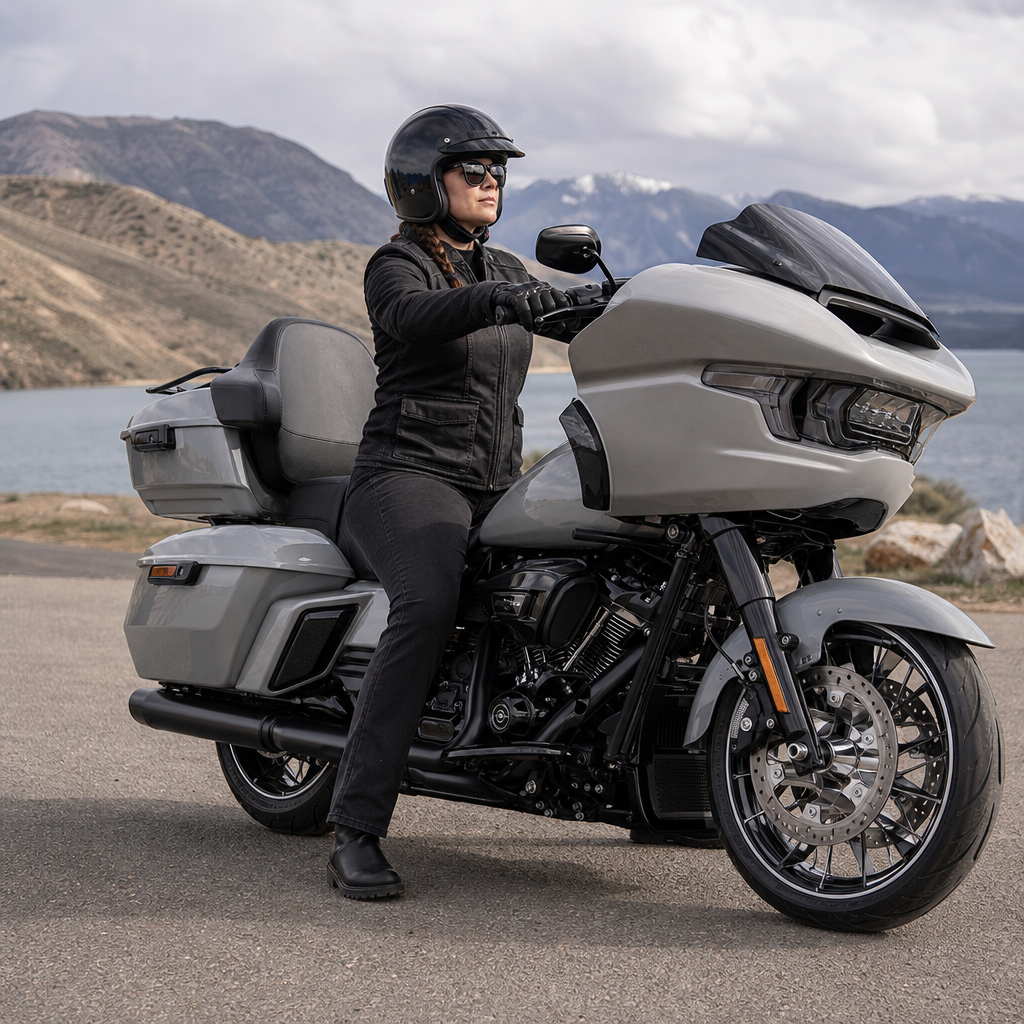
The Grand Tour-Pak is valuable because it expands lockable volume while preserving the touring use case Harley owners actually care about: all-day comfort with quick access to essentials. Its larger dimensions compared with smaller top cases make it especially useful for two-up travel, where helmets, jackets, gloves, and rain layers can consume space quickly. It also changes passenger ergonomics. A well-positioned Tour-Pak gives the passenger a reassuring backrest contact point that reduces fatigue over hundreds of miles, especially on interstates where wind pressure can otherwise force a bracing posture.
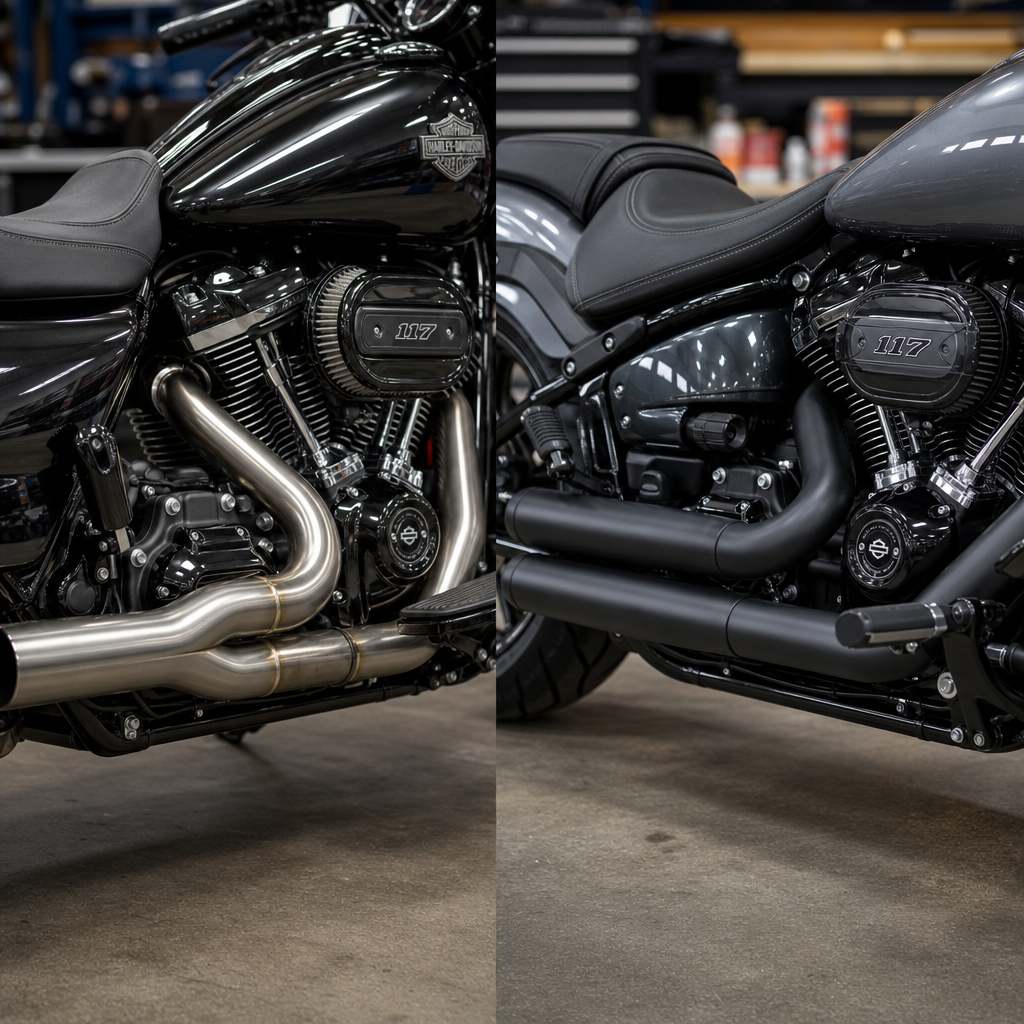
That advantage comes with engineering implications. Once the Grand Tour-Pak is in place, the luggage rack sits at the highest and most rearward point in the cargo stack. Every pound added there creates leverage over the mounting points. That is why quality hardware matters. Harley-Davidson accessory systems and reputable aftermarket kits typically use formed brackets, matched fasteners, and load-distribution plates instead of generic bolts. That hardware does more than hold parts together. It spreads stress across the lid or support structure so vibration cycles do not crack mounting surfaces over time.
There is also a usability benefit that deserves emphasis. A good Grand Tour-Pak rack should not interfere with opening the lid fully, should preserve visibility of lights from the rear, and should allow tie-down paths that do not cross latch lines or backrest seams. In workshops, I have seen otherwise expensive setups become irritating because the rider had to unstrap everything to access a charging cable or rain liner stored inside. Integration means designing for real stops at fuel stations, hotels, and roadside pull-offs, not just for parked-bike appearance.
Model-Specific Ergonomics: Rider Fit, Passenger Space, and Access
Ergonomics in this category are not abstract. On the 2026 Road Glide 3, the luggage rack recipe must protect three touchpoints: rider reach to bars and floorboards, passenger hip-to-backrest relationship, and the ability to mount and dismount cleanly. The Tour-Pak itself can improve passenger support, but a bulky rack load can reverse that benefit if it forces the passenger into a more upright, compressed position. Soft bags stacked high often contact the lower back or interfere with arm movement when the passenger tries to settle naturally into the seat.
The solution is to define a cargo envelope. Keep rack loads lower than the top of the passenger backrest whenever possible, and avoid overhang that extends significantly beyond the Tour-Pak side edges. This is not only about aesthetics. It keeps the load in the slipstream, reduces buffeting, and preserves the passenger’s side-to-side elbow room. For older passengers or anyone with limited mobility, make sure the rack does not create snag points that complicate getting on and off the trike. Compression straps, loose webbing tails, and oversized duffels are common culprits.
Access is equally important. A touring setup that blocks the Tour-Pak lid or trunk access will frustrate you every day. On a sub-pillar hub level, this is the larger lesson for all Harley-Davidson ergonomics recipes: every accessory should be judged by how it changes touch, reach, visibility, and routine use. The best performance upgrade can still be the wrong choice if it makes the motorcycle harder to live with. For the Road Glide 3, passenger comfort and easy access to storage are not side issues. They are central design criteria.
Performance Effects of Rear Cargo on a Harley-Davidson Trike
Rear cargo changes performance in measurable ways. On a Road Glide 3, adding the Grand Tour-Pak and a loaded luggage rack can increase rear mass bias, alter suspension compression, and slightly increase steering effort during slow turns. At highway speed, the bigger concern is aerodynamic drag and side-force sensitivity. A tall, loosely packed bag mounted high on the rack presents more surface area to crosswinds than the same gear packed inside the Tour-Pak. Riders often describe this as a wandering sensation or the need for more constant bar input on gusty days.
Braking behavior also deserves attention. Trikes are stable under braking, but extra cargo lengthens stopping distances simply because there is more mass to decelerate. Tires, brake condition, and suspension preload become more important as load rises. If the rear suspension sits deeper in its travel, bumps can produce sharper impacts and more body motion. That affects comfort and can accelerate wear in mounting hardware if the cargo is bouncing against the rack. For that reason, I advise owners to pack the heaviest items low and inside enclosed compartments, then reserve the rack for sleeping bags, lightweight jackets, or other soft gear under careful compression.
These principles apply across model-specific Harley luggage recipes. Performance is not just horsepower or suspension upgrades. It is the total behavior of the bike with a rider, passenger, accessories, and real cargo aboard. The best setup is the one that preserves predictability. On the Road Glide 3, that means smart weight distribution and conservative rack loading every time.
Choosing the Right Rack and Load Strategy
The correct rack for a Grand Tour-Pak integration should match the Tour-Pak shape, use corrosion-resistant hardware, and publish a clear load expectation. Stainless steel and quality chrome finishes both work if the underlying construction is rigid and the mounting points are engineered for the case. Flat platforms are versatile, but slightly raised perimeter rails often make tie-downs more secure. Avoid ultra-long racks that encourage overpacking; they solve a capacity urge while creating handling and access problems.
| Decision Area | Best Practice for Road Glide 3 | Why It Works |
|---|---|---|
| Rack size | Match Tour-Pak lid footprint closely | Prevents overhang and keeps loads centered |
| Cargo type | Use lightweight, compressible items only | Reduces leverage and wind sensitivity |
| Tie-down method | Two crossed straps plus fore-aft restraint | Stops shifting under braking and crosswinds |
| Heavy item placement | Inside Tour-Pak or lower compartments | Improves stability and lid longevity |
| Passenger clearance | Keep load below backrest top when possible | Preserves comfort and movement |
Real-world example: for a weeklong trip, place tools, battery pack, and rain liners inside the Tour-Pak; put heavier personal items in saddlebags or trunk storage; then secure only a light duffel containing clothing layers on the rack. That arrangement makes the bike easier to manage and still gives quick access to the bag you want at hotel check-in. Another example is daily commuting. A compact rack bag carrying lunch, an extra visor, or a rolled shell layer is ideal. A hard-sided case strapped on top of the Tour-Pak is not.
As a hub principle for Harley-Davidson luggage recipes, choose the smallest system that reliably handles your actual use. Capacity discipline almost always produces a better-riding motorcycle.
Installation Standards, Maintenance Checks, and Long-Term Reliability
Reliable luggage integration depends on installation quality. Use the manufacturer’s instructions, confirm fastener grade and length, and torque hardware to specification with a calibrated torque wrench. If threadlocker is specified, use the correct strength rather than guessing. Check that washers, spacers, and reinforcement plates sit flush and do not preload the lid unevenly. After installation, cycle the Tour-Pak lid repeatedly, inspect latch function, and verify that the rack does not distort the mounting surface under hand pressure.
After the first 100 to 200 miles, retorque the fasteners. Vibration bedding is normal on Harley touring platforms, especially once the rack has seen heat cycles and road shock. Repeat checks before long trips. Look for chrome cracking around welds, powder-coat fretting at bolt holes, strap wear marks, and water leaks around newly mounted hardware. If the Tour-Pak lid begins to close differently or the latch alignment changes, stop loading the rack until you inspect the structure. Small fitment shifts are early warnings, not cosmetic trivia.
For long-term reliability, keep total rack loads modest, use quality straps with covered hooks or hookless loops, and replace frayed tie-downs immediately. Clean mounting areas so trapped grit does not abrade painted surfaces. If you ride frequently in rain or near salt, inspect hardware for corrosion and galvanic interaction between dissimilar metals. This practical discipline is what separates a clean touring build from an accessory stack that ages badly.
Building the Hub: How This Recipe Connects to Broader Harley-Davidson Setups
The 2026 Road Glide 3 luggage rack recipe is the hub because it demonstrates the full method behind model-specific ergonomics and performance recipes: identify the exact platform, define the rider and passenger use case, map accessory clearances, control weight placement, install to spec, and validate the result on the road. The same framework supports related Harley-Davidson articles on seat upgrades, handlebar reach changes, suspension tuning for touring loads, Tour-Pak fitment options, and cargo management for two-up travel.
The main takeaway is straightforward. Integrating the Grand Tour-Pak on a 2026 Road Glide 3 works best when you treat the luggage rack as part of a balanced system rather than an isolated add-on. Fit determines comfort. Weight placement determines stability. Installation quality determines durability. If you get those three decisions right, the Road Glide 3 becomes a more capable touring trike without sacrificing the secure, planted feel that makes it appealing in the first place. Use this hub as your starting point, then audit your own bike the same way: measure clearances, load intelligently, and verify every change on a short test ride before the next long trip.
Frequently Asked Questions
What does a proper 2026 Road Glide 3 luggage rack recipe actually include when integrating the Grand Tour-Pak?
A proper 2026 Road Glide 3 luggage rack recipe is a model-specific installation plan, not just a random combination of touring accessories. The goal is to add the Grand Tour-Pak in a way that increases usable storage while preserving what makes the Road Glide 3 work so well as a long-distance trike: predictable handling, solid passenger support, practical rear access, and a clean, secure fit. On this machine, the “recipe” typically includes the correct luggage rack designed to work with the Grand Tour-Pak footprint, the matching mounting hardware, the right support points for the trike’s rear structure, and attention to backrest position so the passenger still has proper comfort and posture.
It also includes decisions about load placement and final setup checks. That means understanding how much weight will go inside the Tour-Pak, what may be strapped to the rack itself, and how that total weight sits relative to the rear axle and passenger seating area. A strong recipe accounts for lid clearance, opening angles, rack-to-pack alignment, and whether the completed setup interferes with lighting, grab points, or service access. In other words, the best recipe is repeatable because it follows a sequence: verify exact model compatibility, select rack and hardware made for the Road Glide 3 platform, install with proper torque and alignment, confirm passenger space, then test the trike under real riding conditions with a realistic touring load.
Why is model-specific fitment so important for the 2026 Road Glide 3 instead of using a generic Tour-Pak rack setup?
Model-specific fitment matters because the 2026 Road Glide 3 is not simply a two-wheel touring bike with an extra trunk area. Its chassis layout, rear bodywork, passenger zone, and weight distribution create different demands than a standard bagger or even another Harley touring platform. A generic Tour-Pak rack setup may appear close in shape or bolt pattern, but “close” is not good enough when the system must support cargo, remain stable over miles of highway riding, and still allow comfortable use by both rider and passenger. Poor fitment can create uneven loading, flex in the mounting points, interference with the seat or backrest, and awkward lid operation.
There is also a handling and durability reason to stay exact. The Road Glide 3 carries its touring identity through stable road manners, and that depends on keeping add-on components properly centered and securely tied into the intended structure. If the rack sits too far rearward, too high, or on mismatched hardware, the extra leverage from the Grand Tour-Pak and luggage load can put unnecessary stress on the mounting area. Over time that can affect hardware security, comfort, and confidence. A model-specific fitment plan ensures the rack geometry, hardware length, spacer arrangement, and support positioning all match the 2026 Road Glide 3 so the finished setup feels integrated rather than improvised.
How do you add the Grand Tour-Pak without sacrificing passenger comfort on a 2026 Road Glide 3?
Passenger comfort comes down to geometry, not just padding. When integrating a Grand Tour-Pak on a 2026 Road Glide 3, the backrest relationship to the seat is just as important as the luggage capacity itself. If the Tour-Pak is positioned too close, the passenger can feel crowded, forced upright, or pushed forward into an unnatural knee bend. If it is placed too far back, the backrest may lose supportive contact and make the passenger feel unsupported during acceleration or long highway stretches. The right luggage rack recipe aims for a balanced position where the passenger has firm lumbar and mid-back support without losing seat room.
That is why rack selection and mounting layout should be evaluated with the actual passenger setup in mind. You want to confirm seat-to-backrest spacing, shoulder comfort, arm position, and whether the passenger can mount and dismount the trike naturally. In many cases, the difference between a good and bad installation is not dramatic at first glance, but it becomes obvious after an hour in the saddle. A well-integrated Grand Tour-Pak should feel like part of the touring design, giving the passenger a secure, relaxed place to lean while preserving enough personal space for long-distance travel. Before finalizing the setup, it is smart to do a seated fit check with both rider and passenger aboard and then recheck after a short road test.
Will adding a Grand Tour-Pak and luggage rack affect the handling or stable touring feel of the 2026 Road Glide 3?
It can, but when the setup is done correctly, the effect should be controlled and predictable rather than disruptive. Any time you add a Grand Tour-Pak, rack, mounting hardware, and travel gear, you are changing the total weight and where that weight sits on the trike. The Road Glide 3 is designed for touring stability, but stability is best preserved when the added load is centered, secure, and kept within the manufacturer’s intended limits. The biggest mistakes usually involve overloading the top area, placing too much weight far rearward, or stacking cargo high above the mounting surface. That can make the trike feel more top-heavy, slower to settle, or less composed over bumps and transitions.
The best approach is to treat the Tour-Pak as part of an organized load strategy. Put denser, heavier items lower and as close to the machine’s center as possible, and reserve the upper rack area for lighter, bulkier gear if the rack is rated for it. After installation, do a real-world handling check: verify that the trike tracks straight, feels planted in turns, and shows no unusual movement, vibration, or hardware shift. Also inspect fasteners again after the first few rides and after the first loaded trip. A properly integrated Grand Tour-Pak should enhance travel practicality without undermining the composed road behavior that riders expect from the Road Glide 3.
What should riders check after installing the Grand Tour-Pak luggage rack system on a 2026 Road Glide 3?
After installation, riders should perform a complete functional and safety review before treating the setup as trip-ready. Start with the basics: confirm all hardware is the correct type, seated properly, and torqued to the appropriate specification for the rack and mounting system being used. Then inspect alignment. The rack and Grand Tour-Pak should sit square to the trike, remain level side to side, and show no obvious preload, twist, or gap that suggests the system is being forced into place. Open and close the Tour-Pak fully to make sure the lid clears surrounding parts and latches positively. Check that nothing interferes with passenger seating, grab access, or normal rear service points.
Next, load the system with a realistic touring weight and repeat the inspection. Watch for suspension attitude changes, rear-end sag appearance, contact issues, or any movement in the rack under gentle hand pressure. Take a short test ride on mixed roads and listen for rattles, shifting cargo, or signs that the installation is flexing. Then recheck the hardware once the trike cools down. It is also wise to review total cargo habits going forward. The most durable and stable setups are the ones that are not only installed correctly, but used intelligently. A successful 2026 Road Glide 3 luggage rack recipe does not end at bolting on the Grand Tour-Pak; it ends when the whole system proves it can carry the load securely, comfortably, and consistently over touring miles.