
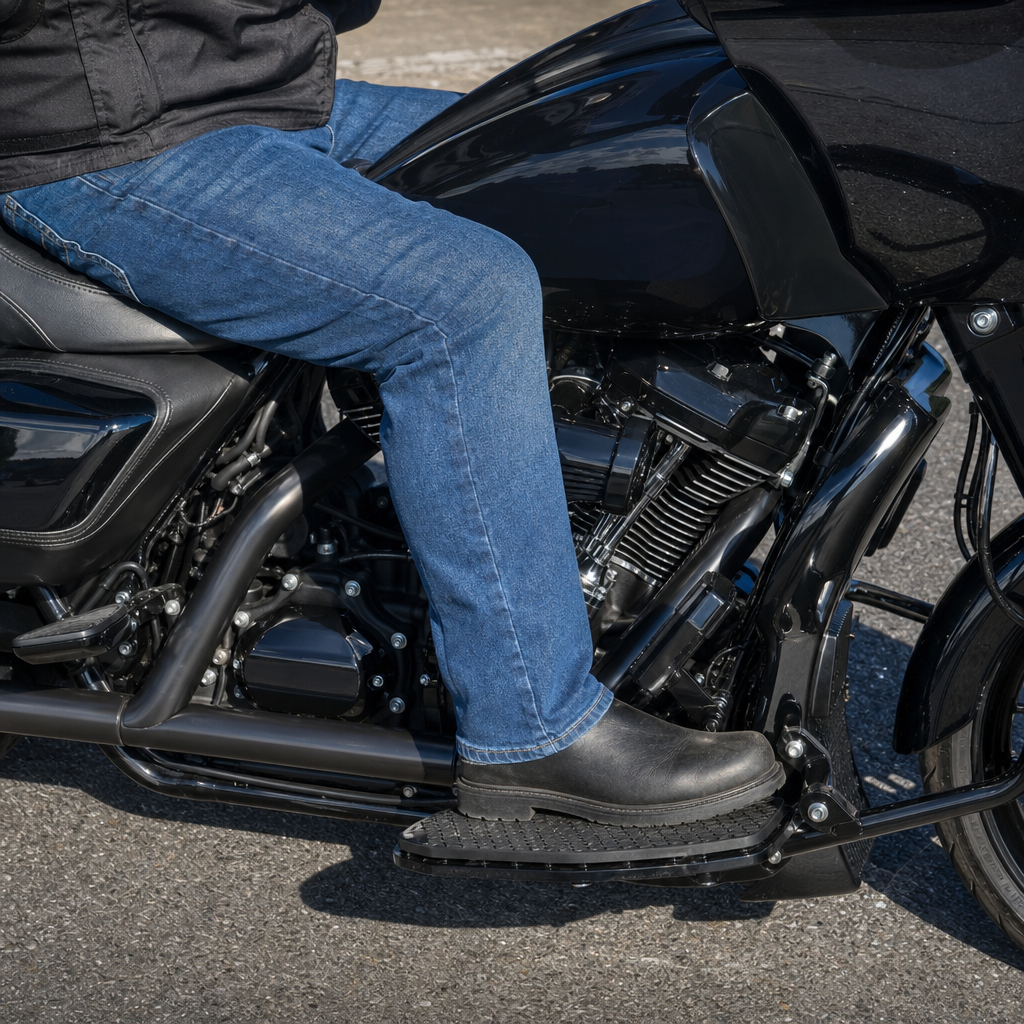
The 2026 Road Glide 3 floorboard extension recipe is the most practical way to improve leg room on Harley-Davidson’s three-wheel bagger without compromising control, braking access, or touring comfort. In this context, a recipe means a repeatable, model-specific setup: the right combination of extension brackets, fasteners, pedal adjustments, fit checks, and test-ride tuning that solves a rider problem in a controlled way. I have set up touring Harleys for taller riders, shorter riders, and owners with knee or hip limitations, and the same lesson keeps proving true: ergonomic changes work best when they are treated as a system rather than a single bolt-on part. On the Road Glide 3, floorboard position affects knee angle, ankle flex, handlebar reach, brake timing, and how securely the rider can brace during slow-speed turns. That is why leg room matters beyond comfort. Better space can reduce hot spots in the hips, lower fatigue over long interstate miles, and make starts, stops, and parking-lot maneuvers more predictable. As a hub article for model-specific ergonomics and performance recipes, this guide explains how to evaluate the stock cockpit, choose an extension range that preserves control, and connect this modification to related upgrades such as seat shape, bar position, suspension preload, and riding-gear choices. If you want more room on a 2026 Road Glide 3, the best result comes from measured changes, not guesswork.
Understanding Road Glide 3 ergonomics before you move anything
The 2026 Road Glide 3 uses Harley-Davidson’s trike chassis with a fixed fairing, large floorboards, and a seating position designed for all-day touring stability. Compared with two-wheel touring models, the rider can be less active with body position in corners, but foot placement remains critical because the machine still demands precise brake control and steady lower-body support. The stock arrangement generally suits average-height riders, yet taller owners often report a tight knee bend, limited ability to vary foot position, and pressure at the hips after an hour or two. Riders with knee replacements or reduced ankle mobility can have the opposite issue: they need the floorboard farther out or differently angled so they can reach the brake pedal naturally without lifting the whole leg.
Before installing extensions, define what problem you are solving. Leg room is not one measurement. It includes knee angle, distance from seat pocket to front edge of board, ankle travel to the brake pedal, and how much boot clearance remains near the fairing lowers and controls. A common mistake is assuming the longest extension available is the best option. In practice, excessive forward movement can force the rider to point the toes down to catch the brake, increasing reaction time and shin fatigue. On a touring trike, small changes matter. A one-inch shift may feel subtle in the garage but significant after 200 miles.
The right baseline starts with simple measurements. Sit on the bike in normal riding boots, back against the seat where you naturally settle, and note three things: where the ball of your foot lands on the board, the bend at the knee when cruising, and whether you can cover the rear brake without lifting your hip. Use a tape measure from the heel contact point to a fixed landmark on the inner fairing or frame guard, then photograph both sides. This gives you a reference when comparing extension kits. It also helps if you later pair the floorboard change with a seat rebuild, taller suspension setting, or different handlebars, because each of those can alter perceived leg room.
The floorboard extension recipe that works on the 2026 Road Glide 3
A reliable floorboard extension recipe for the 2026 Road Glide 3 follows five stages: assess fit, choose extension length, install with correct hardware practice, reset controls, and validate on the road. For most riders seeking more leg room, the sweet spot is an extension in the 1-inch to 2-inch range. That range usually opens the knee angle enough to reduce cramping while preserving quick brake access. Beyond that, the setup becomes more rider-specific and often requires more careful brake-pedal adjustment or a companion change to the seat.
Start with quality components intended for Harley touring models and confirmed by the manufacturer for trike compatibility. Reputable brands typically machine brackets from billet aluminum or steel and supply graded fasteners, spacers, and instructions with torque guidance. Fitment matters because the Road Glide 3 carries its weight and rider inputs differently from a two-wheel Road Glide. The hardware must sit flush, maintain board support under load, and avoid creating interference through the full range of fold or movement designed into the assembly.
During installation, inspect the stock mounting points for wear, damaged threads, or uneven contact surfaces. Clean threads, use the thread treatment specified by the hardware maker, and torque fasteners evenly. This is not a cosmetic accessory. The rider transfers weight into the floorboards during starts, bumps, evasive maneuvers, and long braking events. Uneven torque can allow slight movement, which becomes noise, wear, and eventually loosening. After installation, sit on the bike again before touching the controls. Many riders discover the board now feels correct, but the brake pedal sits too high relative to the new foot position.
Brake-pedal adjustment is the step that separates a comfortable setup from a hazardous one. Your boot should reach the pedal with a deliberate ankle movement, not a full leg lift. At the same time, the pedal must not be so low that you drag the brake or rest on it unintentionally. If your extension kit changes the lateral relationship between your boot and pedal pad, consider a larger or repositioned brake-pedal pad rather than overcompensating with extension length. That preserves natural motion.
| Rider need | Typical extension range | Likely companion adjustment | Main risk if overdone |
|---|---|---|---|
| Mild knee bend relief | 1 inch | Minor brake-pedal reset | Usually low risk |
| Long-distance comfort for taller rider | 1.5 to 2 inches | Brake pad position and seat review | Slower brake pickup if pedal stays high |
| Hip or knee mobility limitation | 2 inches, sometimes more | Seat contour, pedal pad, boot sole check | Reduced control precision if reach is forced |
| Maximum stretch preference | Over 2 inches | Full ergonomic re-evaluation | Compromised access to controls |
Once the hardware and controls are set, perform a static safety check. Turn bars lock to lock, cycle the board if applicable, compress the suspension with rider weight, and verify there is no contact with guards, bodywork, or pedal components. Then do a short neighborhood ride focused on starts, stops, right-foot brake drills, and low-speed turns. Only after that should you judge highway comfort. In my experience, the best setups feel normal within ten minutes and better than stock within an hour. If the change feels awkward immediately, revisit the pedal relationship first, not the extension itself.
How floorboard position affects comfort, control, and long-distance performance
Improving leg room is not just about stretching out. Floorboard position changes the rider triangle, which includes the seat, boards, and handlebars. On the Road Glide 3, that triangle influences fatigue, steering input, and confidence in traffic. When the boards move forward moderately, the knees open, the pelvis can rotate more naturally, and pressure often drops at the tailbone because the rider is not constantly pulling the feet back under the body. That is why many touring riders report less lower-back tension after a correct extension install.
There is also a performance dimension. A comfortable rider reacts faster and rides smoother over distance. If your hips ache or your knees lock up, your attention narrows and your braking becomes less refined. On a heavy touring trike, smooth inputs matter. The machine rewards steady brake application, clean throttle transitions, and relaxed shoulders. Better floorboard placement supports all three because the rider is no longer compensating for a cramped lower body.
However, more leg room is not automatically better performance. If the boards move too far forward, the rider may lose leverage for stabilizing the body over sharp bumps or when climbing on and off the machine. Brake access can degrade, especially with bulky touring boots. A setup that feels luxurious on the interstate may be frustrating in stop-and-go urban traffic. That tradeoff is why I recommend validating the change across several use cases: commuting, back-road cruising, and a two-hour highway run. The Road Glide 3 is a touring platform, but owners use it in varied conditions, and the recipe should match that reality.
This is also where related recipe articles fit into the broader Harley-Davidson ergonomics and performance category. Floorboard extensions often pair well with seat-distance recipes, handlebar-reach recipes, passenger-accommodation recipes, and suspension sag recipes. When riders address only one contact point, they sometimes chase comfort in circles. When they address the whole rider triangle, the bike starts to feel tailored instead of merely modified.
Choosing parts, fitment standards, and installation checks that prevent problems
For the 2026 Road Glide 3, prioritize parts with explicit model-year and platform fitment guidance, clear load-bearing design, and installation support. Look for hardware that uses corrosion-resistant finishes, precision spacers, and mounting geometry that keeps the board level relative to the rider. A bracket that changes angle unexpectedly can create ankle strain even if it adds room. Confirm whether the kit retains factory rubber isolators or replaces them, because vibration feel and underfoot stability can change with different materials.
Use a disciplined installation process. Support the bike securely, compare left and right components before assembly, and dry-fit all parts before final torque. Follow the service manual where it governs removal or reinstallation of factory hardware, and follow the extension manufacturer where it specifies supplied fasteners and threadlocking compound. If torque values conflict or seem incomplete, verify with the manufacturer instead of guessing. That is especially important on rider-contact components.
After installation, mark fastener heads with a paint pen. This simple shop habit makes post-ride inspection faster because any movement is visible. Recheck torque after the first 50 to 100 miles, then again after a longer trip. Aluminum brackets can settle slightly after initial loading, and early inspection prevents nuisance loosening. Also inspect boot scuff patterns on the boards and pedal. They reveal whether your foot is landing where you intended. Uneven scuffing near the board edge often signals that the extension length is right but the pedal pad or seat position still needs attention.
If you ride with a passenger or regularly load the trunk for touring, repeat your fit check with travel weight onboard. Added load can alter seat compression and rider posture enough to change how your legs reach the boards. That is not a flaw in the extension; it is simply part of setting up a touring machine accurately. The best recipes account for real use, not a showroom pose.
When to combine floorboard extensions with seat, bar, and suspension changes
Some Road Glide 3 riders install floorboard extensions and still want more relief. That usually means the leg-room issue is partly a seat or reach issue. A dished seat can lock the rider into a rearward pocket, while a flatter seat can let the body slide slightly forward or back as needed. Even a change in foam density can improve perceived room by reducing how deeply the rider sinks. On several touring setups I have worked on, a modest 1.5-inch floorboard extension plus a seat with a reshaped front bolster felt better than a 3-inch extension alone.
Handlebars matter too. If the boards move forward but the bars remain too far away, the rider may rotate the pelvis forward and lose the benefit of the extra leg room. Conversely, if the bars are pulled too close, the torso can become cramped even when the legs feel open. The fix is to think in terms of balance: feet, seat, hands, then controls. Each touchpoint should support a neutral spine, soft elbows, and easy brake access.
Suspension settings also influence ergonomics more than many riders expect. Excessive rear sag can deepen the seated pocket and increase knee bend; too little sag can perch the rider higher and change pedal reach. While the Road Glide 3’s rear architecture differs from a two-wheel bagger, preload and load distribution still affect rider posture. If you tour with luggage, measure your seated position loaded and unloaded before deciding that another inch of extension is the answer.
The main takeaway for this subtopic hub is simple: model-specific ergonomics and performance recipes work best when they are integrated. A floorboard extension recipe solves a primary issue, but the complete result often depends on seat contour, bar reach, boot design, and suspension setup. Treat the motorcycle like a connected system, and your comfort gains will hold up on real rides, not just in the garage.
The 2026 Road Glide 3 floorboard extension recipe improves leg room when it is approached methodically: measure the stock fit, choose a modest extension first, install quality hardware correctly, reset the brake relationship, and validate the result in real riding conditions. For most owners, the ideal range is enough to open the knee angle and reduce hip strain without delaying brake access. That balance is the core principle behind all model-specific ergonomics and performance recipes. The Road Glide 3 responds especially well to this approach because rider comfort and machine control are tightly linked on a heavyweight touring trike.
As the hub for this Harley-Davidson subtopic, this article should guide every related decision you make. Start with the floorboards if cramped legs are your main complaint, but do not stop there if the bike still feels off. Review the seat pocket, handlebar reach, pedal pad position, suspension load setting, and even your boot shape. Small, well-chosen changes add up faster than one oversized modification. That is how you build a cockpit that supports all-day comfort, confident braking, and smoother touring performance.
If you are planning upgrades for your 2026 Road Glide 3, document your current measurements, target one ergonomic change at a time, and road-test each adjustment before moving to the next. A disciplined recipe will give you more leg room and a better-riding Harley-Davidson.
Frequently Asked Questions
What does a “2026 Road Glide 3 floorboard extension recipe” actually include?
A floorboard extension recipe is not just a single bolt-on part. It is a complete, repeatable setup process designed specifically for the 2026 Road Glide 3 so you can gain useful leg room without creating new comfort or control problems. In practical terms, that recipe includes the extension brackets themselves, the correct mounting hardware, proper torque and alignment during installation, brake pedal position review, clearance checks through the full range of steering and rider movement, and a real-world test ride to fine-tune the final feel. The reason the word “recipe” matters is because leg room changes on a three-wheel touring Harley need to work as a system. If you move the floorboards forward but ignore pedal relationship, foot angle, or stability when braking, the bike may feel worse instead of better.
On a Road Glide 3, the goal is to create more relaxed knee bend and a more natural hip position while preserving fast, confident access to the brake and maintaining comfort over long miles. A good recipe also accounts for rider height, inseam, boot size, and riding style. For example, a taller rider may want the boards farther forward for all-day highway comfort, while a shorter rider may still benefit from a modest extension that changes leg angle without forcing an awkward reach to the controls. The best setups are model-specific, measured, and tested, not guessed at. That is why experienced installers treat floorboard extensions as a fitment solution rather than a cosmetic accessory.
How much leg room improvement can I realistically expect from floorboard extensions on a 2026 Road Glide 3?
Most riders can expect a noticeable improvement in comfort, but the exact gain depends on the extension design, your body dimensions, and how well the full setup is dialed in. In real terms, the improvement usually shows up less as a dramatic visual change and more as reduced knee bend, less hip tightness, and the ability to move your feet into a more natural cruising position. Even a modest forward relocation can make the cockpit feel significantly less cramped, especially on longer rides where small ergonomic changes become very obvious after an hour or two in the saddle.
For taller riders, the biggest benefit is often opening up the knee angle and reducing the feeling that the lower body is folded too tightly behind the fairing and tank area. For average-height riders, the benefit may be more about reducing pressure points and improving posture than simply stretching out. For shorter riders, the right extension can still help, but only if it does not compromise easy brake access. That is why realistic expectations matter. The best result is not “maximum forward position.” The best result is the position that gives you more room while keeping your feet planted securely, your ankles comfortable, and your braking input immediate and predictable. Proper fit always beats the biggest bracket on paper.
Will extending the floorboards affect braking, control, or safety on the Road Glide 3?
It can, if the setup is done incorrectly. That is exactly why a complete floorboard extension recipe matters. On the 2026 Road Glide 3, rider ergonomics and control access need to remain balanced. If the boards are pushed too far forward or installed without checking pedal relationship, some riders may need to lift or slide the foot farther than normal to reach the brake. That delay may feel minor in the garage, but on the road it can affect confidence and reaction time. A properly executed setup avoids that problem by ensuring the brake pedal remains easy to locate and operate from your normal riding position.
Safety also involves more than pedal access. You want to confirm that your boots do not catch on edges, the extension hardware does not reduce usable foot placement, and the final board position supports stable body posture during starts, stops, turns, and low-speed maneuvering. Because the Road Glide 3 is a three-wheel touring platform, low-speed confidence is especially important. You are not balancing the machine at a stop the same way you would on a two-wheeler, but you still need clean, instinctive foot movement and a secure platform for long-distance riding. A well-designed extension setup preserves those qualities. The rule is simple: more leg room is only an upgrade if it does not dilute control.
How do I know which floorboard extension setup is right for my height and riding style?
The correct setup starts with your actual riding posture, not just your listed height. Two riders who are both six feet tall can need completely different solutions if one has a longer inseam, different boot shape, a thicker touring seat, or a more upright versus laid-back riding style. The best way to choose the right extension recipe is to evaluate three things together: knee angle at cruise, ease of brake access, and how naturally your feet return to the same position every time. If one of those is off, the setup probably needs to be adjusted.
Taller riders usually benefit from a more aggressive forward extension, but only up to the point where the brake pedal still feels immediate. Mid-height riders often do best with a moderate extension that reduces bend without creating a “reach” to the controls. Shorter riders may want a smaller movement that improves comfort through foot angle and posture rather than sheer distance. Riding style matters too. If you spend most of your time on long interstate runs, a setup optimized for relaxed cruising may make sense. If you ride in mixed traffic, stop-and-go conditions, or hilly terrain, you may want a slightly more conservative position with quicker brake engagement. In other words, the right extension setup is not just about stretching out; it is about matching the bike to how your body moves on the road.
What should I check after installation to make sure the floorboard extension setup is fully dialed in?
After installation, you should treat the first fit check and test ride as part of the job, not an optional extra. Start with static checks in the garage. Sit on the bike in your normal riding gear and place both feet on the boards naturally, without forcing them into a new position. Check whether your knees feel more open, whether your ankles sit comfortably, and whether your boots can reach the brake pedal smoothly without searching for it. Confirm that all hardware is secure, the boards are aligned evenly, and nothing interferes with your foot movement. If the system includes pedal adjustment, verify that the pedal height and angle support a clean transition from rest to braking.
Then do a short test ride focused on function rather than distance. Pay attention to starts, stops, low-speed turns, parking lot maneuvering, and a few controlled braking events. Notice whether your feet return to the same position automatically or whether you keep repositioning them to feel comfortable. That repeated adjustment is often a sign the board location needs refinement. On a longer ride, watch for hip strain, knee pressure, and any numbness or hot spots that appear over time. The best floorboard extension recipe should make the bike feel more natural mile after mile, not just more spacious for the first ten minutes. Final tuning is where a decent setup becomes a truly effective one, and that is usually what separates a simple parts install from a real ergonomic improvement.





