
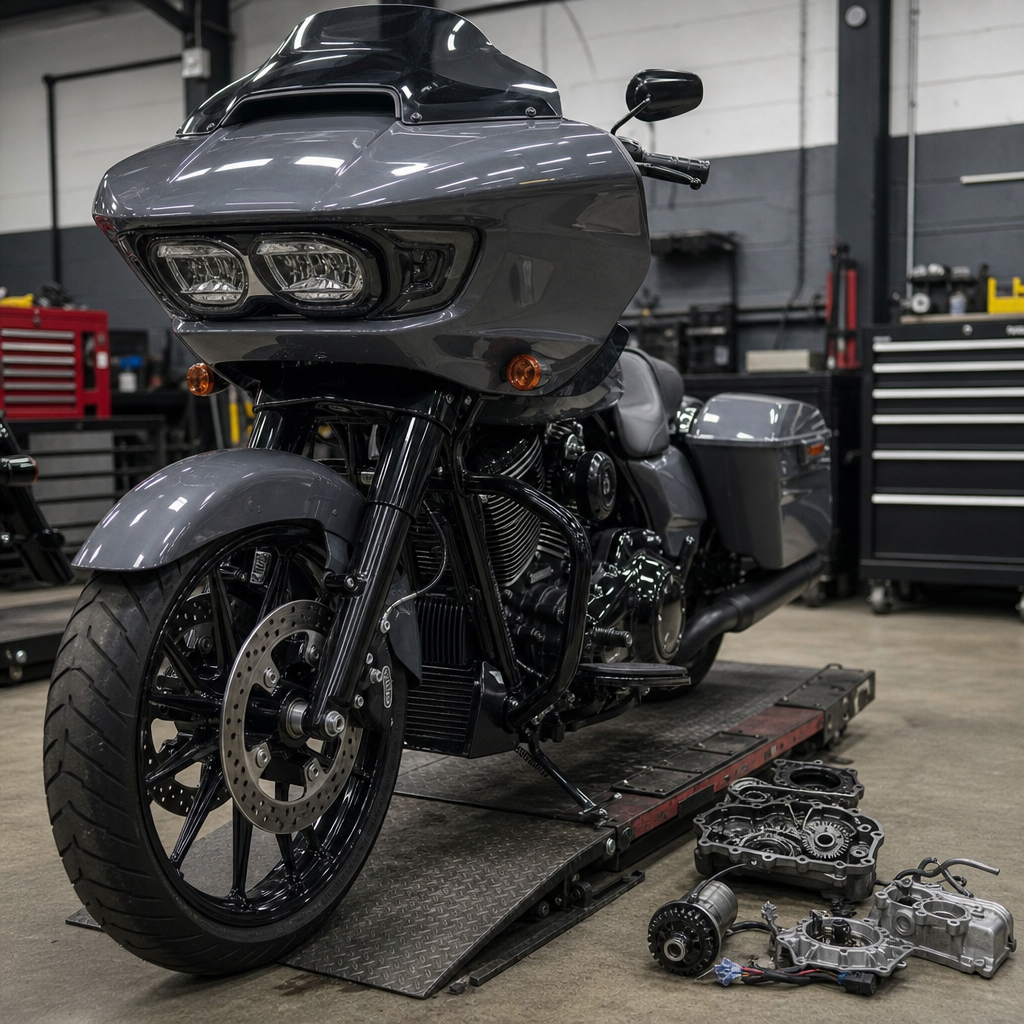
The 2026 Road Glide 3 Electric Reverse Recipe: Troubleshooting 2027 Issues starts with a practical reality every trike owner eventually learns: convenience systems matter most when they stop working. On a Harley-Davidson touring trike, electric reverse is not a novelty feature. It is a low-speed maneuvering aid that reduces strain, improves parking control, and helps riders manage a heavy machine on inclines, gravel, garage lips, and crowded fuel stops. When owners search for fixes, they usually need more than a generic electrical checklist. They need a model-aware, year-aware guide that connects ergonomics, drivetrain behavior, battery health, and rider technique into one clear troubleshooting path.
In this context, a recipe means a repeatable diagnostic sequence built around a specific model’s layout, controls, and operating behavior. I use the term the same way experienced technicians and long-distance riders do: a recipe is the order of checks that prevents missed causes and wasted parts. For the Road Glide 3, that matters because reverse complaints often have overlapping triggers. A weak battery can mimic a switch fault. An out-of-adjustment parking brake or a loaded trunk can make the system seem underpowered. A rider coming from a two-wheel touring bike may also misread what normal trike steering effort feels like during reverse engagement.
This hub article covers model-specific ergonomics and performance recipes for the Road Glide 3 with a focus on the 2026 platform and the troubleshooting patterns owners are likely to encounter in 2027. The year distinction matters because owners often diagnose based on registration year, software update timing, or accessory changes rather than build date. A 2026 machine ridden through one more season can present 2027 issues: aging AGM battery performance, switch contamination, harness fatigue, parking brake drag, and reverse motor complaints that show up only after heat cycles or storage periods. Understanding that timeline prevents confusion when comparing forum advice, service bulletins, and dealer recommendations.
At its core, electric reverse uses battery power, control inputs, and drivetrain engagement to move a very heavy trike backward slowly and predictably. If any of those pieces fall out of specification, reverse becomes intermittent, noisy, weak, or completely inactive. The goal here is to give Road Glide 3 owners a strong baseline, show how ergonomics influence diagnosis, and create a central reference point for deeper Harley-Davidson model-specific articles that branch from this subtopic.
How the Road Glide 3 reverse system behaves in real use
The Road Glide 3 combines Sharknose fairing touring ergonomics with trike rear stability, but that layout changes how riders experience reverse compared with a conventional motorcycle. The machine is long, heavy, and often carries luggage, passenger weight, and accessory electronics. In practice, electric reverse is most stressed when the front wheel is turned, the parking surface is uneven, or the rider is trying to back uphill from a slight depression. Those conditions increase rolling resistance and current draw. On a healthy system, reverse should engage deliberately, move the trike at a controlled pace, and sound mechanically consistent rather than strained or erratic.
When I troubleshoot these complaints, I start by separating normal operating feel from actual fault behavior. A Road Glide 3 will not back up with the effortless smoothness of an automotive transmission. It is a low-speed assist system, and some audible gear noise or motor effort is expected. What is not normal is clicking without movement, sudden disengagement, heavy voltage sag at the display, repeated fuse problems, or reverse that works cold but fails after a ride. Those are strong indicators that the problem is electrical supply, control logic, mechanical drag, or a heat-related weakness in the motor or connections.
Rider ergonomics also influence the complaint description. Because the seating position is relaxed and the bars are wide, some owners apply steering input and body weight in a way that increases tire scrub during reverse. On a crowned driveway, that can feel like reverse has lost power when the system is simply fighting geometry and friction. Likewise, a rider with a shorter inseam may hesitate to keep the machine balanced and unintentionally release the control sequence. Before condemning hardware, verify the exact operating steps, surface conditions, and vehicle load. Clear symptom framing saves time and often reveals whether the issue is user-input related or truly mechanical.
Common 2027 issue patterns affecting 2026 Road Glide 3 reverse performance
Most reverse failures on aging touring trikes cluster into a few predictable patterns. Battery degradation is the most common. A fully charged AGM battery can still be weak under load, especially after frequent short trips, accessory-heavy use, or winter storage without proper maintenance charging. Reverse demands high current at low speed, so marginal batteries reveal themselves here earlier than they do during daytime starting. Corroded terminals, loose grounds, or oxidized main connections can create the same symptoms.
Control-side issues are next. Reverse systems depend on intentional rider input, so switchgear contamination, intermittent button contacts, or damaged wiring near repeated flex points can interrupt operation. I have seen trikes that passed a quick static check but failed under bar movement because the harness was stressed near the neck area. That kind of fault creates intermittent engagement that owners often describe as random, when it is actually position dependent.
Mechanical resistance is another major category. Parking brake drag, underinflated tires, misadjusted rear brake components, or loaded cargo can all make reverse appear weak. Heat compounds the problem; after a long ride, brake drag may increase enough to overwhelm a marginal system. Finally, there is the reverse unit itself. Wear, internal overheating, abnormal noise, or inconsistent torque output point toward motor or gear issues that require targeted testing rather than guesswork.
| Symptom | Likely Cause | What to Check First |
|---|---|---|
| Clicks but does not move | Weak battery or poor main connection | Battery load test, terminal torque, ground integrity |
| Works cold, fails hot | Heat-sensitive motor, relay, or dragging brake | Voltage drop after ride, brake drag, connector temperature |
| Intermittent engagement | Switchgear or harness fault | Button continuity, neck-area wiring movement, connector fit |
| Slow reverse on inclines | Normal limit, low voltage, or excess load | Battery state, tire pressure, cargo weight, parking surface |
| Grinding or harsh noise | Geartrain or engagement problem | Stop use, inspect drive components, compare with service manual specs |
These patterns become more visible in 2027 because usage history starts to matter. One more season means more heat cycles, more opportunity for sulfation, and more vibration exposure across connectors and grounds. That does not mean the platform is inherently flawed. It means troubleshooting must account for age, environment, and maintenance habits, not just odometer readings.
Diagnostic recipe: the fastest path from symptom to root cause
The most efficient troubleshooting sequence starts with electrical supply, then confirms inputs, then checks rolling resistance, and only after that moves to component replacement. Step one is battery testing with a real load test, not just a resting-voltage reading. A battery can show acceptable voltage and still collapse under reverse demand. Use a carbon pile tester or a conductance tester from a known tool line such as Midtronics, and compare the result with the battery’s rated cold cranking amps and service thresholds. Also inspect both terminals, the main ground, and any accessory additions that may have altered current paths.
Step two is voltage-drop testing during reverse activation. Measure battery voltage at rest, during starting, and during reverse command. Then test across the positive feed and ground return to identify resistance in cables or connections. In the field, this step finds many hidden faults that visual inspection misses. If the battery is sound and voltage drop is excessive at a connection, clean, tighten, and retest before replacing expensive parts.
Step three is control verification. Confirm the exact engagement procedure in the owner documentation and test the switch input repeatedly. If the complaint is intermittent, turn the bars lock to lock while monitoring continuity or command status. Harness faults often show up only when moved. Step four is drag assessment: release the parking brake fully, verify tire pressures to spec, and push the trike manually on level ground if safe to do so. Any unusual resistance changes the diagnosis. Step five is component evaluation of the reverse motor, relay, and related hardware according to the factory service manual. If abnormal heat, noise, or current draw appears here, stop guessing and test the unit directly.
This recipe works because it follows failure probability. On touring trikes, electrical and resistance issues are simply more common than catastrophic reverse unit failure. Owners who replace the motor first often spend the most and learn the least.
Ergonomics and performance recipes for everyday riding, parking, and load management
Model-specific ergonomics matter because the Road Glide 3’s reverse performance is inseparable from how the rider positions the machine. The best recipe for reliable operation begins before the button is pressed. Park with a planned exit when possible. Avoid backing uphill on loose stone with the front wheel cranked. Keep the bars as straight as conditions allow to reduce scrub at the front tire. If the trike is heavily loaded, unload unnecessary cargo before diagnosing a weak reverse complaint. Fifty extra pounds in the trunk may not seem dramatic on the highway, but it absolutely changes low-speed reverse effort.
Seat height, reach, and upper-body leverage also affect confidence. Riders with limited shoulder mobility often hold bar angle too aggressively while looking over one side, which adds steering resistance. In training situations, I recommend practicing reverse on flat pavement first, then on slightly crowned surfaces, so riders can distinguish system limitation from technique error. That practice reduces false fault reports and helps owners recognize when a problem is real.
Performance recipes also include preventive maintenance habits. Maintain battery charge with a smart tender approved for AGM chemistry. Check tire pressures monthly, especially after temperature swings. Verify parking brake adjustment and release feel. If accessory lighting, audio amplifiers, or charging ports have been added, inspect installation quality and current draw. Electrical accessories rarely “cause” reverse failure directly, but poor installations create voltage loss and grounding problems that reverse will expose quickly.
For this Harley-Davidson sub-pillar hub, those ergonomics and performance recipes are the connecting thread across related articles: battery care, touring load setup, parking brake adjustment, trike control familiarization, and reverse-specific diagnostics. Owners who treat reverse as a whole-vehicle function get better results than those who isolate it as a single part problem.
When to involve a dealer and how to document the problem clearly
Some reverse issues are ideal for owner diagnosis, but not every problem should be chased in the garage. If the system produces grinding, repeated fuse failure, burning smell, or abrupt disengagement under load, professional inspection is the right move. The same is true if the machine is still under warranty, has recent dealer-installed accessories, or shows signs of software or control module irregularities beyond basic switch and battery checks. Harley-Davidson service departments have access to model-specific procedures, wiring information, and update history that can shorten diagnosis significantly.
Good documentation improves the outcome. Record whether the fault occurs cold, hot, on level ground, or only on inclines. Note battery age, storage history, recent accessory work, and whether starting performance has changed. If possible, capture voltage readings and a short video of the symptom with the instrument display visible. That information helps a technician reproduce the issue and avoid the familiar “could not duplicate” result that frustrates owners.
The strongest takeaway is simple: the 2026 Road Glide 3 electric reverse system should be judged in the context of trike ergonomics, battery condition, rolling resistance, and rider input, not by isolated guesswork. Most 2027 issues are traceable to predictable wear patterns and operating conditions, and a disciplined recipe finds them quickly. Use this hub as your starting point for Harley-Davidson model-specific ergonomics and performance troubleshooting, then follow the related articles for deeper procedures on batteries, brakes, wiring, and touring setup. If your trike is showing reverse trouble now, begin with the battery, verify the controls, check for drag, and document what you find before the next ride.
Frequently Asked Questions
Why did the electric reverse on my 2026 Road Glide 3 stop working even though the trike still starts and rides normally?
That is one of the most common and most confusing complaints, because electric reverse lives in a narrow operating window. The engine may start, idle, and ride forward without issue, yet reverse can still refuse to engage if one of its safety, voltage, or switch inputs is out of range. On a 2026 Road Glide 3, reverse operation depends on more than basic engine function. The system typically requires proper battery voltage, a healthy charging system, correct transmission position, a valid brake or clutch-related input depending on the setup, and a working reverse switch or actuator circuit. If any one of those conditions is missing, the bike can appear perfectly normal until you ask it to back up.
In practical troubleshooting terms, start with the battery and not with the reverse motor itself. Reverse systems pull significant current at low speed, and a battery that is only marginally healthy may still crank the engine but not support reverse engagement under load. Check resting voltage, charging voltage, and cable condition at both the battery terminals and grounds. Corrosion, loose lugs, and heat-damaged cables can create enough resistance to disable reverse performance. After that, inspect the reverse switch, wiring connectors, fuses, relays, and any interlock signals that the system needs before it will activate. If the switch feels inconsistent, the connector shows moisture intrusion, or the relay clicks without motor movement, you likely have narrowed the issue to control-side rather than mechanical failure.
Another overlooked cause is that many riders assume “no movement” means “bad motor,” when the real problem can be low voltage under load, actuator misalignment, or a fault in the enable sequence. If the reverse system engages intermittently, works only when warm, or fails more often on inclines, those patterns strongly suggest either electrical weakness or excessive mechanical drag. The best approach is to diagnose in sequence: battery, charging, fuse and relay path, switch function, connector integrity, actuator engagement, and finally the reverse drive unit itself. That order prevents unnecessary parts replacement and reflects how these systems typically fail in real-world trike use.
What are the first things I should check when troubleshooting 2027 reverse-related issues on a 2026 Road Glide 3?
The smartest first checks are the simple, high-probability items that account for most complaints: battery state, charging output, fuse condition, switch function, wiring connections, and proper operating procedure. These systems are sensitive to voltage and sequencing, so before assuming a component has failed, confirm that the reverse is being activated under the correct conditions. Riders sometimes chase “2027 issues” that are really the same longstanding trike reverse faults seen whenever the battery is weak, the machine is not fully in the required position, or a connector has loosened from vibration.
Begin with battery health. Measure voltage with the engine off, then again while running, and ideally observe how voltage behaves when reverse is commanded. A battery that looks acceptable at rest may collapse under load. Next, inspect the main fuse and any reverse-specific fuse or relay in the circuit. A fuse can test open, but just as often the issue is heat, oxidation, or poor contact at the fuse holder. Then move to the reverse switch and surrounding harness. Touring trikes experience vibration, heat cycling, and occasional moisture exposure, so even a slightly backed-out pin or greened connector terminal can interrupt the enable signal.
Also check for mechanical resistance. If the trike is parked on a steep incline, in deep gravel, or with tire pressure too low, the reverse system may seem weak or inoperative when it is actually being overloaded. Listen carefully for clues: a click without movement suggests relay or motor current issues; a brief engagement followed by shutdown may point to voltage drop or thermal protection; grinding, harsh engagement, or abnormal noise can indicate a mechanical problem that should not be ignored. The key is to separate “electrical no-go” from “electrical go, mechanical overload.” That distinction dramatically shortens the diagnostic process and helps you decide whether you are dealing with a serviceable connection issue or a deeper component fault.
Can a weak battery or charging problem really cause reverse failure even if the trike seems fine otherwise?
Yes, absolutely. In fact, low available voltage is one of the most common reasons an electric reverse system behaves erratically or stops working altogether. Reverse places a different kind of demand on the electrical system than many riders expect. It is a high-load, low-speed assist function, and it asks the battery and charging system to deliver current consistently at the exact moment the trike is resisting movement with its own weight. A battery can still appear “good enough” for lighting, dash operation, and even normal starting, but once reverse is commanded, voltage sag can become severe enough to interrupt the control circuit or prevent the motor from producing useful torque.
This is why symptom patterns matter. If reverse works better after a battery tender session, fails after short trips, becomes inconsistent in cold weather, or struggles most on hills, voltage should be at the top of your list. Charging system performance matters too. If the stator, regulator, or related wiring is not maintaining proper charge, the battery may never fully recover between rides. Over time that leaves the reverse system with too little reserve capacity. The same applies to bad grounds and aging cables. Electrical resistance in the main feed or return path can mimic a weak battery because the motor sees reduced voltage even though the battery itself may test acceptably on the bench.
The fix is to test, not guess. Check battery age, resting voltage, load performance, and charging output at idle and elevated rpm. Clean and tighten both positive and ground connections, including frame and engine grounds where applicable. Look for swollen insulation, overheated terminals, or aftermarket accessories that may have introduced poor wiring practices. If the battery is older or borderline, replacing it can resolve reverse complaints that seem far more complicated than they are. On a heavy touring trike, electric reverse performance often reveals battery weakness before other systems make it obvious.
How can I tell whether the problem is electrical, mechanical, or just incorrect reverse engagement procedure?
The best way to separate those possibilities is to pay attention to exactly what happens when you try to use reverse. If nothing at all happens—no click, no change in sound, no engagement feel—then the problem is usually on the electrical control side. That points toward an input condition not being met, a failed switch, a blown fuse, a bad relay, poor battery condition, or a wiring fault. If you hear a click or relay action but the trike does not move, then power may be reaching part of the system, but the motor may not be turning, the voltage may be collapsing under load, or the drive mechanism may not be properly engaging.
If the reverse motor runs but movement is weak, jerky, or accompanied by grinding, that suggests a mechanical or load-related issue. The trike may be facing too much resistance from incline, surface texture, brake drag, low tire pressure, or misalignment in the reverse drive components. A purely procedural problem usually shows up as a system that works once the exact sequence is followed correctly. For example, if reverse only works when the transmission position, switch timing, or brake input is exactly right, the rider may be close to correct operation but missing one required step. In those cases, reviewing the owner’s procedure and repeating it carefully can save a lot of unnecessary troubleshooting.
A useful rule of thumb is this: silence usually means control circuit, clicking often means partial electrical function, motor noise without movement points toward drive or load issues, and rough engagement suggests mechanical wear or adjustment problems. Also note whether the issue is constant or intermittent. Intermittent faults often trace back to connectors, switch contacts, heat-related electrical resistance, or borderline battery condition. Constant faults are more likely to be blown protection, failed components, or a repeatable mechanical problem. Documenting exactly what you hear, feel, and see during the failure can make diagnosis much faster, whether you are doing the work yourself or handing the trike to a technician.
When should I stop troubleshooting at home and have a Harley-Davidson technician inspect the reverse system?
You should move from home checks to professional diagnosis when the problem goes beyond basic battery, fuse, connector, and procedure verification, or when the system shows signs of mechanical distress. If you hear grinding, repeated harsh engagement, burning smells, overheating, or the reverse motor straining without moving the trike, stop using it until it is inspected. Continuing to force the system can turn a manageable repair into a more expensive one by damaging gears, engagement hardware, wiring, or the motor itself. The same is true if fuses repeatedly blow or if wiring gets hot during operation. Those are not “keep trying” symptoms.
Professional inspection is also the right call if you have confirmed good battery voltage, clean and tight connections, proper switch operation, and correct engagement procedure, yet the fault remains. Modern touring trike systems can require more advanced electrical diagnosis than many owners can reasonably perform in the garage. A technician can test current draw, voltage drop, relay behavior, switch inputs, actuator movement, and mechanical engagement under controlled conditions. That is especially valuable for intermittent faults, because they often require a process of elimination using service information, known-good test values, and direct circuit





