
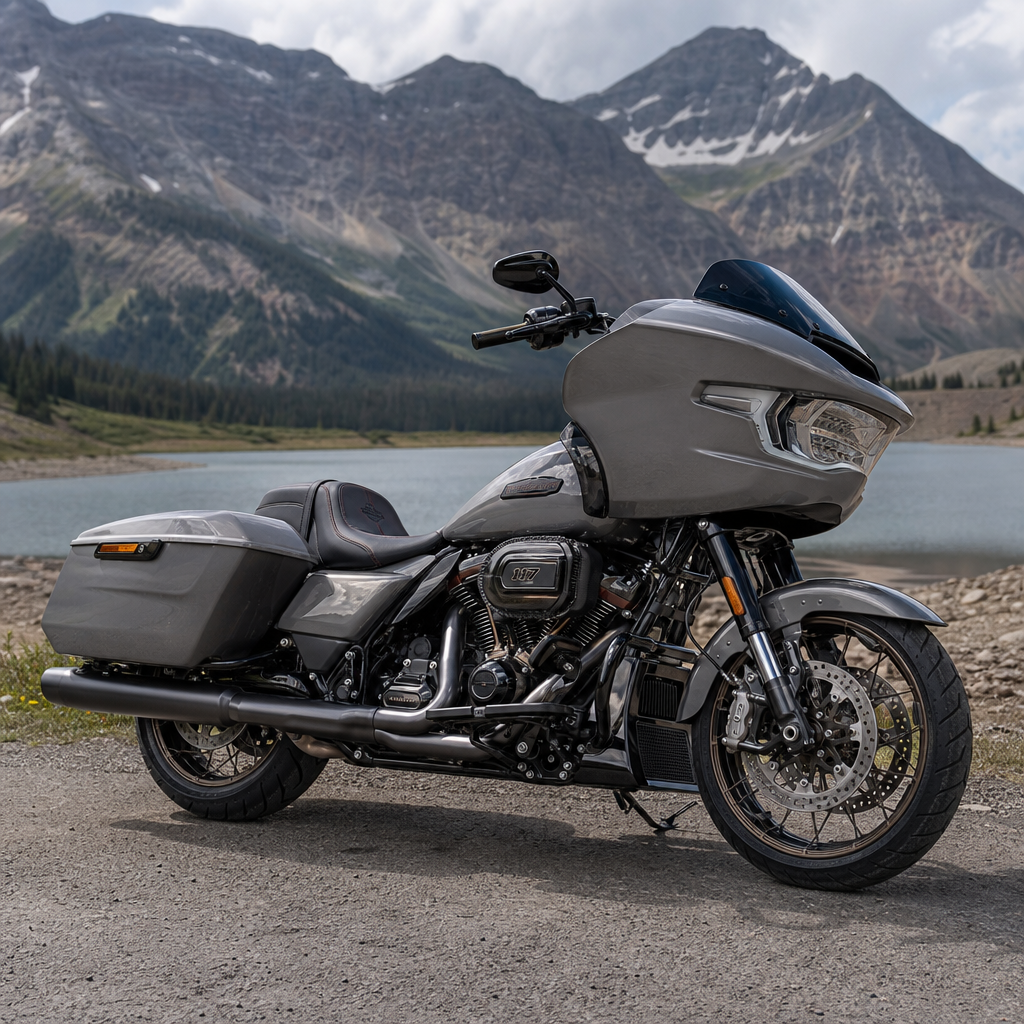
The CVO Road Glide ST Titanium Hardware Recipe is a model-specific plan for replacing selected original fasteners with titanium equivalents to reduce 2027 fastener weight while preserving fit, clamp load, corrosion resistance, and serviceability. In practical terms, a recipe is not a random shopping list. It is a documented specification that maps bolt location, size, thread pitch, flange style, torque method, and risk level to the exact replacement part. For Harley-Davidson owners focused on model-specific ergonomics and performance recipes, this matters because hardware choices influence steering feel, vibration transmission, maintenance access, and even confidence during long-distance riding. On the CVO Road Glide ST, a bagger built around aggressive road performance, small weight reductions in the wrong places are meaningless, but smart reductions in high-count or elevated locations can produce measurable benefits without compromising reliability.
I approach this subject the same way I handle race-prep and premium touring builds in the workshop: begin with function, then identify safe substitutions, then document every torque value and every exception. Titanium hardware is attractive because it offers high strength-to-weight ratio and excellent corrosion resistance, especially in exposed applications around bodywork, controls, exhaust shielding, and accessory brackets. Yet not every bolt should become titanium. Engine internals, brake rotor hardware with specific locking chemistry, and certain structural joints often demand the original grade, coating, or stretch characteristics. The value of a true Road Glide ST titanium hardware recipe is that it separates worthwhile conversions from expensive mistakes.
This page serves as the hub for model-specific ergonomics and performance recipes under Harley-Davidson, with the CVO Road Glide ST as the working example. Ergonomics and performance are linked more tightly than many riders assume. Bar reach affects steering leverage. Floorboard and peg position affect hip angle, cornering clearance, and fatigue. Hardware weight affects how easy components are to reposition, how much mass sits above the center of gravity, and how service work progresses when you are changing bars, risers, seats, or luggage configurations. A proper recipe therefore connects fastener strategy to rider fit, handling intent, maintenance intervals, and the known realities of Milwaukee-Eight based touring platforms.
What 2027 Fastener Weight Reduction Actually Means on a CVO Road Glide ST
When riders ask about reducing 2027 fastener weight, they usually mean building a future-proof hardware map for the current CVO Road Glide ST platform using 2027 planning assumptions: full inventory, gram-level accounting, and repeatable substitutions that can carry through upcoming refresh cycles of a personalized bike. The goal is not to remove 2027 grams from fasteners. It is to reduce the weight of the fastener system across the machine in a way that is organized enough to update, compare, and expand as the build evolves. On a Road Glide ST, that means cataloging dozens of accessible bolts across fairing supports, dash panels, saddlebag hardware, seat mounts, fender supports, floorboards, passenger accommodations, and selected control assemblies.
In workshop audits, the biggest gains rarely come from one heroic substitution. They come from converting clusters of steel hardware in non-critical but numerous locations. Replace twenty to forty stainless or zinc-coated steel fasteners with properly specified titanium pieces and the savings become real, often in the hundreds of grams depending on head style and bolt length. That will not transform the motorcycle the way wheels, exhaust, or suspension will. It can, however, sharpen the overall build by trimming mass high on the bike, improving corrosion behavior, and making repeated bodywork removal less frustrating because quality titanium fasteners resist cosmetic degradation better than many factory-coated bolts.
The most important principle is location priority. Fasteners mounted high, far from the roll center, or in frequently serviced assemblies deserve attention first. Fairing inner and outer structures, windshield and trim hardware, instrument panel retention, upper bagger accessories, and seat-related mounting points often offer cleaner gains than lower chassis bolts. By contrast, substituting critical engine mount or swingarm-adjacent hardware without engineering justification is poor practice. A Road Glide ST recipe should always rank parts by benefit, service frequency, and mechanical consequence, not by catalog excitement.
Where Titanium Hardware Works Best, and Where It Does Not
The best titanium conversions on a CVO Road Glide ST are usually in bodywork, brackets, non-shear-critical mounts, and rider-contact component hardware. Examples include fairing fasteners, dash and console screws where applicable, seat retention hardware, backrest or luggage support mounts designed around conventional metric bolts, heel-toe shifter accessories, floorboard support accessories, horn brackets, selected exhaust shield screws, and saddlebag latch or trim hardware when dimensions and head profiles match perfectly. These locations typically benefit from lower mass, strong corrosion resistance, and reduced visual wear. They also tend to be serviced more often, so the owner repeatedly gains from better-looking, easier-to-maintain hardware.
There are also areas where titanium is possible but requires close review. Brake caliper bolts, rotor bolts, handlebar clamp bolts, axle pinch hardware, and suspension-adjacent fasteners involve high loads, safety consequences, or manufacturer-specific chemistry and surface assumptions. In those locations, substitution is only appropriate if the exact titanium grade, head design, engagement length, anti-galling strategy, and torque method are validated against the original application. I do not treat these as casual garage upgrades. Even when a titanium part matches tensile strength targets on paper, the friction coefficient, preload behavior, and fatigue environment may differ enough to change joint security.
Finally, some fasteners should remain original unless there is a formally engineered replacement path. That group includes torque-to-yield bolts, internal engine fasteners, primary or transmission hardware with specific service-manual instructions, and any joint where Harley-Davidson specifies replacement due to threadlocker patch, prevailing torque feature, or controlled stretch. A reliable recipe is defined as much by the no-convert list as by the convert list.
Building the Recipe: Audit, Specification, and Torque Control
Every successful hardware recipe starts with a physical audit. Remove one assembly at a time, measure the original fastener with calipers and thread gauges, note head style, flange diameter, shoulder length, washer requirement, and installed depth, then weigh the original piece on a gram scale. I log each item by zone: front fairing, cockpit, mid-bike, rear bodywork, luggage, and rider interface. Then I compare thread engagement to standard engineering practice, usually targeting full engagement through the nut or sufficient thread depth in blind holes without bottoming. This step prevents the common mistake of buying a titanium bolt that is dimensionally close but mechanically wrong.
Material selection comes next. For motorcycle external hardware, Grade 5 titanium, commonly Ti-6Al-4V, is the standard choice because it combines high strength, low density, and good corrosion resistance. Pure titanium hardware is generally not the answer for loaded joints. Surface finish matters too. Rolled threads, accurate socket depth, and consistent head geometry distinguish premium suppliers from decorative hardware sellers. On Harley applications, I also check for galvanic interaction where titanium meets aluminum, especially in exposed weather service. A suitable anti-seize or assembly compound is not optional; it reduces galling risk and improves torque consistency.
Torque control is where many builds succeed or fail. Titanium does not automatically use the factory torque specification blindly. Torque is a proxy for preload, and preload depends on friction under the head and in the threads. Change the material and lubricant, and the torque-to-clamp relationship changes too. The correct method is to start with the service manual, confirm the joint function, evaluate whether torque is specified dry or lubricated, and use supplier guidance where available. On critical joints, measured bolt stretch is ideal, though that is impractical for many motorcycle applications. At minimum, use calibrated tools, fresh thread preparation, and documented assembly notes.
| Priority Area | Typical Factory Material | Titanium Conversion Value | Primary Caution |
|---|---|---|---|
| Fairing and windshield hardware | Coated steel or stainless | High service benefit, moderate gram savings | Head profile and trim fitment |
| Seat and rider interface mounts | Steel | Frequent access, clean corrosion resistance | Thread engagement in captive nuts |
| Saddlebag trim and accessory brackets | Steel | Good cluster savings across many bolts | Vibration and latch alignment |
| Controls and floorboard accessories | Steel | Supports ergonomic adjustments and repeat service | Do not confuse accessory mounts with structural pivots |
| Brake, axle, and suspension-adjacent hardware | High-spec steel | Usually low priority | Safety-critical load paths and torque sensitivity |
Connecting Hardware Reduction to Ergonomics and Performance Recipes
This sub-pillar hub exists because Harley-Davidson owners rarely modify one system in isolation. A CVO Road Glide ST owner changing bars, risers, seat shape, floorboard position, and luggage setup is already disassembling the exact zones where a titanium hardware recipe delivers the most practical value. When I build an ergonomics package, I create a hardware map at the same time. If the rider needs reduced reach, I may pair a handlebar and riser change with lighter fairing and nacelle-adjacent hardware that simplifies future cable access. If the rider wants better lower-back support for distance work, I evaluate seat mount hardware, backrest interfaces, and quick-detach points together rather than as separate purchases.
Performance recipes follow the same logic. The Road Glide ST responds strongly to changes in suspension calibration, tire profile, wheel mass, brake feel, and rider triangle. Fastener weight is not the lead actor, but it supports the whole production. Lighter hardware in upper bodywork slightly reduces mass above the center of gravity. More importantly, premium corrosion-resistant fasteners make repeated tuning easier. A rider testing windshields, bars, or audio-delete panels should not be fighting chewed bolt heads and flaky coatings every time the fairing comes apart. In that sense, the titanium recipe improves the performance development process, not just the motorcycle’s scale number.
The hub structure for model-specific ergonomics and performance recipes should therefore link this hardware article with dedicated guides on seat-to-peg distance, bar reach by rider height, suspension sag for loaded baggers, brake lever ergonomics, and luggage mass placement. Those pages answer detailed fit questions, while this page provides the hardware strategy that supports all of them.
Cost, Tradeoffs, and the Smart Upgrade Sequence
Titanium hardware is expensive, and pretending otherwise weakens trust. A complete CVO Road Glide ST conversion can range from a focused few hundred dollars for visible bodywork and cockpit fasteners to far more if you pursue custom lengths, color-anodized heads, and broad accessory coverage. The financial case improves when the bike is already undergoing staged personalization and when the owner values corrosion resistance, repeat serviceability, and finish quality in addition to weight reduction. If the only goal is lap-time-style performance per dollar, wheels, suspension, tires, and rider coaching will beat titanium hardware every time.
The smartest sequence starts with an inventory and target list. First, convert non-critical, high-count, high-visibility fasteners in the fairing and rider interface. Second, move to seat, luggage, and accessory brackets that are frequently removed during ergonomic changes. Third, evaluate any medium-load applications individually with supplier data and service manual cross-checking. Last, leave critical structural and safety-sensitive hardware alone unless you have a validated engineering basis. This sequence keeps risk low while delivering the most noticeable ownership benefit early.
For most owners, the main benefit is not bragging rights about exotic metal. It is having a cleaner, documented, model-specific recipe that supports every future adjustment to the bike. Audit your Road Glide ST, build the conversion list carefully, and upgrade the right fasteners first.
Frequently Asked Questions
What is a CVO Road Glide ST titanium hardware recipe, and why is it better than simply buying a generic titanium bolt kit?
A CVO Road Glide ST titanium hardware recipe is a location-by-location replacement plan for selected original fasteners on this specific motorcycle, not a universal assortment of bolts. The goal is to reduce 2027 fastener weight in a controlled way while maintaining the fit, clamp load, corrosion behavior, and serviceability that the motorcycle requires. A proper recipe identifies each fastener by where it is used, its diameter, thread pitch, grip or installed length, head or flange style, washer strategy, torque method, and overall risk level. It also notes whether the replacement should be titanium at all, or whether the original steel fastener is the better choice for that position.
That model-specific approach matters because not every fastener on a CVO Road Glide ST does the same job. Some hold cosmetic trim, some support brackets, some locate components precisely, and some are truly safety-critical or subject to repeated heat cycles, vibration, and complex loading. A generic titanium kit usually groups parts by thread size and length without enough attention to flange diameter, shoulder design, captive washer requirements, socket clearance, or the torque procedure Harley-Davidson intended for that joint. That is where problems begin. A bolt may thread in, but if the under-head geometry is wrong, the clamping surface is too small, or the installed length is slightly off, the joint may not perform like the original.
A good recipe also protects owners from one of the biggest mistakes in lightweight fastener swaps: assuming every steel bolt can be replaced with a titanium bolt of the same nominal dimensions and tightened the same way. In reality, friction characteristics, anti-seize use, and the presence of threadlocker can all affect final clamp load. The value of a documented recipe is that it turns the project from guesswork into a repeatable specification. For owners focused on meaningful weight reduction without compromising reliability, that is the difference between a professional upgrade and a random shopping list.
Which fasteners on a CVO Road Glide ST are the best candidates for titanium replacement, and which ones are usually left in steel?
The best candidates are typically non-structural or moderately loaded fasteners where weight savings can be achieved without affecting critical safety margins. On a CVO Road Glide ST, that often includes selected bodywork, fairing-related hardware, covers, seat and trim fasteners, certain bracket fasteners, and other locations where the original bolt primarily provides straightforward clamping and does not depend on unusual shoulder geometry or specialized locking features. These positions are especially attractive because they often appear in larger quantities, making small per-bolt savings add up across the motorcycle.
Hardware near highly visible areas can also benefit from titanium because it offers excellent corrosion resistance and can improve long-term cosmetic durability when the correct finish and installation practice are used. In many cases, owners pursuing a cleaner, premium build appreciate that titanium can reduce both weight and maintenance concerns compared with ordinary plated steel hardware. That said, even in these areas, the replacement still needs to match the original flange style, seating surface, and installed length. Good fit remains the first requirement.
Fasteners commonly left in steel are those with high consequence of failure, highly engineered elasticity requirements, unusual strength or ductility demands, or specialized design features that are difficult to duplicate correctly. Examples may include certain brake-related, suspension-related, drivetrain-adjacent, axle, engine internals, steering, and other safety-critical joints. Depending on the location, Harley-Davidson may have chosen a specific fastener class, coating, patch locking feature, or torque-plus-angle procedure for reasons beyond simple tensile strength. In those cases, preserving the factory design intent is usually smarter than chasing a small weight reduction number.
The key principle is not “replace everything with titanium.” It is “replace the right things with the right titanium parts.” A quality recipe separates low-risk opportunities from high-risk ones and makes clear where titanium is appropriate, where it is optional, and where the original hardware should remain untouched. That is how experienced builders reduce weight responsibly instead of creating avoidable service or reliability issues.
How much weight can realistically be saved with a titanium hardware recipe, and does that reduction actually matter?
Realistic weight savings depend on how broad and conservative the recipe is. If the plan targets only cosmetic and low-risk fasteners, the reduction may be modest but still meaningful to detail-oriented owners. If it expands to a larger number of carefully selected bracket, fairing, cover, and accessory-mount fasteners, total savings become more noticeable. The important point is that the recipe is aimed at reducing 2027 fastener weight through cumulative gains, not through one dramatic part swap. Titanium hardware projects are usually an exercise in trimming many small masses across the bike, with the final result determined by the number of eligible positions and the size of the original steel fasteners being replaced.
Whether that matters depends on the owner’s goal. From a pure performance standpoint, the difference may not transform the motorcycle on its own. However, for riders who are already pursuing an overall lightweight build, reducing fastener weight is one of the cleaner ways to remove mass without changing the motorcycle’s character or comfort. It can complement other changes such as exhaust, wheel, battery, or bracket upgrades. In that broader context, a titanium hardware recipe is less about one isolated number and more about disciplined weight management across the entire machine.
There is also a quality and longevity argument. When done correctly, titanium replacements can resist corrosion well, maintain a premium appearance, and simplify long-term upkeep in exposed areas. So even when the gram savings at a single bolt location seem small, the combined benefits of lower weight, cleaner presentation, and durable service can still make the recipe worthwhile. Enthusiasts who care about precision tend to appreciate the cumulative effect.
The most useful way to think about the value is this: a titanium recipe matters when it is part of a measured, engineered approach. It is not magic, and it is not a substitute for major weight-saving components. But it is a valid finishing step for an owner who wants the CVO Road Glide ST to be lighter, cleaner, and more intentionally specified right down to the hardware.
Do titanium fasteners require different torque practices, anti-seize, or threadlocker compared with the original hardware?
Yes, installation practice is one of the most important parts of a successful titanium hardware conversion. The biggest mistake is assuming the original torque value can always be copied directly without considering friction changes at the threads and under the bolt head. Clamp load comes from the relationship between torque and friction, not torque alone. Titanium fasteners, especially when installed with anti-seize or into different mating materials, can behave differently from the plated steel hardware they replace. That means the torque method in a proper recipe should account for lubricant condition, threadlocker use, washer strategy, and the material of the receiving threads.
Anti-seize is often discussed because titanium can be prone to galling under the wrong conditions, particularly in titanium-to-titanium or titanium-to-stainless combinations, though actual risk varies by surface finish, load, and mating material. In many motorcycle applications, the replacement fastener is titanium while the threaded hole or nut is aluminum or steel, which changes the risk profile but does not eliminate the need for sound installation practice. The recipe should specify whether a particular fastener is installed dry, with a defined anti-seize, or with a threadlocker approved for that joint. Using both randomly can create inconsistent clamp loads and complicate service later.
Threadlocker selection also matters because some locations rely on vibration resistance as much as clamp force. If the factory called for a specific threadlocker, patch-lock feature, or prevailing-torque nut, that requirement cannot be ignored just because the bolt material changed. Likewise, if the original joint used a flange head to distribute load over a softer surface, replacing it with a non-flanged titanium cap screw can change the seating stress and produce misleading torque feel. That is why experienced builders do not spec bolts by thread size alone.
The safest approach is to follow a recipe that documents the exact replacement part and the intended installation method for each location. For owners building their own list, the right answer is to verify dimensions, head style, engagement length, and joint function before setting torque strategy. Titanium can work extremely well, but only when torque practice is treated as part of the engineering, not as an afterthought.
How do you preserve reliability and serviceability when reducing fastener weight on a CVO Road Glide ST?
Reliability and serviceability come from restraint, documentation, and consistency. The first step is limiting the conversion to fasteners that have been evaluated by location and duty. That means understanding what each fastener actually does: whether it merely holds a cover, locates a bracket, supports vibration-prone components, or secures something with genuine safety implications. Once the job of the fastener is clear, you can decide whether titanium is appropriate and, if it is, what exact replacement geometry is required to preserve the original joint behavior.
Documentation is what turns that judgment into a repeatable system. A strong recipe records the bolt location, size, thread pitch, installed length, head type, flange requirement, washer stack, torque method, and any notes about anti-seize, threadlocker, or re-use limitations. It should also identify risk level





