
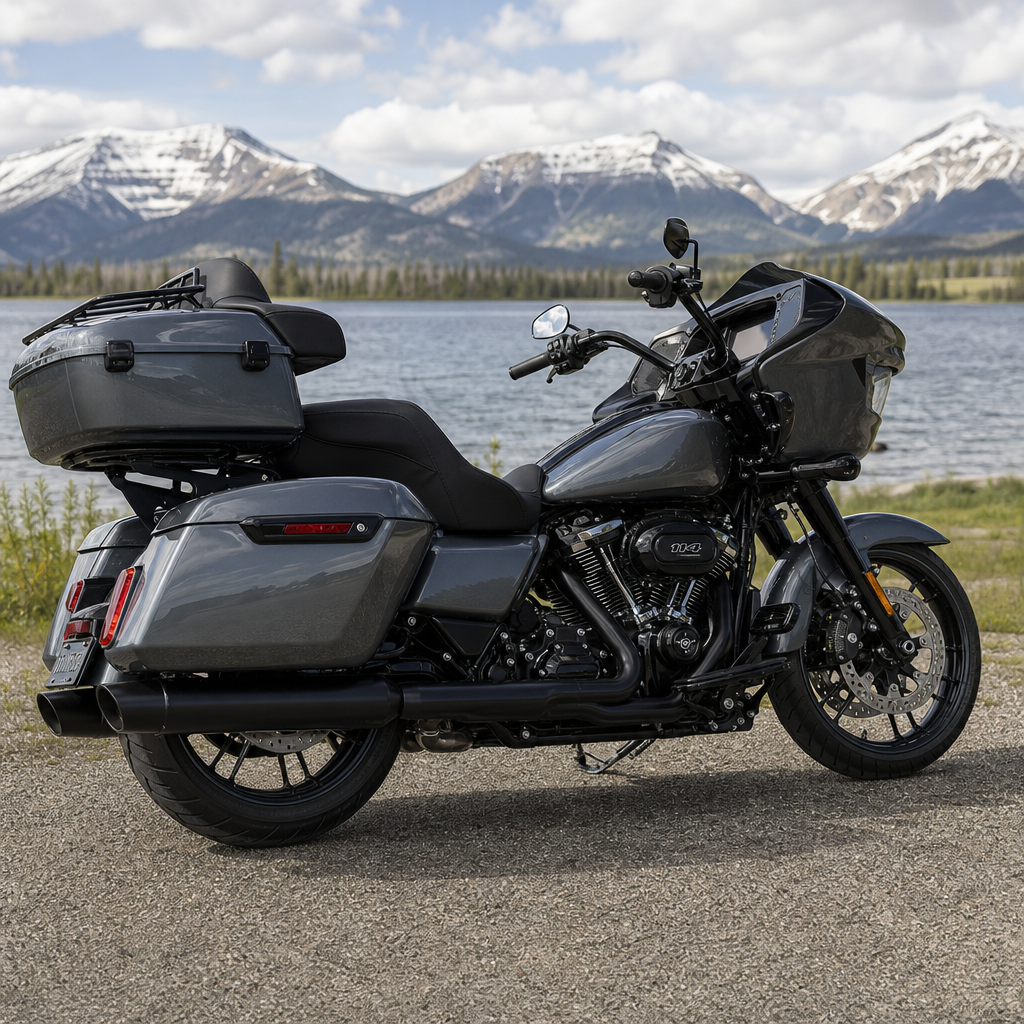
The 2026 Road Glide 3 Tour-Pak mounting recipe is not just a parts list. It is a model-specific plan for fitting luggage capacity from the 2027 accessory ecosystem to Harley-Davidson’s three-wheeled bagger without ruining passenger space, handling balance, or service access. In this hub article, I will explain how to approach Tour-Pak fitment as a repeatable recipe: identify the chassis constraints of the Road Glide 3, choose the correct rack and docking geometry, confirm load ratings, and match luggage choices to real touring use. That matters because a trunk upgrade on a trike affects more than storage. It changes reach to the backrest, wind behavior around the rider, seat-to-lid clearance, rear lighting visibility, and the way weight sits over the axle.
For clarity, a Tour-Pak is Harley-Davidson’s hard rear trunk system, usually mounted above the rear fender section or luggage rack and often paired with a passenger backrest, speaker pods, lighting, and liner accessories. A mounting recipe is the exact combination of hardware, spacing, torque sequence, and luggage strategy that produces a safe, comfortable, and useful result on one specific platform. The 2026 Road Glide 3 deserves that specificity because it is not a two-wheel touring bike. Its frame packaging, rear bodywork, passenger position, and load path differ from Road Glide and Street Glide models, so generic advice often leads to rattles, lid interference, awkward passenger posture, or overloaded brackets.
I have worked through enough Harley touring fitments to know that owners usually ask three practical questions first. Will a newer luggage setup fit? Will it hold the weight I actually travel with? Will it still feel comfortable on a full-day ride? Those are the right questions. The Road Glide 3 is built for long distances, but the best setup depends on how you travel: solo, two-up, weekend trips, camera gear, rain layers, helmets, or full cross-country packing. This hub covers the full decision path and gives you a framework you can use before you buy parts, drill into a schedule, or commit to a premium painted trunk.
Start with the Road Glide 3 platform, not the accessory catalog
The most common mistake in Tour-Pak planning is shopping by accessory generation instead of by motorcycle geometry. The 2026 Road Glide 3 uses a trike-specific rear structure and body layout. That means the passenger seat relationship to the mounting plane is different from many two-wheel baggers, and the rear mass sits in a more fixed, axle-centered footprint. On this platform, luggage capacity is easier to add than on a bike, but comfort penalties show up quickly if the trunk is mounted too far forward or too high. In practical terms, an inch of fore-aft movement can decide whether a passenger can sit naturally or feels pushed into the rider for 300 miles.
Begin by measuring four things before selecting hardware: seat rear edge to proposed backrest face, top rack height above the fender reference line, clearance to open the trunk lid fully, and distance from the trunk base to any antennas, lighting housings, or speaker pods. I always mock these dimensions up with cardboard or a borrowed Tour-Pak shell before ordering painted components. That simple step catches the expensive errors. It also tells you whether your intended 2027 luggage pieces, such as liners, organizer trays, or top-rack bags, will remain easy to access once the trunk is installed on the trike.
Another platform issue is suspension and steering feel under load. Trikes are more tolerant of stationary cargo than motorcycles, but they still react to high-mounted weight. Put too much mass at the top rear and you increase pitch sensitivity over expansion joints and reduce the tidy, planted feel that makes the Road Glide 3 enjoyable. Harley-Davidson’s own touring guidance has long emphasized respecting gross vehicle weight rating, side-to-side balance, and secure cargo containment. Those principles matter even more when owners assume a trike can carry anything because it has three wheels. It cannot.
The mounting recipe: rack, hardware, spacing, and torque discipline
A reliable Tour-Pak installation follows a sequence. First, confirm the rack or support plate is explicitly rated for the Road Glide 3 or the relevant Tri Glide and Freewheeler family architecture if a cross-compatible aftermarket system is used. Second, verify the base pattern of the Tour-Pak shell matches the plate without slotting holes or forcing alignment. Third, use the correct reinforcement, isolators, washers, and threadlocker specified by the rack manufacturer. Fourth, torque fasteners in stages and recheck after the first 100 to 250 miles. Vibration does not usually break a good installation at once; it loosens a poor one gradually until the trunk shifts, squeaks, or cracks around the base.
In my experience, spacing is the hidden variable that separates a “fits in the garage” install from a “works on the road” install. Riders often mount the trunk as far forward as possible to keep the bike compact. That can improve appearance, but it may reduce passenger room and make the lid harder to open with a luggage rack bag attached. A better recipe is to define your nonnegotiables first: minimum backrest comfort, full lid opening, and easy access to side cases. Then set the trunk position around those priorities. If your setup includes a detachable plate, test the docking latch engagement repeatedly before loading weight into the box.
Use corrosion-resistant hardware and pay attention to washer stack-up. Stainless fasteners look attractive but are not automatically the right grade for every structural point; many premium rack systems specify coated steel bolts with known tensile properties. Follow that guidance. For threadlocker, use the manufacturer’s recommended medium-strength product unless the service literature says otherwise. Overtightening can crush isolators or distort the Tour-Pak base, which eventually causes stress cracks. Undertightening allows movement, which wears holes oval. The target is clamp load, not brute force.
| Decision point | Best practice for 2026 Road Glide 3 | Why it matters for 2027 luggage |
|---|---|---|
| Mounting plate fit | Choose trike-specific or explicitly cross-listed hardware | Prevents misalignment and preserves load path integrity |
| Fore-aft position | Set using passenger comfort and lid clearance measurements | Keeps larger trunk organizers and top bags usable |
| Fastener method | Use specified bolts, washers, isolators, and threadlocker | Reduces vibration damage with heavier packed loads |
| Load planning | Pack heavy gear low and central, light gear high | Maintains handling while maximizing storage volume |
| Post-install checks | Retorque after initial miles and inspect every service interval | Stops small shifts before they damage trunk or rack |
Making 2027 luggage work: volume, access, and modular packing
Maximizing 2027 luggage does not mean buying the biggest trunk and stuffing every cavity. It means using the accessory generation intelligently. Many newer luggage systems focus on modularity: removable liners, packing cubes, lid organizers, top-rack duffels, and quick-access pouches for charging cables, gloves, and rain gear. On the Road Glide 3, that modular approach is better than relying on one huge open compartment because it shortens stop time and avoids constant unpacking. If you have to dig past a rain suit, tool roll, and camera cube just to reach medication or charging gear, the setup is inefficient no matter how much it holds.
A strong recipe divides storage by weight and frequency of use. Put dense items such as tools, tire repair kits, battery jump packs, and spare fluids as low as possible, ideally in saddlebags or lower compartments rather than at the top of the Tour-Pak. Reserve the Tour-Pak floor for medium-weight essentials and the upper space or lid pockets for soft, light, often-used items. Helmets, heated gear layers, and compressible overnight bags are excellent trunk cargo. Laptops, hard camera cases, and bottled liquids are usually better lower and more central unless protected carefully. This improves both handling and packing logic.
For two-up touring, treat the passenger backrest as part of the luggage system. A well-positioned Tour-Pak back pad reduces fatigue and makes the passenger less likely to brace with their core over bumps, which in turn improves rider stability. But too thick a pad or too little setback can crowd the passenger hip angle. I recommend mock-seating in full riding gear for at least ten minutes before final tightening. Boots, armored pants, and a bulky jacket change posture. If the passenger says it feels slightly tight in the garage, it will feel cramped by the second fuel stop.
Security and weather sealing also matter. Harley-style trunks are excellent for secure touring when the lid seal is healthy and latch engagement is correct. Check for even gasket compression around the perimeter after mounting. An uneven plate can create a twist that compromises sealing over time. If you are adapting 2027 liners or organizers, make sure they do not interfere with latch closure or interior speaker housings. Water intrusion often comes from poor closure, not failed plastic. In real travel, that distinction saves expensive electronics and paperwork.
Ergonomics recipe: rider fit, passenger comfort, and long-day usability
Model-specific ergonomics are the reason this subject deserves a hub page. The right Tour-Pak setup on a 2026 Road Glide 3 supports posture; the wrong one creates neck tension, passenger crowding, and awkward loading habits. Start with rider triangle preservation. The trunk should not force the passenger so far forward that the rider’s lower back loses natural movement. On a long day, the rider needs room to shift position slightly, especially on a trike where body english is different from a leaning motorcycle. Limiting that movement increases fatigue even when the seat itself is comfortable.
Passenger ergonomics depend on three numbers: seat depth, backrest angle, and shoulder clearance relative to the trunk profile. A passenger backrest that is too upright can feel supportive for ten minutes and tiring after an hour because it pushes the pelvis forward. A slight recline, combined with enough seat depth, usually feels better. Shoulder clearance matters when the trunk includes armrest-style pads, speaker pods, or a broad wraparound profile. Larger passengers notice this immediately. So do riders wearing cold-weather layers. Do not judge fit with summer T-shirts if your real trips happen in insulated gear.
Usability includes service access. You should still be able to remove the seat, reach battery or fuse areas as required by the model, and clean around the rack without disassembling half the luggage system. Detachable Tour-Pak hardware can be worth the extra cost if your Road Glide 3 alternates between local day rides and full touring duty. The tradeoff is complexity: detachable systems add latch interfaces that must be inspected regularly. Fixed mounts are usually simpler and stiffer. Neither is universally better. The better choice is the one that matches how often you reconfigure the bike.
Performance recipe: weight distribution, stability, and braking expectations
Every luggage decision is also a performance decision. The Road Glide 3 can mask poor packing better than a two-wheeler at parking lot speed, but it will still reveal it on rough pavement, in crosswinds, and under firm braking. Weight placed high and rearward increases the moment acting on the chassis. You feel that as more pronounced fore-aft motion and a slightly busier response over surface changes. The cure is simple and nonnegotiable: heavy low, light high, balanced left to right. If one saddlebag holds tools and the other holds rain gear, compensate intentionally rather than hoping the trike will ignore the difference.
Braking distances are influenced by total mass, tire condition, and surface grip, not just brake hardware. Add a fully packed Tour-Pak, passenger gear, and rack-top cargo and you have meaningfully increased the work the braking system must do. Riders should adjust following distance and brake earlier, especially in wet conditions. Tire pressures should be checked cold and set to the specification for the load condition in the owner literature. I have seen many “handling problems” disappear after correcting load distribution and tire pressure, with no hardware changes at all.
Wind management is another overlooked factor. A taller trunk profile and stacked rack bag can change the air wake behind the rider and passenger. Sometimes that improves comfort by reducing buffeting; sometimes it increases turbulence around helmets. Test one change at a time. Do not mount a new trunk, add a tall luggage bag, install a different windshield, and then guess which part altered the airflow. Methodical setup always wins.
How this hub supports the full Harley-Davidson luggage strategy
This page is the hub for model-specific ergonomics and performance recipes across Harley-Davidson touring fitments. The Road Glide 3 example shows the method you should apply to every related article in the cluster: start with the exact platform, confirm mounting compatibility, measure rider and passenger touchpoints, then pack by weight and access frequency. From here, supporting guides can go deeper into detachable versus fixed Tour-Pak systems, passenger backrest positioning, load-limit calculations, waterproof packing, and trike-specific handling after accessory installation. That internal structure helps owners move from general understanding to exact purchase and setup decisions.
The main benefit of a proper 2026 Road Glide 3 Tour-Pak mounting recipe is confidence. You get luggage capacity that works with the motorcycle instead of fighting it. You protect comfort on long rides, preserve stable road manners, and avoid costly mistakes like misaligned plates, overloaded racks, or cramped passenger geometry. If you are planning to maximize 2027 luggage, measure first, choose trike-correct hardware, install with torque discipline, and test the setup in stages before the big trip. Use this hub as your starting point, then build the rest of your Harley-Davidson touring system with the same recipe-driven approach.
Frequently Asked Questions
1. What makes a 2026 Road Glide 3 Tour-Pak mounting setup different from a standard two-wheel Harley touring install?
The biggest difference is that the 2026 Road Glide 3 has its own packaging, weight distribution, and rear structure considerations that do not behave exactly like a two-wheel touring chassis. A standard bagger install often focuses on whether the Tour-Pak physically bolts on and clears the seat. On the Road Glide 3, the better question is whether the entire mounting recipe supports the trike’s real-world use without compromising passenger comfort, rear access, handling feel, or long-distance practicality.
Because this is a three-wheeled platform, the rear section has a different visual and structural relationship to the bodywork, trunk area, and rider-passenger space. That means rack choice, bracket geometry, spacer height, backrest position, and cargo weight all matter more than many riders expect. A Tour-Pak that technically fits can still create problems if it sits too far forward, crowds the passenger, blocks service points, or places luggage mass in a way that affects ride balance.
That is why a true mounting recipe is model-specific rather than just a shopping list. It starts with chassis constraints, then works outward: verify what rack and docking hardware are designed for the Road Glide 3, confirm clearances around bodywork and seat lines, check the load rating of every component in the stack, and make sure the final position preserves usable space. When riders skip that sequence and simply adapt parts from another touring model, the result is often an install that looks acceptable in the garage but becomes inconvenient on the road.
In short, the Road Glide 3 install is different because success is measured by more than bolt pattern compatibility. The right setup has to integrate luggage from the newer accessory ecosystem while still respecting how the trike carries weight, how the passenger sits, and how the owner services and uses the bike over time.
2. Can I use 2027 luggage and Tour-Pak-related accessories on a 2026 Road Glide 3?
In many cases, yes, but only after you confirm that “fits” means more than cosmetic similarity or matching brand labels. The phrase “2027 luggage” usually refers to parts from a newer accessory ecosystem, and those parts may share styling language, latch types, liners, lighting options, or storage features with earlier models. However, that does not guarantee direct compatibility at the rack, docking, hinge, latch, or mounting interface level.
The safest approach is to separate the system into layers. First, determine whether the Tour-Pak shell or luggage case itself can be mounted using hardware approved for the 2026 Road Glide 3. Second, verify that the rack or platform supporting that case is engineered for the trike chassis. Third, check whether any related accessories such as back pads, liners, organizer trays, tether hardware, speakers, lighting harnesses, or quick-detach components require generation-specific adapters. Small differences in hardware spacing, lid geometry, wiring connectors, or support bracket shape can create headaches if they are discovered after installation begins.
You also want to think beyond physical attachment. Newer luggage systems may be larger, heavier, or designed around revised cargo assumptions. If the 2027 accessory adds storage volume but also adds more rearward mass, the mount and rack need to be rated accordingly. The Road Glide 3 can benefit from increased luggage capacity, but only when the mounting recipe accounts for total loaded weight, not just the empty case. This matters for both durability and ride quality.
The practical answer is that 2027 accessories can often be integrated successfully, but they need to be matched deliberately. Confirm fitment at the case level, rack level, docking level, and wiring level. If one of those layers is treated as “close enough,” the project can quickly turn from a clean upgrade into a compromise that affects function, appearance, or safety.
3. How do I choose the correct rack and docking geometry for a Road Glide 3 Tour-Pak installation?
Choosing the right rack and docking geometry is the core of the entire recipe. The goal is not simply to get the Tour-Pak attached; it is to place it in the correct position relative to the seat, passenger back support area, bodywork, and rear mass center. A well-chosen rack creates enough room for the passenger, keeps the luggage stable, and avoids awkward overhang or interference with access points. A poor rack choice can make the case sit too high, too far back, or too close to the seat, even if every bolt lines up properly.
Start by identifying hardware specifically intended for the 2026 Road Glide 3 platform. That means looking for rack systems, support plates, and docking arrangements designed around the trike’s dimensions and intended load path. Pay close attention to where the rack places the Tour-Pak front edge, how it supports the floor of the case, and whether the mounting points distribute weight evenly. Docking geometry should support both the static weight of the case and the dynamic load created by bumps, cornering forces, and packed travel gear.
Next, evaluate passenger ergonomics. A setup that looks sleek in photos may be unusable if the back pad lands too close to the passenger or at the wrong angle. The best geometry preserves real seating room while keeping the Tour-Pak close enough to avoid excessive rear leverage. In other words, you usually do not want the case jammed forward, but you also do not want it cantilevered too far behind the axle line simply to gain legroom. The right recipe balances both needs.
Serviceability is another major filter. Before finalizing any rack, confirm that it does not create unnecessary obstacles when you need to access the seat area, wiring routes, fasteners, or surrounding components. Touring upgrades should improve usability, not make routine maintenance harder. If quick-detach hardware is part of the plan, make sure it is robust, correctly rated, and compatible with the case size and intended payload.
Ultimately, the correct rack and docking geometry is the one that fits the Road Glide 3 as a system. It should support the chosen Tour-Pak securely, maintain comfort, respect weight limits, and leave the bike practical to own. That is why geometry is not a minor detail in this project; it is the difference between a durable touring solution and an expensive mismatch.
4. Why do load ratings matter so much when adding a Tour-Pak and more luggage capacity to a Road Glide 3?
Load ratings matter because luggage capacity is only useful when the supporting hardware, chassis, and mounting points can manage that weight consistently and safely. Riders often focus on the added storage volume of a Tour-Pak, but the more important number is the total load the system will carry once the case is packed. The empty Tour-Pak, mounting plate, rack, backrest pad, accessories, and contents all add up, and dynamic loads on the road can be significantly higher than the bike’s stationary appearance suggests.
On a Road Glide 3, this becomes especially important because the rear-mounted storage affects leverage and weight distribution. A heavily packed Tour-Pak positioned higher or farther rearward can change how the trike responds to bumps, acceleration, and braking. Even if the chassis remains stable, overloaded mounting hardware may flex more, wear faster, or place stress on fasteners and support structures not intended for that level of use. Over time, that can lead to looseness, rattling, hardware fatigue, or damaged mounting surfaces.
That is why the correct process is to verify every rating in the chain. Check the Tour-Pak or luggage case rating, the rack rating, the docking hardware rating, and any platform or adapter plate rating involved in the install. Then compare those numbers against realistic touring use, not idealized empty-case conditions. If you travel with rain gear, electronics, tools, passenger items, and travel essentials, calculate with those real loads in mind. The safest setup is one with margin, not one that merely survives under perfect conditions.
Load ratings also protect comfort and practicality. An overloaded case may force you to pack too much high and rearward, which can reduce the refined feel you want from a long-distance touring trike. Keeping the Tour-Pak within rating encourages smarter packing and better placement of heavier items lower and more centrally when possible. In that sense, ratings are not just legal or engineering numbers; they are a roadmap for preserving the Road Glide 3’s touring manners.
If your goal is to maximize 2027 luggage options on a 2026 machine, respecting ratings is what turns capacity into confidence. More storage is only an upgrade when the entire system is engineered and used within its intended limits.
5. How can I maximize luggage on a 2026 Road Glide 3 without sacrificing passenger space, handling balance, or service access?
The smartest way to maximize luggage is to treat the Tour-Pak as one part of an overall packing and mounting strategy instead of the single solution to every storage need. Start with the basics: choose a Road Glide 3-compatible rack and Tour-Pak position that preserves passenger comfort first. If the passenger back pad location is cramped, the bike may gain cargo space on paper but lose real touring value. A good recipe creates useful storage while keeping the passenger seated naturally and securely.
Next, think





