
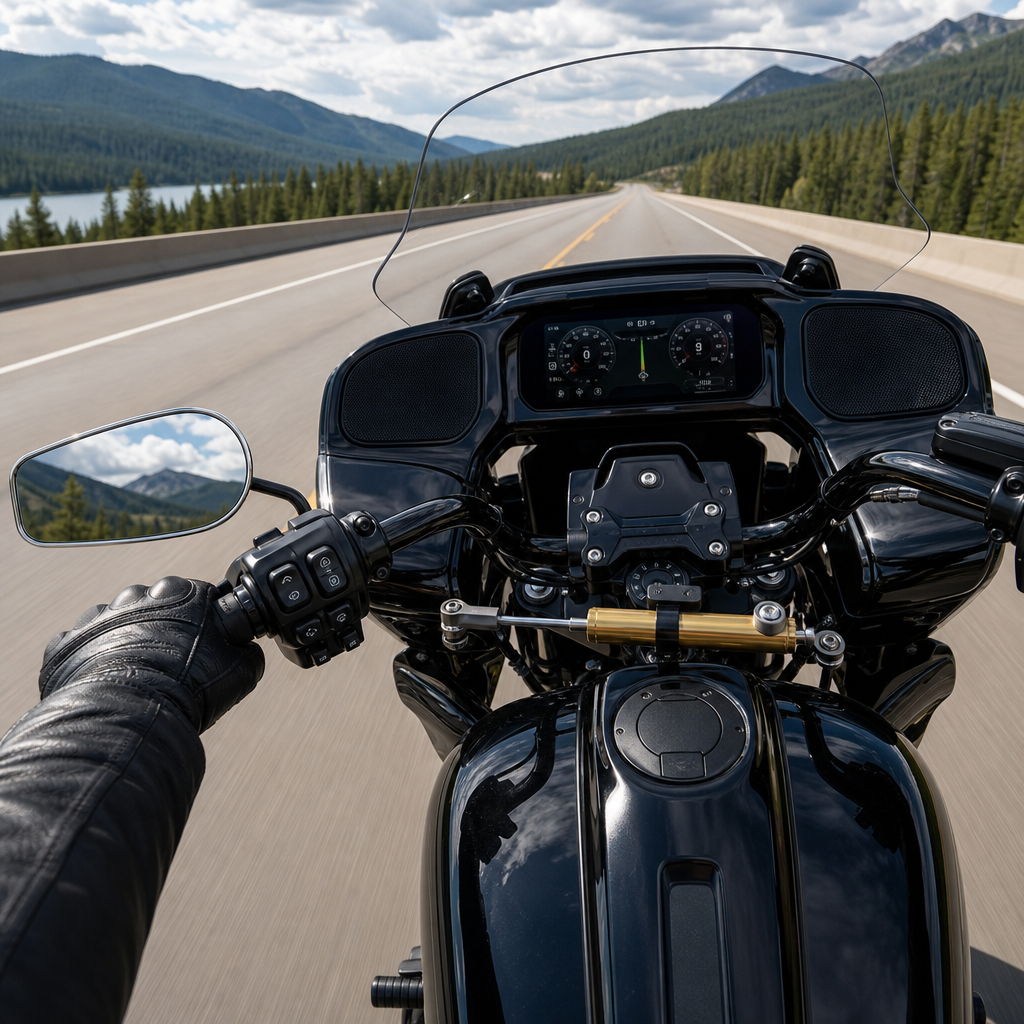
The 2026 Road Glide 3 Steering Damper Recipe starts with a simple goal: reduce unwanted handlebar movement at highway speeds without dulling the three-wheeled confidence that makes Harley-Davidson’s frame-mounted-fairing touring trike so easy to ride. In practical terms, a steering damper is a hydraulic device that resists sudden steering inputs, especially the quick oscillations riders describe as twitchiness, headshake, or nervous tracking over grooves, bridge joints, and crosswinds. A recipe, in this context, is not a single bolt-on part. It is a tested combination of steering control, suspension setup, tire pressure, alignment verification, rider ergonomics, luggage balance, and road-speed evaluation. I approach it that way because I have seen too many owners install one premium component, expect a miracle, and then discover the trike still wanders because the front tire is overinflated, the rear shocks are mismatched to load, or the bars put the rider in a tense posture.
That broader view matters even more on the 2026 Road Glide 3 because this machine sits at the intersection of touring comfort, trike geometry, and modern Harley-Davidson refinement. Unlike a two-wheel bagger, the Road Glide 3 does not lean through corners, so steering loads, rider inputs, and pavement reactions are transmitted differently through the front end. Highway stability depends on maintaining predictable steering effort while preventing rapid deflection from road imperfections and aerodynamic disturbances. Riders searching for a 2026 Road Glide 3 steering damper recipe usually want answers to a few direct questions: will a damper help at 70 to 85 mph, what setup changes should come first, which supporting modifications make the biggest difference, and how do you improve stability without creating heavy low-speed steering? This article answers those questions and serves as the central guide to model-specific ergonomics and performance recipes across the Harley-Davidson lineup, with the Road Glide 3 as the working example.
Why Highway Stability Changes on a Road Glide 3
Highway stability on a touring trike is shaped by geometry, mass distribution, tire behavior, and rider input. The Road Glide 3 carries substantial weight, uses a frame-mounted sharknose fairing, and places a wide rear track behind a single steering wheel up front. That configuration can feel planted in clean air on smooth pavement, yet react more sharply when the front tire encounters rain grooves, wheel ruts, patchwork asphalt, or truck bow waves. The reason is straightforward: one front contact patch is doing all the directional work. When that patch is lightly loaded because of poor cargo balance, excessive rear preload, or front tire pressure that is too high for conditions, the bars can feel busy. A steering damper helps by slowing abrupt movements, but it cannot correct the underlying load path.
Rider ergonomics also plays a bigger role than many owners expect. If the bars are rotated too far back, the wrists angle inward and the elbows lock. That posture causes overcorrection, especially in gusty wind. On test rides, I look for relaxed shoulders, a slight bend in the elbows, and a grip light enough that the rider could wiggle fingers at speed. If that posture is not possible with the current handlebar, seat, and floorboard relationship, any stability upgrade is incomplete. This is why a true model-specific performance recipe must combine hardware with fitment and setup.
The Core Steering Damper Recipe
The most effective 2026 Road Glide 3 steering damper recipe follows a fixed order. First, verify tire condition, age, and pressure with an accurate gauge. Second, inspect steering head bearings, front suspension bushings, axle torque, and rear suspension settings. Third, confirm alignment and wheel condition. Fourth, establish rider sag and cargo load distribution. Only then should you add a steering damper and tune around it. Doing the steps in reverse often masks a problem instead of solving it.
The steering damper itself should be chosen for consistent hydraulic control, corrosion resistance, and a mount engineered specifically for the trike’s front end packaging. Linear dampers are the most common format because they are compact and predictable. Adjustable units are preferable for touring use because they let you increase resistance for long interstate days with a trunk full of gear, then back it off if parking-lot steering feels unnecessarily heavy. In practice, the sweet spot is usually moderate damping: enough to calm rapid bar flicks from pavement seams, not so much that the trike resists deliberate lane changes. If you feel the bars returning lazily after a turn input, damping is probably too high.
| Setup Area | What to Check | Target Result |
|---|---|---|
| Front tire | Correct spec, even wear, accurate pressure | Stable contact patch and reduced tramlining |
| Rear suspension | Preload matched to rider, passenger, cargo | Balanced front loading at highway speed |
| Steering hardware | Bearings, fasteners, fork alignment | No play, bind, or induced wobble |
| Damper setting | Start low, increase incrementally | Less twitch without heavy steering |
| Ergonomics | Bar reach, seat support, elbow bend | Relaxed inputs and fewer corrections |
| Load management | Trunk weight, side-to-side balance | Predictable tracking in wind and sweepers |
That sequence reflects real workshop experience. I have watched riders chase instability with expensive parts when a ten-minute pressure correction and a preload adjustment delivered most of the improvement. A damper is valuable, but it is the final amplifier of a correct setup, not the substitute for one.
Suspension, Tires, and Alignment: The Hidden Stability Multipliers
Suspension setup is the most underappreciated part of any Harley-Davidson handling recipe. On the Road Glide 3, rear shock preload affects how much weight remains on the front wheel. Too much preload for the actual load raises the rear attitude and can make the front feel skittish. Too little can produce wallow and delayed response. The right setting keeps the chassis neutral and preserves steering authority. If the trike is used in multiple configurations, solo one day and two-up with luggage the next, record preload positions and tire pressures for each use case. That habit turns guesswork into repeatable tuning.
Tires deserve equal attention. Tread pattern, carcass stiffness, and wear profile all influence tracking. A front tire with cupping or a sharpened center from long highway miles can make the bars communicate every groove in the pavement. Replacing a worn but still legal tire often transforms stability more than riders expect. For rear tires, mismatch in brand, construction, or wear side to side can alter how the trike reacts to crowned roads. Sticking with known, load-appropriate touring tires is the conservative and effective choice. Use the motorcycle manufacturer’s baseline recommendations and adjust only with a clear reason, measured changes, and testing.
Alignment is non-negotiable. If the front wheel is not properly aligned relative to the rear track, the rider may unconsciously steer against a constant pull. That creates fatigue and amplifies the sense of instability at speed. Dealers and specialty trike shops use alignment tools that can detect issues invisible to the eye. If the machine has hit a pothole hard, worn tires unevenly, or always needed bar pressure to go straight, alignment should move to the top of the checklist.
Ergonomics Recipes That Improve Performance
Model-specific ergonomics and performance recipes exist because fit changes function. On a Road Glide 3, the wrong handlebar bend can create more instability than a missing accessory. If your hands sit too high or too close, your shoulders rise and tension enters the steering. If the reach is too long, you brace on the bars instead of supporting your torso with the core and seat. Either condition increases unwanted input. A touring seat with better lumbar support can reduce the tendency to hang on at speed. Floorboard position and windshield height also matter because rider fatigue and wind buffeting translate directly into steering corrections.
This is where the Road Glide 3 hub concept becomes useful for Harley-Davidson owners. The same method used here can be adapted into separate recipes for bar reach, seat height, wind management, passenger comfort, and suspension bias across Street Glide, Road Glide, Tri Glide Ultra, CVO touring models, and performance baggers. The principles remain consistent: put the rider in a neutral posture, manage airflow, keep chassis attitude balanced, and then layer in parts that refine the result. The biggest mistake is treating comfort upgrades and performance upgrades as separate categories. On a touring Harley, they are usually the same system viewed from different angles.
Testing the Setup Safely and Logically
Once the steering damper and supporting adjustments are installed, evaluate the setup in stages. Start with low-speed steering in a large parking lot to confirm full lock clearance, natural self-centering, and no hydraulic binding. Move next to a 45 to 55 mph secondary road with normal pavement seams. Finally, test on a familiar highway section in light traffic and steady weather. Make only one change at a time. If you increase damper resistance and tire pressure together, you will not know which variable improved or harmed the result.
Use the same route when possible. Repeatability is what separates useful tuning from anecdotal impressions. Note steering effort entering sweepers, response to expansion joints, sensitivity to truck wake, and how much bar input is needed to hold lane position. Also pay attention to rider fatigue after thirty to sixty minutes. Many setups feel acceptable for ten minutes and tiring after an hour. For touring riders, endurance is part of stability. A machine that tracks straight but demands constant muscle is not truly optimized.
There are limitations to what a steering damper can do. It will not fix worn steering head bearings, bent components, poor tires, or aerodynamic problems caused by poorly mounted accessories. It also will not turn a trike into a sport motorcycle. The goal is calmer, more confidence-inspiring highway behavior, not a total change in platform character. When owners understand that distinction, satisfaction is much higher because expectations match engineering reality.
How This Hub Connects to the Wider Harley-Davidson Recipe Library
As a sub-pillar hub under Harley-Davidson, this page should guide readers toward a broader library of model-specific ergonomics and performance recipes. The Road Glide 3 steering damper recipe is one of several high-intent topics owners search when dialing in touring comfort and control. Closely related articles should cover handlebar fit for shorter and taller riders, seat and backrest combinations for long-distance support, windshield selection to reduce buffeting, rear shock tuning for two-up loads, front tire choices for groove resistance, and cargo packing methods that preserve balance. Each article can link back to this hub because the same diagnostic framework applies across them.
That internal structure is useful for readers because motorcycle setup problems are rarely isolated. A rider researching highway-speed stability often also needs guidance on wind management, suspension preload, and bar ergonomics. Bringing those topics together creates a practical roadmap instead of a collection of disconnected tips. For Harley-Davidson owners, especially those new to trikes, that integrated approach shortens the path from frustration to a machine that feels composed, predictable, and comfortable on long interstate runs.
The key takeaway is clear: the best 2026 Road Glide 3 steering damper recipe is a system, not a single part number. Begin with tire condition and pressure, confirm alignment and steering hardware, set suspension for real load, improve rider posture, and then add an adjustable damper to control sharp deflections. That sequence produces the greatest gain in highway stability because it addresses root causes first and fine-tunes behavior second. Riders who follow it usually report less twitch over grooves, fewer corrections in crosswinds, and lower fatigue after hours in the saddle.
Just as important, this recipe shows how ergonomics and performance work together across the Harley-Davidson range. A stable trike is easier to control because the chassis is balanced, but also because the rider is supported correctly and not feeding tension into the bars. That idea applies to every model-specific setup guide linked from this hub. Whether the next step is seat fit, handlebar reach, tire selection, or shock tuning, use the same disciplined process: inspect, measure, adjust, test, and document results. If you want your Road Glide 3 to feel calmer and more confident at highway speeds, start with this recipe and build the rest of your touring setup around it.
Frequently Asked Questions
What does a steering damper actually do on a 2026 Road Glide 3, and why would a rider want one?
A steering damper is a hydraulic control device that slows sudden, unwanted steering movement without making the front end feel heavy or unresponsive. On a 2026 Road Glide 3, its job is not to “lock down” the handlebars or hide serious chassis problems. Instead, it adds measured resistance to quick oscillations that can show up at highway speeds, especially when the trike encounters bridge joints, rain grooves, pavement seams, crosswinds, turbulent air from passing trucks, or rough expansion cracks. Riders often describe these moments as twitchiness, light headshake, wandering, or nervous tracking.
Because the Road Glide 3 uses a frame-mounted fairing and three-wheel layout, it already offers a very different feel from a two-wheeled touring bike. It is naturally more confidence-inspiring at low speed and steady in many conditions, but that does not mean the steering is immune to fast inputs from imperfect roads or wind pressure. A properly selected and tuned steering damper helps calm those sudden reactions so the rider spends less energy making constant micro-corrections. The result is usually a more planted feel at interstate speeds, cleaner lane tracking, and less fatigue on long rides.
The key point is balance. A good steering damper recipe improves stability while preserving the Road Glide 3’s easy, predictable steering character. Riders should still feel connected to the road and able to steer accurately in curves, traffic, and parking-lot situations. When set up correctly, the damper does not remove feedback; it filters out the sharp, unnecessary movements that can make a trike feel unsettled at speed.
Will installing a steering damper fix all high-speed handling issues on a Road Glide 3?
No, and that is one of the most important things to understand before treating a steering damper as a cure-all. A damper can significantly improve the way a Road Glide 3 reacts to sudden steering disturbances, but it cannot correct worn parts, poor alignment, bad tires, improper tire pressure, loose steering-head components, suspension problems, or loading issues. If the trike already has a mechanical problem, the damper may mask some symptoms temporarily, but it will not solve the root cause.
The smartest approach is to treat the steering damper as one part of a complete stability recipe. That recipe should begin with a thorough inspection of the front end, steering components, tires, and suspension. Tire pressures need to be verified when cold and adjusted to the rider’s load and real-world use. Tire condition matters as much as pressure; cupping, uneven wear, or mismatched tire types can all contribute to wandering and nervous steering. Front-end fasteners, wheel bearings, steering-head bearings, and suspension bushings should also be checked to make sure everything is within specification.
Load placement is another major factor on a touring trike. Luggage, accessories, passenger weight, and added gear can all change the way the Road Glide 3 tracks at speed. If too much weight is positioned poorly, the steering may feel lighter, busier, or less settled. Aerodynamic add-ons such as tall windshields, wind deflectors, trunk racks, and broad accessories can also change how crosswinds affect the bike. In that context, the best steering damper setup is the one installed after the chassis is healthy, the tires are correct, and the suspension is set up properly. Then the damper can do what it is designed to do: refine the ride rather than compensate for neglected maintenance.
How do you choose the right steering damper recipe for highway stability without making the steering feel too stiff?
The right recipe comes down to selecting a quality damper, using a mount designed specifically for the Road Glide 3 chassis geometry, and tuning resistance conservatively. The biggest mistake riders make is assuming more damping is always better. In reality, too much damping can make the steering feel artificially heavy, slow to react, and less natural in low-speed maneuvers. That can reduce comfort and confidence rather than improve it. The goal is controlled stability, not numbness.
For most riders, the best starting point is a damper with adjustable resistance so changes can be made gradually. Begin with a light-to-moderate setting and test the trike in the exact conditions where the problem is most noticeable: interstate cruising, bridge transitions, uneven pavement, and moderate crosswind exposure. If the handlebars still react too sharply, increase damping a little at a time. The ideal setting is usually the lowest amount of damping that noticeably reduces twitchiness while preserving clean turn-in and normal steering feel.
Mounting quality matters just as much as the damper itself. A proper bracket system should keep the unit aligned through its full range of movement, avoid binding, and maintain safe clearance from surrounding parts. Poor mounting geometry can create inconsistent resistance, premature wear, or even limit steering travel. That is why Road Glide 3 owners should use components built for the platform rather than trying to adapt generic parts.
Finally, remember that the recipe is personal. A solo rider on mostly smooth highways may prefer less damping than a rider who regularly carries a passenger, loaded luggage, and rides in gusty open-country conditions. The best setup is the one that matches how the trike is actually used, not the stiffest setting available.
What riding improvements should you realistically expect after adding a steering damper to a 2026 Road Glide 3?
A well-tuned steering damper typically delivers a calmer, more composed feel at speed rather than a dramatic transformation in basic steering behavior. Most riders notice that the handlebars react less abruptly to sharp pavement inputs, and the trike feels more settled when crossing expansion joints, grated bridges, tar snakes, and rutted interstate sections. In windy conditions, the front end may still acknowledge crosswinds, but the corrections usually feel more controlled and less busy.
Another common improvement is reduced rider fatigue. When a trike feels nervous on rough or windy highways, the rider often compensates by gripping the bars harder and making constant small corrections. Over a long day, that can become tiring in the hands, forearms, shoulders, and upper back. By softening sudden steering disturbances, the damper helps the Road Glide 3 track with less drama, which can make long-distance riding more relaxed and less mentally demanding.
That said, expectations should stay realistic. A steering damper will not make the Road Glide 3 feel like a completely different machine, and it will not erase the normal influence of wind, road crown, or pavement texture. You should still expect some feedback from the road, because that is part of how the chassis communicates traction and surface changes. What should change is the sharpness and frequency of those unwanted steering reactions. In simple terms, the trike should feel calmer, not disconnected.
Is a steering damper installation something most Road Glide 3 owners can handle themselves, or is professional setup better?
That depends on the rider’s mechanical experience, tool quality, and willingness to follow model-specific instructions carefully. Many owners with solid garage skills can install a steering damper kit successfully if the kit is engineered for the Road Glide 3 and includes clear hardware, torque specifications, and mounting guidance. The work usually requires attention to bracket alignment, fastener torque, steering travel checks, and confirmation that the damper moves smoothly without interference anywhere in the steering range.
However, even when installation is physically straightforward, correct setup is what separates a useful upgrade from a disappointing one. The damper must be centered properly, mounted without side load or bind, and adjusted so that resistance is even and predictable. After installation, the trike should be checked for full lock-to-lock steering movement, clearance around the fairing and surrounding components, and any signs that cables, lines, or nearby parts could be affected. A careful road test is essential, starting at low speeds before moving to highway conditions.
Professional installation is often the better choice for riders who want the highest confidence level, especially if the trike already shows handling quirks that may involve tires, alignment, or suspension setup. A qualified technician can evaluate the complete front-end system, confirm there are no underlying mechanical causes for instability, and dial in the damper as part of a broader handling package. For many owners, that expertise is worth it because the real objective is not just bolting on a part, but achieving a stable, predictable Road Glide 3 at highway speeds without compromising the easy steering feel that makes the platform so enjoyable.





