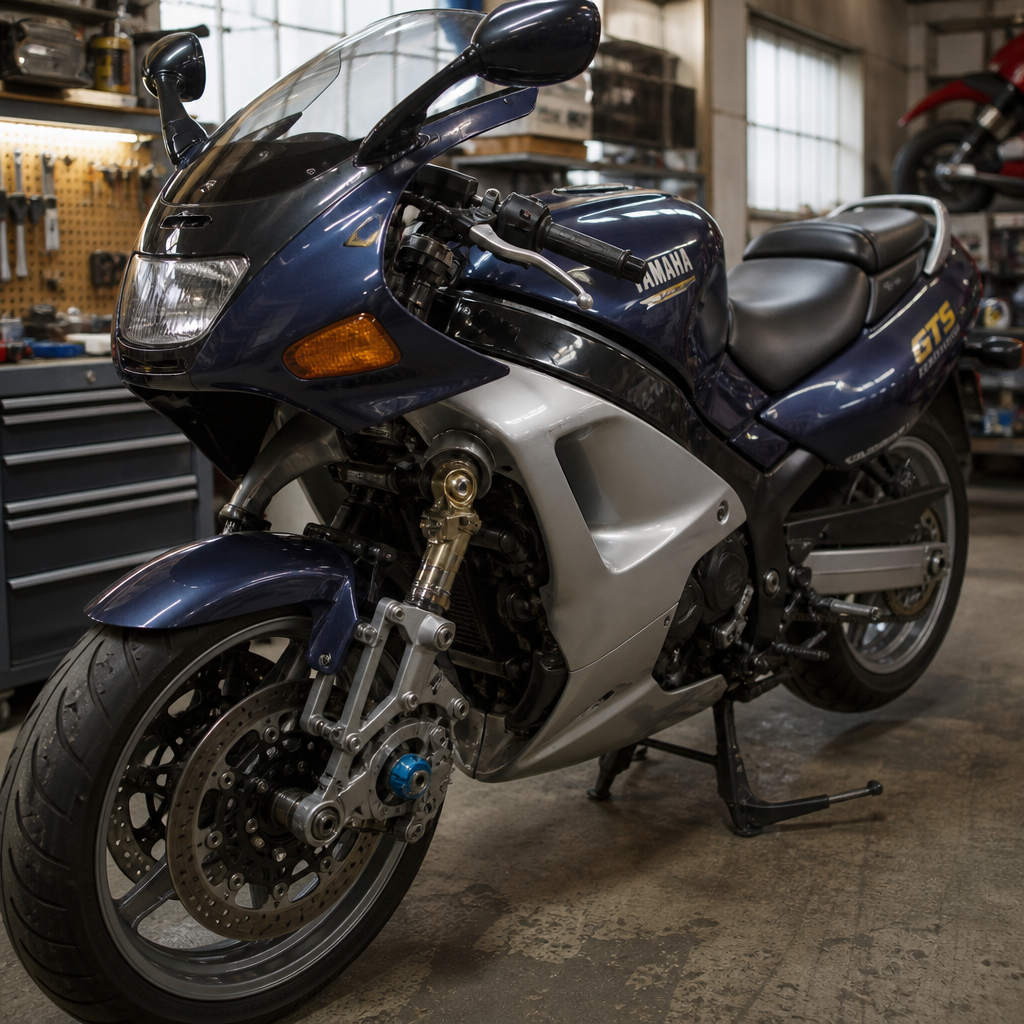
The Yamaha GTS1000 remains one of the most technically ambitious metric classics ever sold, and in 2026 its defining challenge is no longer understanding why the bike mattered, but how to service the RADD hub-center steering correctly while preserving reliability, originality, and parts availability. For restorers working within the broader world of metric classics from 1970 to 1996, the GTS1000 sits at a useful intersection of innovation and practicality: it is old enough to demand restoration discipline, modern enough to punish guesswork, and rare enough that mistakes become expensive. When I inspect one for recommissioning, I treat it less like a conventional sport tourer and more like a systems-driven engineering project. The frame, front suspension, steering geometry, brakes, EFI, and linked chassis loads all interact in ways familiar forks do not.
RADD stands for Rationally Advanced Design Development, the hub-center steering concept developed by James Parker and adapted by Yamaha for production. Instead of telescopic forks handling steering, suspension, and braking loads together, the GTS1000 separates those functions. A single-sided front swingarm controls wheel movement, the steering upright pivots through bearings, and linkages transmit rider input to the hub assembly. That layout reduces dive under braking and isolates some suspension forces from steering inputs, but it also introduces service points many shops never learned. In 2026, that matters because surviving motorcycles often have deferred maintenance, improvised bearing replacements, aged seals, and alignment errors created by owners accustomed to fork-based diagnostics.
This article serves as a hub for restoration guides covering metric classics built between 1970 and 1996, with the Yamaha GTS1000 used as a detailed case study. The aim is not only to explain how to service the RADD hub-center steering, but to show how a successful restoration encyclopedia should be organized: inspection first, measurements second, parts sourcing third, and only then cosmetic work. For this model, that sequence is essential. A glossy repaint means little if the front swingarm pivot has play, the steering links are not phased correctly, or the wheel bearings have been pressed in without respecting side loading. The GTS1000 rewards methodical work, accurate torque procedures, and careful documentation.
Why focus so heavily on steering service? Because on the GTS1000, front-end condition determines whether the motorcycle feels stable and uniquely refined or vague and untrustworthy. Riders who sample neglected examples often describe heavy steering, odd self-centering, or mid-corner reluctance. In my experience, those symptoms usually come from wear in pivot bearings, dried linkage joints, poor tire selection, or incorrect setup after front wheel removal. The good news is that the design is fundamentally robust. Yamaha built the system with quality castings, large-diameter hardware, and conservative geometry. When restored properly, the bike tracks cleanly, brakes hard with minimal dive, and still demonstrates why the model remains a landmark in chassis design.
What Makes the GTS1000 a Key Hub in Metric Classic Restoration
A hub article in a maintenance and technical encyclopedia should connect readers to recurring restoration themes, and the GTS1000 touches nearly all of them. It raises questions about orphan-model support, low-volume parts sourcing, service manual literacy, chassis measurement, and balancing originality against sensible upgrades. Those same issues apply across many metric classics, whether the project is a Honda CBX, Kawasaki Z1R, Suzuki GSX-R750, or Yamaha FJ1200. The difference is that the GTS1000 compresses those lessons into one machine. If a restorer learns to evaluate structural wear, identify model-specific consumables, and build a service plan around scarce components on this Yamaha, that discipline transfers well to any serious 1970–1996 restoration.
The model also demonstrates why restoration is not the same as repair. Repair gets a machine running; restoration returns systems to a known baseline and documents what was changed. On GTS1000 projects, I begin by separating the motorcycle into five streams: chassis, steering and suspension, braking, electrical and EFI, and cosmetic preservation. Each stream gets its own inspection sheet. This avoids a common failure where owners rebuild the engine or repaint bodywork before discovering hidden wear in the front suspension links or corrosion around fasteners unique to the steering upright. Because parts can take months to source, sequencing is as important as mechanical ability.
As a sub-pillar for restoration guides on metric classics from 1970 to 1996, this topic should also point readers toward adjacent work. A full GTS1000 restoration naturally links to front brake rebuild procedures, wheel and tire fitment research, EFI troubleshooting, cooling system renewal, and torque-spec verification. That internal structure matters because classic motorcycle restoration is cumulative. The front steering assembly cannot be judged accurately if the tire profile is wrong, the rear shock is dead, or the brakes drag. A useful encyclopedia page therefore frames the RADD service not as an isolated curiosity, but as one chapter within a complete recommissioning standard for rare metric motorcycles.
How the RADD Hub-Center Steering System Works
The RADD system on the GTS1000 separates steering from suspension movement. A conventional fork combines springing, damping, and steering pivoting in two sliding tubes. On the Yamaha, the front wheel is carried by a single-sided swingarm attached to the chassis through a pivot. Suspension travel is controlled by linkage and shock components, while steering input is transferred through rods and bellcranks to an upright at the hub. The steering axis is therefore defined by the geometry of the hub carrier and its bearings rather than by fork rake alone. Under braking, this arrangement sharply limits fork dive because the suspension path and brake reaction are managed through different structural routes.
In plain terms, the wheel can move up and down without the same twisting and sliding loads a fork experiences. That gives two benefits when the system is healthy: steering feel remains more consistent during braking, and front-end stiffness can be very high. The tradeoff is complexity. There are more bearings, more machined interfaces, and more opportunities for assembly errors. A fork service on a conventional sport tourer might involve bushings, seals, oil, and alignment at the triple clamps. A GTS1000 service requires attention to pivot preload, steering link play, hub bearings, brake reaction forces, and exact fastener condition. If one element is loose or dry, the rider often feels it immediately.
Another nuance restorers should understand is that unusual does not mean fragile. The front end is durable when lubricated, aligned, and torqued to specification. Problems arise when mechanics unfamiliar with hub-center designs substitute general assumptions for model-specific procedure. I have seen wheel removals done with the machine unsupported correctly, spacers reinstalled in the wrong sequence, and bearings hammered in as if they belonged to a small commuter fork assembly. The result is predictable: notchiness, steering drag, and premature wear. Proper service begins with the Yamaha workshop manual, a parts fiche, and a habit of measuring every removed component instead of trusting appearance alone.
Inspection Checklist Before Disassembly
Before turning a single fastener, document the motorcycle as found. Measure static ride height front and rear, record tire sizes and manufacture dates, check steering sweep lock to lock, and note whether braking causes pulsing or chassis deflection. On a GTS1000, a road test—if safe—is invaluable. A healthy example turns neutrally, holds line under trail braking, and does not shake its bars over uneven pavement. If the bike resists initial turn-in, wanders during deceleration, or feels wooden over small bumps, expect wear or stiction in the steering and suspension interfaces. Photograph every side of the front end before disassembly, including hose routing, fastener orientation, and linkage positions.
Next, elevate the motorcycle securely so the front wheel hangs free and the chassis remains stable. Check wheel bearing play, then inspect the steering links for any detectable looseness by hand. Verify that all visible pivot hardware matches factory finish and dimensions; mixed fasteners often indicate prior disturbance. On neglected machines, look for dried grease, powdery oxidation around bearing housings, and fretting marks at mounting faces. These signs reveal movement where there should be clamping force. I also inspect the front brake discs for uneven wear because dragging calipers or warped rotors can mimic steering faults during a test ride, sending diagnosis in the wrong direction.
| Inspection point | What to look for | Why it matters |
|---|---|---|
| Front swingarm pivot | Play, rust staining, dry grease | Affects stability, brake behavior, and alignment |
| Steering linkage joints | Free play, binding, damaged boots | Creates vague steering or heavy self-centering |
| Hub carrier bearings | Roughness, notchiness, side load marks | Directly influences steering precision |
| Wheel bearings and spacers | Noise, incorrect assembly order | Can imitate suspension faults |
| Tires | Squared profile, age cracking, wrong spec | Strongly changes steering feel on this chassis |
| Brake system | Rotor runout, caliper drag, old fluid | Braking issues distort front-end diagnosis |
Only after the baseline inspection should disassembly begin. This is the stage where many restorations are saved, because careful notes allow you to separate wear caused by age from faults introduced by previous service. If the machine is highly original, preserve witness marks, factory clips, and any shim stack order exactly as found until the manual confirms orientation. Metric classics are full of parts no longer stocked in every market, and the GTS1000 is no exception. Preservation during teardown is not caution for its own sake; it is the fastest path to a correct rebuild.
Servicing the Front Pivot, Bearings, and Steering Linkages
The heart of RADD service is the front pivot and steering linkage assembly. Once disassembled, clean every component with a residue-free solvent and inspect under bright light. Bearings should rotate smoothly with no notchiness, pitting, or discoloration. Any sign of brinelling, corrosion, or cage damage is reason for replacement. Measure pivot shafts for scoring and out-of-round using a micrometer, not a caliper. On motorcycles of this age, apparent polish can hide wear patterns significant enough to alter preload. Replace seals proactively if they have hardened, because one failed seal can wash out grease and shorten bearing life dramatically.
Steering links deserve the same scrutiny. Ball joints or rod ends must articulate smoothly without slack. If a joint feels dry, gritty, or loose under finger pressure, it will feel worse at speed. I mark left and right orientations before removal and compare center-to-center lengths against manual references or untouched examples. Even minor asymmetry can create off-center bar position or uneven steering lock. Use a medium-strength threadlocker only where specified, and torque fasteners with the suspension loaded as the manual requires. On sophisticated chassis systems, torque values are not clerical details; they define clamping friction, bearing preload, and the way loads travel through the structure.
Lubrication choice matters. Modern high-quality waterproof greases often outperform period products, but compatibility with seals and bearing design must be confirmed first. Do not overpack enclosed bearings blindly; excess grease can trap heat or compromise seal seating. During reassembly, move each link through its full travel before the next component is installed. This isolates sources of bind early. I also verify that brake hose routing does not influence steering effort near full lock. More than one GTS1000 has been misdiagnosed with geometry trouble when the real issue was a line or harness creating drag after incorrect reassembly.
Parts Sourcing, Restoration Standards, and Common Mistakes in 2026
In 2026, sourcing GTS1000 steering parts requires a mix of OEM research, specialist suppliers, used-part vetting, and cross-referencing dimensions for bearings and seals. Yamaha still provides some consumables in certain regions, but restorers should assume that model-specific castings, link components, and cosmetic trim are finite. Build a parts spreadsheet early with OEM numbers, supersessions, bearing dimensions, seal sizes, and known donor compatibility where verified. I rely on factory fiches, owner forums with documented measurements, and bearing houses that can match quality industrial equivalents from SKF, NTN, Koyo, or NSK. Generic low-grade substitutes are false economy on this front end.
Set restoration standards before spending money. A rider-grade recommission should prioritize safety, structural integrity, and correct function: bearings, brakes, tires, hoses, fluids, battery, and EFI baseline first. A show-level restoration may add refinishing of castings, replating hardware, reproduction decals, and cosmetic fasteners, but those should never interrupt mechanical sequencing. Common mistakes are consistent across rare metric classics. Owners powder-coat brackets before checking fit, replace hardware with incorrect flange thickness, install modern tires without considering carcass shape, or ignore the rear shock and then blame the steering. The GTS1000 is especially sensitive to whole-chassis balance, so front-end service must be paired with rear suspension evaluation.
This is why the motorcycle works so well as a hub topic for restoration guides covering 1970–1996 metric classics. It teaches the right habits: verify specifications, preserve evidence during teardown, source by measurement rather than assumption, and test one variable at a time. Those habits apply whether you are rebuilding anti-dive forks on an early 1980s tourer, tuning carburetors on a six-cylinder superbike, or restoring aluminum perimeter chassis bearings on a 1990s homologation machine. The GTS1000 simply makes those lessons impossible to ignore because its engineering is visible, unusual, and unforgiving of shortcuts.
Road Testing and Long-Term Maintenance After Reassembly
After reassembly, road testing should be staged. Begin with a static function check: full steering sweep, brake application, suspension compression, and verification that all fasteners are paint-marked after torque. The first ride should be short and focused on basic behavior under low loads. Check for straight tracking, bar centering, and any brake-induced pull. Then progress to medium-speed turns and firm braking. A sorted GTS1000 feels planted and calm, with little dive and notably stable turn entry. If steering remains heavy, revisit tire condition, linkage free play, and rear ride height before assuming a deeper design fault.
Long-term maintenance is straightforward once the system is restored. Replace brake fluid on schedule, inspect seals and joints annually, and relubricate critical pivots at intervals based on mileage and climate exposure rather than waiting for symptoms. Keep detailed records with dates, torque notes, bearing brands, and measurements. That documentation increases reliability and resale value because future service on rare motorcycles depends on traceable history. For anyone building a serious library of restoration guides for metric classics from 1970 to 1996, the Yamaha GTS1000 proves a final point: advanced engineering does not make a motorcycle unserviceable. It simply demands discipline, precision, and respect for the way the machine was designed. If you are restoring one in 2026, start with the front end, document everything, and build the rest of the project from that solid baseline.
Frequently Asked Questions
What makes the Yamaha GTS1000’s RADD hub-center steering so different from conventional forks, and why does that matter when servicing it in 2026?
The Yamaha GTS1000’s front end is fundamentally different from a telescopic fork because steering, suspension movement, and braking forces are separated rather than combined into one assembly. In a conventional fork, the fork tubes both guide the wheel and absorb suspension loads, while also reacting to braking forces. On the GTS1000, the RADD hub-center steering system uses a single-sided swingarm, a hub carrier, linkages, pivots, and a separate steering mechanism to do those jobs independently. That architecture is exactly why the bike earned its reputation for technical ambition, but it is also why servicing it requires a different mindset than restoring more familiar metric classics.
In practical terms, the biggest service difference is that wear can occur in multiple pivot points, bearings, bushings, rod ends, and linkages that many technicians simply do not encounter on period Japanese motorcycles. Instead of focusing only on seals, stanchions, and fork oil, a correct 2026 service approach means inspecting geometry-related components for play, corrosion, binding, and misalignment. Even minor looseness in the steering linkage or hub carrier pivots can affect feel at the bars, tire wear, braking stability, and rider confidence. Because the system was designed to deliver precise steering behavior, small deviations from specification matter more than owners sometimes assume.
It matters even more in 2026 because most surviving GTS1000s are now long past the point where “basic maintenance” is enough. Age, storage history, infrequent use, and previous owner improvisation all influence the condition of the front end. Some bikes have low mileage but hardened grease and dried seals. Others have been ridden regularly yet serviced by mechanics more familiar with standard fork rebuilds. A good restorer should treat the RADD system as a precision assembly, not a novelty. The goal is not merely to make it move freely, but to preserve original handling character, maintain braking stability, and avoid introducing substitute parts or assembly shortcuts that compromise what made the bike unique in the first place.
Which components of the RADD hub-center steering system should be inspected first during a 2026 service or restoration?
The first priority is a systematic inspection of all wear points and all structural fasteners in the front suspension and steering assembly. Start with the hub carrier pivots, steering linkages, rod ends, bearings, bushings, and the swingarm pivot areas. These are the components most likely to develop either measurable play or stiffness over time, and either condition can degrade steering precision. A proper inspection should also include checking for cracked dust seals, contaminated or dried lubricant, corrosion on exposed hardware, deformation from previous over-tightening, and any signs that the front end has been disassembled and reassembled incorrectly in the past.
Next, evaluate the steering action throughout its full range with the front wheel unloaded and then again under light load. You are looking for notchiness, uneven resistance, free play, or any delay between bar input and hub response. The RADD system should feel precise and mechanically coherent. If the handlebars move but the wheel seems to “catch up,” or if there is a vague dead zone around center, the cause is often in linkage wear or incorrect adjustment rather than anything resembling conventional head bearing trouble. This is one of the most common diagnostic misunderstandings on the GTS1000.
The front suspension damper and shock components also deserve close attention. Even if the geometry-related parts are sound, a tired or leaking front suspension unit can give misleading symptoms that owners may misinterpret as steering faults. Likewise, inspect the wheel bearings, brake mounting points, and tire condition because hub-center systems can magnify the feel of front-end inconsistencies. A squared-off tire, incorrect pressure, or brake drag can distort road manners and send restorers chasing the wrong problem.
Finally, inspect documentation and parts provenance whenever possible. In 2026, many GTS1000s have had isolated repairs over decades, and originality matters both for reliability and for future parts sourcing. If a bike has custom-machined spacers, non-original spherical joints, altered fasteners, or missing shims, that should be treated as a major clue rather than a minor detail. The smartest first inspection is not only mechanical but historical: establish what is still original, what has already been replaced, and whether previous work respected Yamaha specifications.
Are parts for the GTS1000’s RADD steering still available in 2026, and how should owners handle worn or discontinued components?
Parts availability in 2026 is best described as manageable but increasingly selective. Routine service items, general bearings, seals, fluids, brake consumables, and some chassis hardware can still be sourced through specialist suppliers, cross-referencing, or knowledgeable Yamaha parts networks. The challenge comes with model-specific front-end components tied directly to the RADD system: certain linkages, unique carrier-related parts, proprietary brackets, trim-adjacent hardware, and some discontinued original Yamaha items are far less straightforward to find. That means owners should stop thinking in terms of “just order another one later” and start thinking in terms of preservation, refurbishment, and careful inventory management.
When worn parts are discovered, the first decision should be whether the part can be restored to service safely and correctly. Many metal components can be cleaned, measured, refinished, and reused if they remain within specification and show no structural damage. Bearings, seals, and spherical joints are more case-dependent. If an exact replacement exists from an original or high-quality equivalent source, replacement is generally the better path. If a part is truly discontinued, then the standard should be functionally correct, dimensionally verified, and reversible wherever possible. In other words, do not machine or modify rare original components unless there is no sound alternative and the work is being done by someone who fully understands the system.
Owners should also build relationships with GTS1000 specialists, marque forums, and metric classic parts communities. This is one of those motorcycles where shared institutional knowledge matters almost as much as stock on the shelf. A part that appears unavailable through mainstream channels may still exist in a specialist’s inventory, as new old stock in another market, or through a small-batch reproduction run. Conversely, a part that “fits” dimensionally may still be wrong for load rating, articulation range, or long-term durability. The safest approach is to verify every substitute against the original part’s intended role, not merely its appearance or basic measurements.
From a collector and rider standpoint, it is also wise to buy critical spares before they become urgent. If you find correct seals, bearings, hardware kits, or model-specific front-end pieces, it often makes sense to acquire them while they are available. The GTS1000 sits in that narrow zone where it is valuable enough to restore properly but uncommon enough that procrastination can turn a routine service into a months-long parts search. In 2026, smart ownership increasingly means treating parts planning as part of maintenance itself.
How can restorers preserve originality while still making the RADD front end reliable and safe to ride?
The key is to separate cosmetic originality from mechanical correctness and to understand that the best restorations protect both whenever possible. On a Yamaha GTS1000, preserving originality does not mean blindly retaining every aged component. It means retaining original design intent, factory geometry, correct finishes, proper hardware types, and authentic operating behavior while replacing true wear items and degraded safety-critical components as needed. A bike that looks original but has sloppy linkages, dry bearings, and makeshift fasteners is not a faithful restoration. It is simply an unrestored machine wearing original parts.
Begin with a documentation-first process. Photograph the assembly before disassembly, label hardware carefully, note shim locations, preserve original finishes where practical, and consult factory literature for torque values and alignment procedures. The GTS1000 rewards methodical work because seemingly minor assembly details can affect steering feel and long-term durability. If original plating, coatings, or fastener markings can be retained without compromising safety, that is ideal. If replacement is necessary, use parts that match the original specification and appearance as closely as possible.
Reliability comes from precision and restraint. Avoid “upgrades” unless they solve a known problem without altering the character of the bike. The RADD system was engineered as an integrated package, and random modifications can upset steering response or introduce stress into parts that were never intended to compensate for changes elsewhere. Even well-meaning substitutions—such as generic joints, non-standard bolts, or improvised spacers—can create cumulative errors. On a conventional classic, you may get away with a little parts-bin creativity. On a GTS1000 front end, that approach is much harder to justify.
If the bike will be ridden regularly, safety-related renewals should be embraced rather than resisted. Fresh seals, correct-spec bearings, properly serviced dampers, modern rubber where appropriate, and accurately torqued hardware all support originality by preserving the machine’s intended performance. A properly sorted GTS1000 should still feel advanced, composed, and stable today. If it feels strange, vague, heavy, or inconsistent, that is usually a sign that the machine is not expressing its original design properly. In that sense, reliability work is not the enemy of originality; done correctly, it is what allows originality to be experienced