The ultimate motorcycle packing list is not a random checklist of gear; it is a system for carrying shelter, clothing, tools, food, and safety essentials in two panniers without ruining the handling of your bike. For touring and camping, “packing” means balancing volume, weight, weather protection, and daily access. “Two panniers” usually refers to a matched pair of hard cases or soft bags mounted low and wide on either side of the rear wheel, with total capacity often ranging from 50 to 90 liters. “Hub article” matters here because touring and camping is a broad subject: luggage selection, campsite setup, riding apparel, cooking kits, maintenance tools, and trip planning all connect. I have packed bikes for weekend overnights, weeklong backroad loops, and mixed hotel-and-camp tours, and the same truth always holds: efficient packing starts before a single item goes into a bag.
This matters because overpacking creates real problems on the road. A top-heavy motorcycle turns slower, brakes longer, and becomes harder to stabilize in gravel parking lots or off-camber gas stations. Underpacking causes different trouble: cold nights, wet layers, dead batteries, missing tools, and expensive emergency purchases in remote towns. The best motorcycle packing list solves both issues by separating must-have equipment from nice-to-have gear, then assigning every item a fixed place. That approach reduces decision fatigue each morning, speeds camp setup, and keeps the motorcycle predictable in crosswinds and low-speed maneuvers.
Touring and camping also demand tradeoffs that car campers rarely notice. Space is limited, weight capacity is finite, and many common camping items are simply too bulky. A full-size lantern, large folding chair, heavy cast-iron cookware, and multiple pairs of spare shoes may fit in a trunk, but they work against efficient motorcycle travel. Compact, multi-use equipment wins. A down quilt compresses smaller than a rectangular sleeping bag. A titanium pot can serve as both boiler and bowl. Merino base layers dry faster and smell less than cotton. Dry bags and packing cubes turn loose gear into compact modules that slide into panniers without wasting dead space.
If you want to fit everything in two panniers, think in categories, not individual objects. There are six core categories: sleep system, shelter, clothing, cooking and food, tools and repair, and documents and electronics. The goal is to carry one complete solution for each category, not multiple overlapping options. In the sections below, this touring and camping hub covers exactly what to pack, how to distribute weight, how to adapt for weather and trip length, and which mistakes waste the most space. Use it as the master reference for building your own motorcycle packing list and for planning deeper reading across the rest of The Open Road.
Start with Luggage Strategy and Weight Distribution
Before choosing gear, confirm the bike’s payload and luggage setup. Payload is the maximum combined weight of rider, passenger, luggage, accessories, and cargo, and it is usually listed on the frame sticker or in the owner’s manual. Many middleweight touring motorcycles have a payload around 375 to 430 pounds, while large adventure and touring models may allow more. Subtract your body weight, riding gear, crash bars, auxiliary lights, and mounted luggage from that figure before adding camping equipment. This is not paperwork for its own sake. An overloaded rear subframe, underinflated tire, or overloaded rack changes the motorcycle’s steering and can contribute to tire failure.
Pack heavy items low and as close to the bike’s centerline as possible. Tools, spare tubes, stove fuel, and dense food go at the bottom of the panniers. Medium-weight items such as clothing and electronics sit above them. Compressible, light gear such as a puffy jacket or camp pillow fills gaps. Keep left-right balance close; a one- or two-pound difference is usually manageable, but a five-pound imbalance becomes noticeable during low-speed handling. I weigh panniers with a basic luggage scale during trip prep, especially on smaller dual-sport and ADV bikes where every pound is obvious.
Accessibility matters as much as weight. Build three layers of access: roadside essentials, camp essentials, and deep storage. Roadside essentials include rain gloves, visor cleaner, first-aid basics, and tire repair equipment. Camp essentials include shelter, sleep gear, and warm layers needed immediately after arrival. Deep storage includes spare parts, backup cables, and items not needed unless something goes wrong. This system prevents the common mistake of unpacking half the bike in a fuel station just to find a headlamp or chain lube.
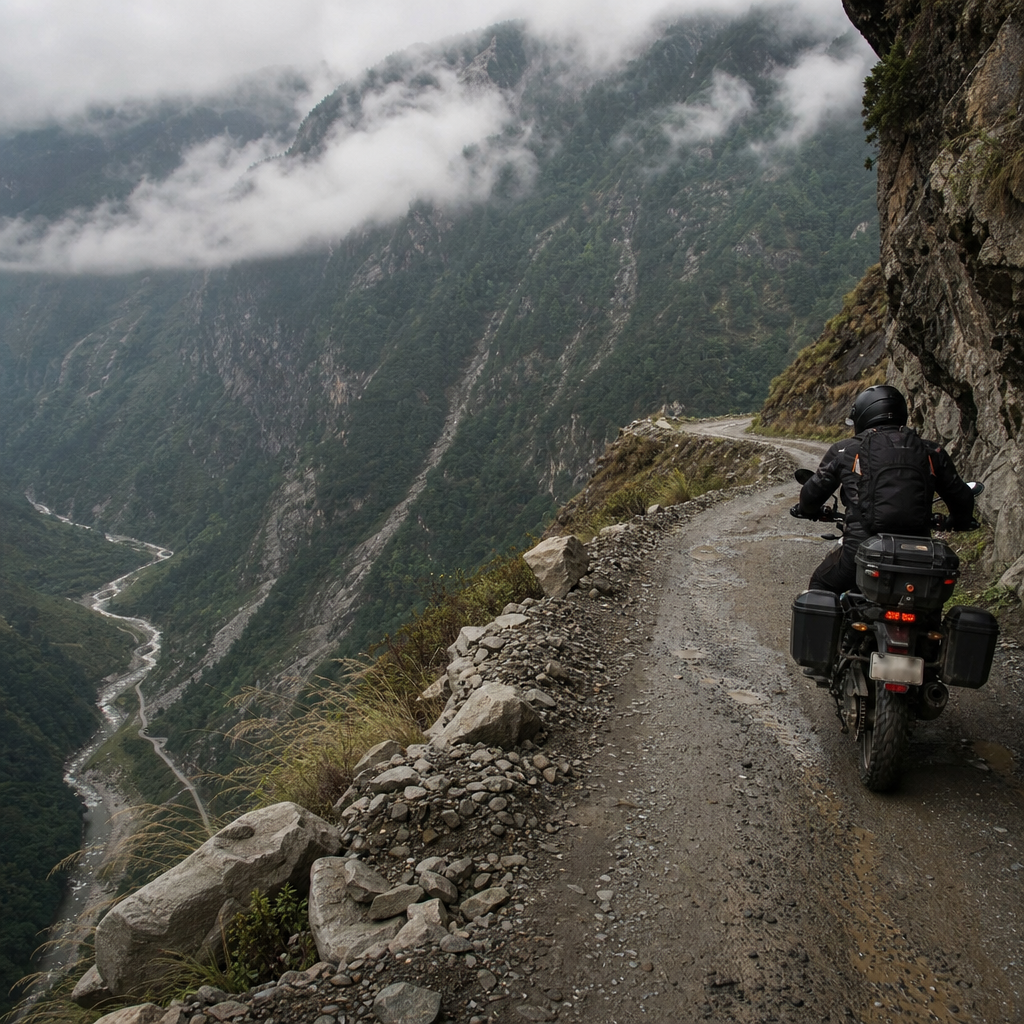
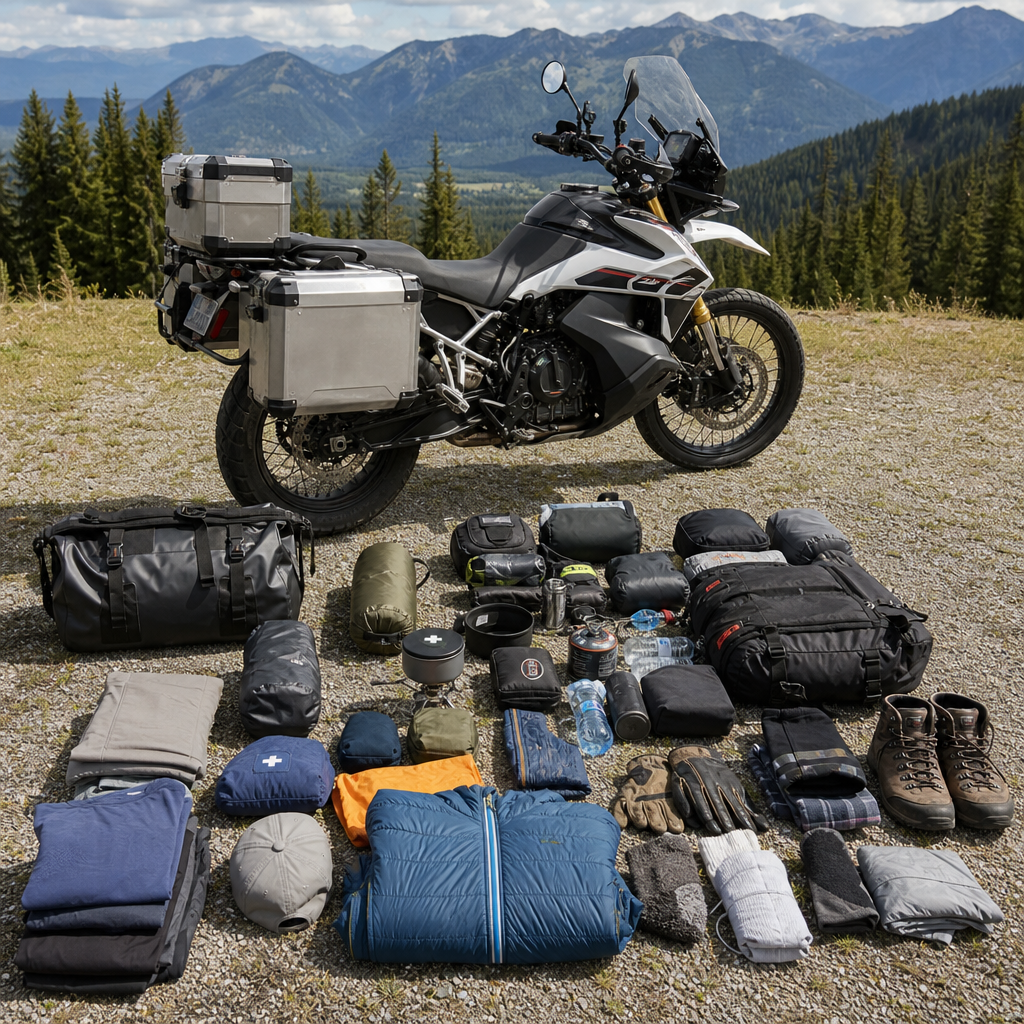
Hard panniers provide better security and shape retention, while soft panniers often save weight and reduce injury risk in a tip-over. Neither is universally better. Aluminum boxes are excellent for paved touring and mixed travel where lockable storage is important. Roll-top soft luggage is often more forgiving on rough roads and usually leaks less when seams and closures are maintained properly. Whichever style you use, line the inside with color-coded dry bags or packing cubes. Internal organization is what makes two panniers truly workable.
The Core Motorcycle Packing List for Touring and Camping
A functional motorcycle packing list starts with one complete sleep and shelter setup. Pack a compact tent with short poles, a footprint if the tent floor is light, a sleeping pad with an R-value matched to the coldest expected night, and a sleeping bag or quilt rated realistically rather than optimistically. Many riders learn this the hard way: a “40-degree” budget sleeping bag can be miserable at 45 degrees if humidity rises and the sleeping pad provides poor insulation. For three-season touring, an inflatable pad in the R-3 to R-5 range and a down or synthetic bag in the 20 to 32 degree range covers most conditions when combined with dry base layers and a hat.
Clothing should follow a layering system built around riding safety and camp comfort. Pack one off-bike base outfit, one spare underwear and sock rotation beyond the days between laundry, a compact insulating layer, and a dedicated sleep layer kept dry at all costs. Cotton is the item I cut first because it dries slowly and gets cold when damp. Merino wool and synthetic fabrics are more useful on multi-day tours. Bring lightweight camp shoes only if they are truly compact; many riders can use waterproof sandals that double as shower shoes and stream-crossing footwear.
Cooking and food should be stripped to basics unless the trip is built around campsite meals. A canister stove such as the MSR PocketRocket or Soto WindMaster, one small pot, a mug, a spoon, a lighter, and simple foods like instant oats, noodles, coffee, and dehydrated meals are enough for most overnights. If towns are frequent, reduce kitchen gear further and buy hot meals. Water storage deserves more attention than cookware. Carry at least one reliable bottle within easy reach and additional collapsible capacity for dry camps. Water is often the heaviest thing you carry, so only haul extra when the route requires it.
Tools and repair gear are mandatory, but duplicates are wasted space. Build your kit around the fasteners actually used on your motorcycle. Include the correct axle tools, tire repair gear for tubed or tubeless wheels, a mini compressor or CO2 inflator, chain lube if applicable, fuses, zip ties, duct tape wrapped around a small core, nitrile gloves, and a compact multibit driver. Add bike-specific spares that commonly fail on your model, such as a clutch cable, valve core, or spare tube that can serve either wheel in an emergency. A generic automotive tool roll is usually too heavy and misses key sizes.
Documents and electronics deserve a waterproof pouch and a charging plan. Carry license, registration, insurance, roadside assistance information, and emergency contact details in one place. On electronics, less is better: phone, charging cable, battery bank, and perhaps a compact wall charger are enough for many riders. If you use a GPS, keep paper notes or offline maps as backup. Battery management is part of packing. I test every cable and charging port before departure because dead electronics are usually caused by worn cords, not dramatic failures.
How to Fit Everything in Two Panniers Without a Top Box
The secret to fitting everything in two panniers is compression plus discipline. Every item must either compress, stack cleanly, or serve more than one purpose. Use roll-top dry bags for the sleep kit and clothing because they squeeze air out efficiently and create brick-shaped bundles that fill panniers better than loose fabric. Tent poles can go along the inside wall of a pannier if they fit, while the tent body and fly are split into separate bags to use irregular spaces more effectively. Splitting the tent also helps if it is wet in the morning, because the damp fly can be isolated from dry sleeping gear.
Assign each pannier a role. One common setup is “camp on one side, road on the other.” The camp pannier holds tent, pad, sleeping bag, camp clothes, and stove. The road pannier holds tools, rain layers, first aid, electronics, toiletries, and daytime food. Another method is “heavy left, light right” if exhaust heat or bag shape reduces usable space on one side. The exact layout matters less than consistency. If every item has a home, repacking at dawn takes minutes instead of half an hour.
| Category | Best Placement | Why It Works |
|---|---|---|
| Tools and repair kit | Bottom of pannier, near bike center | Keeps dense weight low and improves stability |
| Sleeping bag or quilt | Top half in compression dry bag | Lightweight and easy to remove first at camp |
| Tent fly and footprint | Outer edge in separate waterproof sack | Isolates moisture from dry gear |
| Rain gear and warm gloves | Top of road-access pannier | Fast access during weather changes |
| Food and stove | Middle layer, balanced side to side | Moderate weight and simple camp retrieval |
| Documents and electronics | Inner pocket or bright zip pouch | Prevents loss and speeds security checks |
Minimize packaging before the trip. Rebag toiletries into travel bottles, remove cardboard food packaging, and combine first-aid items into one pouch. Choose a microfiber towel, a short toothbrush case, and a small toiletry kit rather than household-size products. A few tiny substitutions can save several liters. The same applies to clothing. Rolled garments look tidy, but tightly packed cubes usually use space better inside square panniers.
Most riders can fit a three-season solo touring and camping kit into two 35-liter panniers if they avoid luxury items. Cold-weather touring, bulky winter gloves, and thick insulated layers make the challenge harder, but still manageable with higher-compression gear. The biggest gains come from upgrading the sleep system and reducing duplicate clothing, not from buying the most expensive luggage.
Seasonal, Trip-Length, and Bike-Specific Adjustments
Your motorcycle packing list should change with climate, mileage, and motorcycle type. For summer weekend touring, you can cut food, layers, and charging gear to a minimum. For shoulder-season mountain travel, add a warmer sleep system, insulated gloves, a neck gaiter, and a more robust rain plan. Temperature swings of 30 degrees in one day are normal in high elevations, and riders often underestimate how fast camp comfort becomes a safety issue when fatigue and wet weather combine.
Trip length affects consumables more than core gear. A three-day trip and a ten-day trip use almost the same shelter, sleep, and tool loadout. What increases is laundry planning, chain maintenance supplies, medication, and battery charging discipline. This is why experienced riders focus on resupply rather than carrying ten days of everything from home. On a long route through populated regions, buy food daily, wash clothes mid-trip, and replace fuel canisters on the road instead of carrying backups.
Bike type changes the packing equation. Sport-touring motorcycles may have excellent hard luggage but limited ground clearance and a tighter rider triangle, so compact camp kits reduce strain at the end of the day. Adventure bikes usually offer better payload and more forgiving suspension but can still become awkward if luggage is packed too high. Smaller displacement bikes demand stricter discipline. On a 300 to 500cc machine, every unnecessary pound shows up during overtakes, steep climbs, and gusty highway stretches. Lighter gear is not about status; it directly improves control and reduces rider fatigue.
Route surface matters too. For mostly paved touring, hard cases and a slightly heavier comfort-oriented loadout are reasonable. For gravel, forest roads, or rougher backcountry travel, secure soft goods tightly, reduce breakable items, and make sure nothing can bounce internally. A loose stove or tool pouch can wear holes in lightweight fabrics surprisingly fast. On washboard roads, poor internal packing is as damaging as poor suspension setup.
Common Packing Mistakes and the Smartest Upgrades
The most common mistake is packing for hypothetical scenarios instead of probable needs. Riders bring extra jeans, full-size camp kitchens, oversized medical kits, and multiple backup gadgets “just in case,” then struggle daily with clutter and excess weight. Another frequent error is failing to test pack before departure. A home driveway rehearsal reveals whether the tent fits, whether the compressor reaches both wheels, and whether rain gear can be accessed while the bike is loaded. I also recommend a local overnight shakedown ride because it exposes practical problems no spreadsheet catches, from hot spots in boots to pannier lids that interfere with refueling.
The smartest upgrades are usually not flashy. A compact down bag, quality dry bags, a tire inflator you trust, and a well-fitted waterproof layer improve every trip. So does a center stand or reliable trail stand solution if your bike needs wheel service on the road. For navigation, offline maps in Gaia GPS, Rever, Calimoto, or Google Maps downloads are more valuable than adding another device with another charging cable. For camp comfort, a better sleeping pad often matters more than a larger tent.
As the touring and camping hub for The Open Road, this guide should help you build a repeatable system: choose compact multi-use gear, pack heavy items low, keep daily essentials accessible, and adjust for season, route, and motorcycle type. Two panniers are enough for most solo riders when the loadout is intentional. Start with the core checklist in this article, test it on a short trip, then refine ruthlessly. The reward is a motorcycle that still rides well and a campsite setup that feels simple instead of chaotic. Build your list, weigh your bags, and get on the road.
Frequently Asked Questions
How do you fit everything you need for touring and camping into just two panniers?
The key is to stop thinking in terms of a long gear checklist and start thinking in terms of packing systems. Two panniers can hold a surprising amount of equipment if every item earns its space and serves a clear purpose. Begin by separating your kit into five categories: shelter, clothing, tools and maintenance, food and cooking, and safety or personal essentials. Then assign each category a realistic volume budget before you put anything on the bike. This prevents bulky low-priority items from crowding out the things you actually need every day.
A practical approach is to use one pannier primarily for camp and overnight gear and the other for denser, more frequently accessed items. Shelter components such as a compact tent, sleeping bag, sleeping pad, and camp sleepwear can be compressed and grouped together because you usually only need them at the start and end of the day. The opposite pannier can handle tools, rain gear, cooking kit, first-aid supplies, electronics, and a tightly edited clothing setup. Packing cubes, dry bags, and small pouches make a major difference because they eliminate dead space and help you stack items efficiently rather than tossing loose gear into the case.
Compression matters, but smart item selection matters more. Choose travel-sized toiletries, quick-drying base layers, compact camp gear, and multi-use clothing. One insulating mid-layer, one off-bike shirt, a few pairs of underwear and socks, and an effective rain layer usually work better than packing separate outfits for every day. For food, carry a minimal supply of dense, easy-to-store items unless you are heading somewhere remote. The more often you can resupply, the less volume you need to dedicate to groceries. In short, fitting everything into two panniers is less about cramming and more about choosing a compact, disciplined kit that matches your route, weather, and riding style.
What is the best way to distribute weight between two panniers without affecting motorcycle handling?
Weight distribution is one of the most important parts of motorcycle packing because even a well-organized load can make the bike feel unstable if the mass sits too high, too far back, or too unevenly side to side. The general rule is simple: keep the heaviest items low, balanced, and as close to the motorcycle’s centerline as possible. That means tools, spare parts, locks, cooking fuel, and dense food should go at the bottom of the panniers, not up high in a top bag or loosely strapped to the rear seat. Lightweight but bulky items such as sleeping bags, camp clothing, and inflatable pads can sit higher because they add volume without dramatically affecting the center of gravity.
Left-to-right balance matters more than many riders expect. If one pannier contains your tool roll, tire repair kit, pump, and stove, and the other only contains clothing and your sleeping gear, the bike may feel subtly uneven in low-speed handling, especially during parking lot maneuvers, off-camber stops, or technical roads. You do not need both panniers to weigh exactly the same, but they should be close enough that the bike remains neutral. A luggage scale is useful here. Weigh each loaded pannier before departure, then shift items until the load is reasonably matched.
It is also important to respect your motorcycle’s luggage and gross vehicle weight limits. Pannier racks, subframes, and rear suspension all have practical limits, and overloading them can compromise braking, tire wear, and stability. After loading, adjust rear preload and, if your bike allows it, damping to account for the added weight. Then test ride the bike at low and moderate speeds before setting off on a long trip. If the steering feels vague, the front end feels light, or the bike wallows in corners, revisit the load placement. Good packing should make the bike feel settled and predictable, not burdened and top-heavy.
What should you pack for the easiest daily access while living out of two panniers?
The most efficient two-pannier setup separates “camp-only” items from “during-the-day” items. This is one of the biggest quality-of-life improvements you can make on tour because it keeps you from unpacking half your luggage every time you need a visor wipe, a snack, or your rain gloves. Daily-access gear should include rain layers, extra gloves, water, snacks, basic first aid, tire pressure gauge, documents, charging cables, sunglasses, sunscreen, a headlamp, and any electronics you are likely to use during breaks. If you cook at lunch stops, your compact stove and utensils may belong in this category as well.
Think in terms of access frequency. The things you reach for in bad weather or short roadside stops should be either at the top of a pannier or grouped in clearly labeled pouches. For example, a “weather kit” pouch with rain gear, neck tube, and glove liners saves time when conditions change quickly. A separate “quick maintenance” pouch for chain lube, rag, and a small multitool is helpful if you are covering long distances. The more intentionally you organize these micro-kits, the less likely you are to scatter gear or waste time digging at fuel stops.
By contrast, camp gear should stay packed until evening. Your sleeping kit, tent components, camp clothes, and nonessential toiletries can live deeper in the pannier because they do not need to be accessed throughout the riding day. This structure also helps with repacking each morning. If everything has a fixed place, you can load the bike consistently, keep the weight balanced, and avoid leaving items behind. Good daily access is not just about convenience; it reduces stress, speeds up transitions, and makes life on the road significantly smoother.
How do you keep your gear dry, organized, and protected in all weather when using two panniers?
Weather protection should be built into your packing method, not treated as an afterthought. Even hard panniers that seem watertight can let in moisture through worn seals, pressure changes, or repeated exposure to heavy rain and dust. Soft panniers need even more attention because water resistance varies widely by brand and closure style. The safest strategy is to create layers of protection. Use waterproof inner dry bags or roll-top stuff sacks for anything that absolutely must stay dry, especially clothing, electronics, sleeping gear, and important documents. That way, even if the outer pannier gets damp inside, your essential kit remains protected.
Organization and protection go hand in hand. Instead of using one large bag full of loose items, divide your load into smaller modules: sleep system, clothing, cooking kit, tools, hygiene, and emergency supplies. This keeps gear from shifting, reduces wear, and makes it much easier to find what you need. It also helps you unpack only what is necessary when you arrive at camp. For example, you can pull out one dry bag with your shelter and sleep system instead of rummaging through mixed gear in fading light or rain.
Protection also includes guarding against vibration, impact, and contamination. Tools should be wrapped or stored in sturdy pouches so they do not damage other equipment. Fuel, chain lube, and toiletries should be isolated in sealed containers or zip bags in case they leak. Electronics benefit from padded sleeves, especially on rough roads. Periodically inspect straps, buckles, pannier mounts, and closures during the trip because repeated vibration can loosen hardware and wear down bag materials over time. In real-world touring, staying dry and organized is not just about comfort. It protects safety-critical items, preserves your gear, and makes your entire packing system more dependable.
What are the biggest packing mistakes riders make when trying to use only two panniers?
The most common mistake is packing for hypothetical situations instead of the actual trip. Riders often bring too many clothes, duplicate tools, oversized toiletries, excessive food, and “just in case” items they never use. This quickly fills pannier space and forces important gear into poor locations, which then affects handling and access. A better approach is to build your list around expected riding conditions, trip length, resupply opportunities, and your motorcycle’s carrying capacity. If you can wash clothes every few days and buy food along the way, there is no reason to carry a week’s worth of bulky extras.
Another major mistake is poor weight placement. Heavy gear packed high or too far rearward makes the bike less stable, especially in crosswinds, slow turns, and emergency braking. Overstuffing one pannier while leaving the other relatively light creates a side-to-side imbalance that can make the bike feel awkward and tiring to manage. Riders also underestimate the importance of suspension setup. Even a carefully packed motorcycle can handle poorly if preload is not adjusted for the added load. Packing and setup should always be treated as part of the same process.
A third mistake is disorganization. If rain gear is buried under your sleeping bag, or your tire repair kit is trapped beneath food and clothes, you are not truly packed for the road. You are simply carrying gear. Efficient motorcycle packing means each item has a logical place based on weight, fragility, and access frequency. Finally, many riders fail to test-pack before departure. A full trial load at home lets you confirm fit, balance, weather protection, and missing essentials without the pressure of a travel day. The riders who succeed with two panniers are not necessarily carrying less random stuff; they