
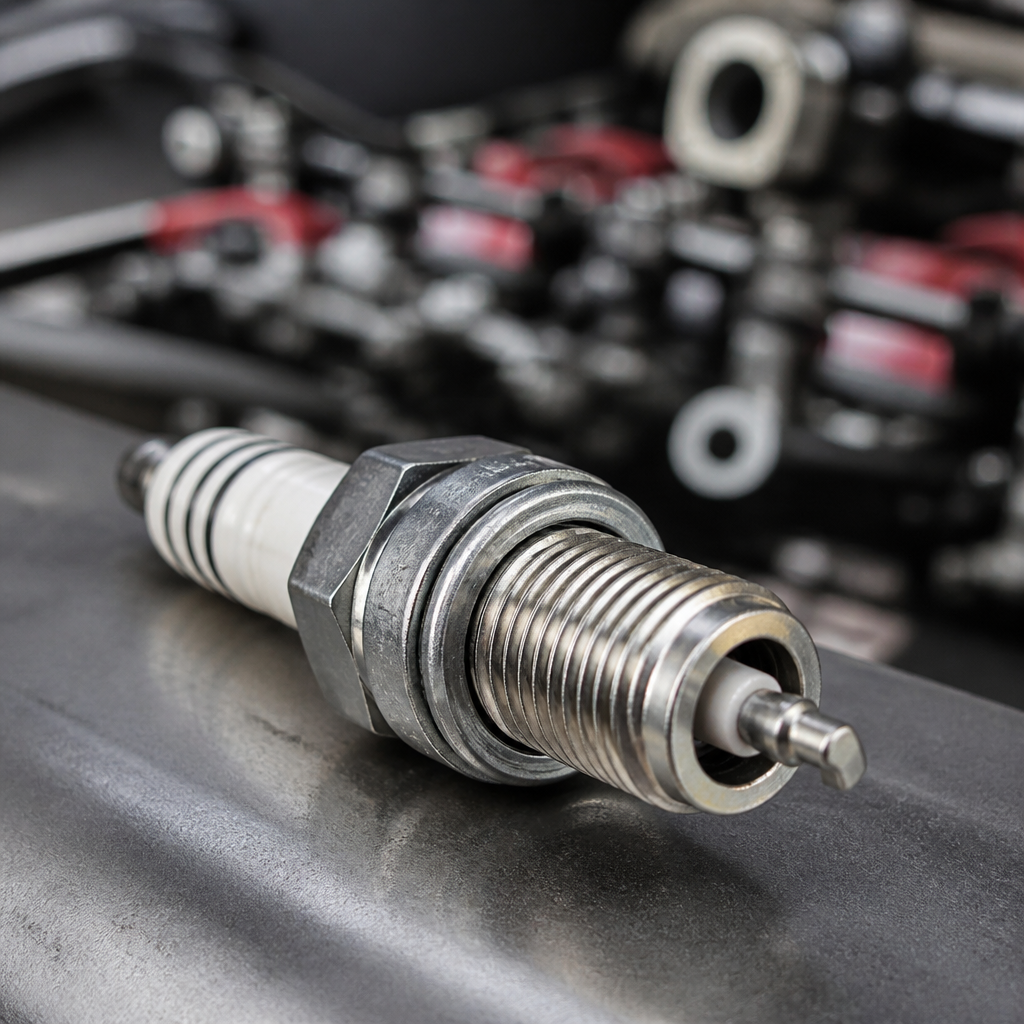
Stage I performance tuning on a Harley-Davidson starts with combustion, and the spark plug recipe you choose in 2026 has a measurable effect on throttle response, idle quality, heat management, and long-term reliability. In practical terms, a spark plug recipe means the full combination of plug heat range, electrode material, gap setting, torque, fuel calibration, intake and exhaust flow, and riding conditions for a specific motorcycle. Riders often reduce plug selection to a part number, but that shortcut misses how modern Harley engines react to lean factory mapping, freer-breathing Stage I hardware, ethanol-blended fuel, heavier touring loads, and rider ergonomics that influence operating temperature. I have tuned Twin Cam, Milwaukee-Eight, and late Evolution setups where the wrong plug masked a fuel problem, and I have also seen a correctly chosen plug clean up cold starts, reduce part-throttle surge, and sharpen passing power. That is why optimizing 2026 combustion is not a cosmetic upgrade. It is a system decision that connects engine performance with model-specific ergonomics and with the broader way the bike is actually used.
This hub article covers that system comprehensively for Harley-Davidson owners who want a dependable Stage I baseline before moving into camshafts, compression changes, or headwork. It focuses on model-specific ergonomics and performance recipes because seat height, fairing protection, rider posture, luggage, passenger weight, wheelbase, and intended speed all change combustion demands. A Road Glide Ultra crossing hot interstate miles at full touring weight asks more from its plugs than a Low Rider S used for short urban blasts. A Pan America Special running mixed terrain sees heat cycles and throttle transitions unlike a Street Glide on premium fuel. Throughout this guide, Stage I refers to the classic first-step package of intake, exhaust, and calibration improvements without internal engine modifications. Combustion refers to the controlled burn in the chamber, where spark timing, mixture quality, cylinder pressure, and flame travel determine how effectively fuel turns into torque. When those variables are aligned, a Harley feels smoother, runs cooler, and responds more predictably from idle to redline.
What a Stage I spark plug recipe includes on a Harley-Davidson
A proper Stage I spark plug recipe includes more than plug brand. It begins with the stock engine family, current modifications, and the rider’s real operating pattern. For most 2026 Harley-Davidson applications, the recipe should specify the plug construction, usually iridium or fine-wire precious metal for durability and stable ignition, the heat range matched to cylinder head temperature and load, the gap tuned to ignition strength and combustion pressure, and the installation details that protect aluminum threads and maintain heat transfer. It should also document the supporting calibration variables: target air-fuel ratio under cruise and acceleration, idle speed strategy, decel fuel cut behavior, and timing adjustments if the engine has a freer exhaust or a high-flow intake.
On Milwaukee-Eight touring bikes, I generally treat the plug as the final verifier of the tune, not the first cure. If a plug looks blistered, sooty, oil-wet, or peppered, that symptom must be read alongside data from a scan tool, wideband sensors, and rider feedback. A good recipe therefore includes inspection intervals and reading criteria. For example, after a fresh Stage I tune on a Street Glide, I want to see clean porcelain, no aluminum speckling, no glazed ground strap, and a strap color line consistent with the intended heat range. If the motorcycle is used for short trips only, carbon buildup can appear even with a correct tune, which is why usage profile belongs in the recipe. This hub matters because every model-specific ergonomics article under it should start from the same combustion logic.
Model-specific ergonomics and why they change plug choice
Ergonomics affect combustion because they shape airflow, rider input, heat soak, and load. That sounds indirect, but in workshop practice the connection is obvious. A forward-control cruiser ridden aggressively from stoplights experiences repeated transient enrichment and low-speed heat buildup. A bagger with a batwing or sharknose fairing can trap heat around the rider and powertrain at slow speeds, encouraging owners to lug the engine to stay comfortable, which increases cylinder pressure at low rpm. An adventure-oriented Harley used standing on the pegs sees different throttle openings and engine braking patterns than a cruiser with mids and a low seat. Each use pattern changes how often the plug must ignite a lean mixture, a rich tip-in event, or a high-load pull.
Consider three examples. A Nightster or Sportster S ridden in traffic may benefit from a plug and calibration package that prioritizes clean low-speed combustion and hot restart stability. A Road King Special carrying luggage and a passenger needs a recipe biased toward sustained load and heat control, especially in summer. A CVO Road Glide with high-output mapping and premium fuel can usually support a tighter, more deliberate plug specification because its owner is more likely to maintain battery health and fuel quality. Ergonomics also influence maintenance access. On some touring models, fairing lowers, crash bars, and accessory placement subtly change how often owners inspect plugs, so a longer-life iridium choice has practical value. In other words, the right Stage I performance spark plug recipe is model-specific because real people ride these motorcycles in very different positions, climates, and load states.
Choosing heat range, material, and gap for 2026 combustion
The three plug variables that matter most are heat range, electrode material, and gap. Heat range describes how quickly the plug transfers heat from the firing tip into the cylinder head. Too hot, and the plug can contribute to pre-ignition or detonation under load. Too cold, and it can foul during short-trip use or extended idling. For Stage I Harley-Davidson setups, the correct heat range is usually close to stock unless the bike sees unusually high sustained load, hotter calibration, or upgraded compression later. Many riders incorrectly jump colder at the first sign of pinging, when the real cause is often excessive spark advance, low-octane fuel, or a lean area in the map.
Material affects wear and spark consistency. Traditional copper-core plugs conduct heat well and can work nicely, but fine-wire iridium and platinum designs typically hold gap more consistently over longer intervals. That matters on Harley twins because vibration, heat cycling, and service intervals favor durable components. Gap must match the ignition system’s ability to fire the mixture under pressure. Wider gaps can improve flame kernel growth and idle quality, but only if the coil can reliably jump the gap at peak load. Too wide a gap leads to misfire under acceleration; too narrow can reduce combustion efficiency and crispness.
| Harley use case | Preferred plug traits | Why it works |
|---|---|---|
| Urban cruiser, short trips | Stock heat range, iridium, conservative gap | Improves fouling resistance and hot restart behavior |
| Touring bagger, passenger and luggage | Stock or one-step colder only if tune and load justify it, iridium, verified torque | Handles sustained heat without masking fueling issues |
| Performance cruiser, spirited solo riding | Stock heat range, fine-wire iridium, gap optimized after dyno pulls | Supports clean throttle response and stable high-rpm ignition |
| Adventure touring, mixed terrain | Durable precious-metal plug, moisture-resistant installation, frequent inspection | Maintains consistency through varied temperatures and throttle transitions |
In 2026 combustion optimization, fuel quality is part of plug choice. E10 gasoline burns differently from straight gasoline, and regional octane variation still matters. If your bike is tuned on premium from a top-tier station, then ridden on inconsistent fuel while heavily loaded, plug readings can shift quickly. That is why dyno sheets alone are not enough. The best recipes are validated on the road, with plug inspections after highway pulls, stop-and-go traffic, and heat-soak restarts.
Building recipes by Harley platform
A hub page under Harley-Davidson should organize plug recipes by platform because engine architecture changes the answer. Evolution Sportster engines are comparatively simple and reward straightforward, conservative Stage I combinations. They usually respond well to a stable gap, fresh wires or coils where applicable, and careful carburetor or EFI tuning rather than dramatic plug changes. Twin Cam engines, especially on heavier touring frames, are more sensitive to heat management and detonation control, so the recipe must consider cam timing, exhaust scavenging, and rider loading. Milwaukee-Eight engines generally deliver cleaner combustion out of the box, but Stage I hardware can expose low-rpm lugging habits and poor fuel choices faster because torque arrives earlier and riders ask more from the engine in top gear.
For Sportster S and Revolution Max models, do not copy an air-cooled big-twin recipe. These engines have different combustion chamber design, cooling control, and operating rpm. The plug recommendation must follow the engine management strategy and the manufacturer’s specification more closely, especially when closed-loop fueling and knock control are active. Pan America models deserve their own subcategory in this hub because off-pavement use introduces dust control, water exposure, and repeated temperature swings. On those bikes, intake filtration quality and coil connector condition can be just as important as the plug itself.
From an ergonomics angle, each platform should link to deeper pages for seat-to-peg fit, handlebar reach, wind protection, and cargo assumptions, because those factors predict how the engine is loaded. A Heritage Classic ridden two-up at moderate pace on back roads does not need the same spark plug strategy as a Low Rider ST run hard on hot pavement. The hub structure works when it helps readers quickly narrow to a recipe that matches both machine and mission.
Tuning workflow, diagnostics, and common mistakes
The correct workflow is simple: confirm engine health, install the intake and exhaust parts correctly, verify battery and charging voltage, choose the appropriate plug, torque it to specification on a cold engine unless service information says otherwise, then tune fueling and timing with data. Compression issues, intake leaks, weak coils, damaged plug wires on older models, and exhaust leaks at the head can all mimic a bad plug decision. I start with a visual inspection, then scan for trouble codes, log fuel trims where available, check idle stability, and review wideband data from cruise through full-load acceleration. Only after that do I make plug-gap changes.
The most common mistake is using the plug to bandage an untuned Stage I setup. Riders install a high-flow air cleaner and slip-ons, notice extra heat or surging, and switch to a colder plug. Sometimes the symptom feels reduced for a while, but the root issue remains in the calibration. Another mistake is over-tightening plugs in aluminum heads, which distorts heat transfer and risks thread damage. Anti-seize use is another area where people get into trouble; if the plug manufacturer uses a plated shell, torque values may already account for dry installation. Follow the plug and service manual guidance exactly rather than relying on outdated habits.
Finally, avoid reading plugs from modern street engines the way racers read them after a single pass. Contemporary fuels, closed-loop corrections, and mixed-use riding complicate the picture. Plug reading still matters, but it must be combined with data logs, rider complaints, and repeatable test conditions. That disciplined process is what separates a reliable Harley-Davidson Stage I recipe from a collection of forum guesses.
How this hub supports future model-specific performance recipes
This page is the foundation for deeper Harley-Davidson articles covering exact combinations for Road Glide, Street Glide, Road King, Heritage Classic, Fat Boy, Breakout, Low Rider S, Low Rider ST, Sportster S, Nightster, Pan America, and CVO models. Each supporting article should answer the same core questions directly. What plug specification suits this model’s Stage I setup? How do rider posture, wind protection, passenger load, and luggage change heat and fueling demand? What symptoms point to an incorrect gap, heat range, or tune? Which upgrades deliver the best result for comfort and performance together, not in isolation?
The benefit of this hub approach is consistency. Riders can compare recipes across models without losing the combustion fundamentals that make the advice trustworthy. Start with your platform, be honest about how you ride, and build the plug recipe around the whole motorcycle rather than a catalog shortcut. When the plug, tune, intake, exhaust, and ergonomics align, 2026 combustion becomes smoother, cooler, and more efficient across the Harley-Davidson range. Use this hub to identify your model path, then move into the linked recipe pages and tune with evidence, not guesswork.
Frequently Asked Questions
What does a “Stage I performance spark plug recipe” actually mean on a 2026 Harley-Davidson?
A Stage I performance spark plug recipe is not just the plug part number. It is the complete combustion setup that allows the spark plug to work correctly within the engine’s real operating conditions. On a 2026 Harley-Davidson, that includes the plug’s heat range, electrode design and material, gap setting, installation torque, ignition system capability, fuel calibration, intake airflow, exhaust scavenging, and even how and where the bike is ridden. A bike used for short city trips in hot weather may want a different plug behavior than a bike ridden long-distance at highway speed with a freer-flowing intake and exhaust.
That matters because the spark plug is the final trigger for combustion. If the heat range is too hot, the plug can retain excess heat and raise the chance of detonation, pre-ignition, or accelerated electrode wear. If it is too cold, the plug may not stay clean enough in lower-load riding, which can lead to carbon buildup, rough idle, lazy throttle response, and inconsistent starts. The “recipe” approach recognizes that combustion quality depends on balance, not guesswork. The best result usually comes from matching the plug to the engine’s tune, not forcing the tune to compensate for an incorrect plug.
For Stage I applications, where intake and exhaust flow are improved and fuel delivery is typically recalibrated, the spark plug becomes more sensitive to the overall setup. A correctly chosen recipe helps stabilize idle, sharpen off-idle response, improve burn consistency under load, and manage heat more predictably across varying riding conditions. In other words, the plug is one component, but it reflects the health and accuracy of the whole combustion package.
How do I choose the right heat range and electrode material for a Stage I setup?
Heat range is one of the most important variables in spark plug selection because it controls how quickly the plug can transfer heat from its tip into the cylinder head. In a Stage I Harley-Davidson, airflow changes and fuel mapping adjustments can alter combustion temperature and pressure enough that the stock plug is not always the ideal choice. In many cases, the correct plug remains close to the factory recommendation, but that decision should be based on how the engine is actually running, not on the assumption that “more performance” automatically requires a colder plug.
A hotter plug holds more heat at the tip and can help prevent fouling in engines that spend a lot of time idling, making short trips, or operating in cooler conditions. A colder plug sheds heat faster and is generally preferred when the engine sees sustained load, higher cylinder temperatures, aggressive riding, hotter climates, or tuning that increases combustion intensity. The key is staying in the correct operating window: hot enough to remain self-cleaning, but not so hot that it contributes to abnormal combustion.
Electrode material also affects durability and firing consistency. Copper-core plugs are valued for conductivity and often work very well in performance street applications, but they can wear faster than precious-metal designs. Iridium and platinum plugs typically offer longer service life and maintain gap stability over more miles, which is helpful if you want a reliable plug that holds its performance characteristics over time. Iridium, in particular, often provides a fine-wire center electrode that can improve ignitability, especially during cold starts and low-speed operation.
The best approach is to choose a reputable plug that matches the engine’s combustion demands, then verify the result through real-world operation and plug reading. If the bike idles cleanly, starts easily, pulls smoothly, and the plugs show healthy coloration without signs of overheating or fouling, the heat range and material are probably in the right zone. If not, it is smarter to revisit the full recipe, including tune and operating conditions, before blaming the plug alone.
Does spark plug gap really affect throttle response, idle quality, and combustion efficiency?
Yes, plug gap has a direct effect on how consistently the mixture ignites, and that influences throttle response, idle quality, fuel burn stability, and overall rideability. The gap determines how much voltage is required to jump the electrode space and initiate the spark. A wider gap can expose more of the spark kernel to the air-fuel mixture and, in the right conditions, promote a stronger and more complete ignition event. That can help smooth idle and sharpen low-speed response. However, the wider the gap, the more demand you place on the ignition system.
If the gap is too wide for the coil output, cylinder pressure, or operating conditions, misfires can appear under load, during acceleration, or in hot conditions when ignition demand rises. Riders may interpret that as poor tuning or bad fuel when it is really a marginal spark event. On the other hand, if the gap is too tight, the plug may fire more easily, but the spark can be less effective at consistently igniting the mixture across varying loads and air-fuel conditions. That can reduce combustion quality, especially in situations where the engine would benefit from a more robust flame start.
In a Stage I 2026 Harley-Davidson, the ideal gap is the one that the ignition system can support consistently with your exact tune, intake, exhaust, and riding style. There is no universal “performance gap” that works best for every bike. A properly set gap often improves idle steadiness, reduces hesitation right off throttle, and makes the engine feel cleaner through transitional fueling. It also supports more predictable plug wear and better long-term consistency.
Because gap changes over time as electrodes wear, it is worth checking plugs periodically rather than treating them as install-and-forget parts. Small deviations can become meaningful when combined with a lean spot, heat stress, or high-load riding. In a properly tuned Stage I setup, the right gap is one of the easiest and most measurable ways to support efficient combustion without making any dramatic hardware change.
Can the wrong spark plug recipe cause extra heat, pinging, fouling, or reliability problems?
Absolutely. A mismatched spark plug recipe can contribute to a wide range of symptoms, and those symptoms often get misdiagnosed as separate issues. If the plug heat range is too hot, the plug tip may retain excessive heat, which can elevate chamber temperatures and increase the risk of spark knock, detonation, or pre-ignition. Those conditions are especially concerning on an air-cooled or partially air-cooled V-twin that already works hard in traffic, high ambient temperatures, or heavy-load riding. In severe cases, abnormal combustion can damage pistons, rings, or valves over time.
At the opposite end, a plug that is too cold may never stay hot enough to burn off deposits during normal street use. That can lead to soot buildup, weak idle, harder starting, stumble on takeoff, and a general sense that the engine is “loaded up.” Oil control issues, rich fueling, and repeated short-trip riding can make this worse. The result is not just inconvenience; chronic fouling can reduce fuel efficiency, increase unburned hydrocarbons, and place additional stress on the ignition system as it tries to fire through contamination.
Incorrect gap and improper torque can also create reliability problems. A gap that is too wide may trigger intermittent misfire under pressure, while a gap that is too tight can compromise flame initiation quality. Under-torqued plugs may not seal and transfer heat correctly, and over-torqued plugs can damage threads, distort the plug shell, or complicate future service. Even something as simple as installing a premium plug without adjusting the tune can leave performance on the table if the fuel and spark strategy do not match the engine’s airflow and combustion demands.
The larger lesson is that spark plugs should be evaluated as part of a system. If you have pinging, excess heat, unstable idle, or repeated plug problems, the answer may involve fuel mapping, injector behavior, intake leaks, exhaust changes, or riding pattern—not just the plug itself. The right recipe improves reliability because it brings combustion back into a stable, repeatable window where the engine is neither over-stressed nor under-cleaned.
How should I read spark plugs and fine-tune the recipe after installing Stage I upgrades?
Reading spark plugs is still one of the most useful ways to evaluate combustion, but it should be done carefully and with realistic expectations. Modern fuels can make plug reading less dramatic than it was decades ago, so you are not looking for one perfect old-school color chart. Instead, you are looking for patterns: signs of overheating, fouling, uneven cylinder behavior, detonation traces, excessive deposits, oil contamination, or abnormal electrode wear. Ideally, you inspect plugs after the bike has been run in the conditions you actually care about, such as hot idle, stop-and-go traffic, highway cruise, and hard acceleration.
A healthy plug in a well-sorted Stage I setup will usually show clean electrodes, stable edges, and light, even deposit patterns without wetness, blistering, or heavy carbon accumulation. Chalky white insulators, melted or rounded electrodes, or speckling can suggest excessive heat or abnormal combustion. Dry black soot often points toward rich operation, incomplete burn, or a plug that is too cold for the duty cycle. Oily deposits may indicate a mechanical issue rather than a tuning problem. Comparing front and rear cylinder plugs can also reveal differences in temperature or fueling behavior that are common on V-twin engines.</





