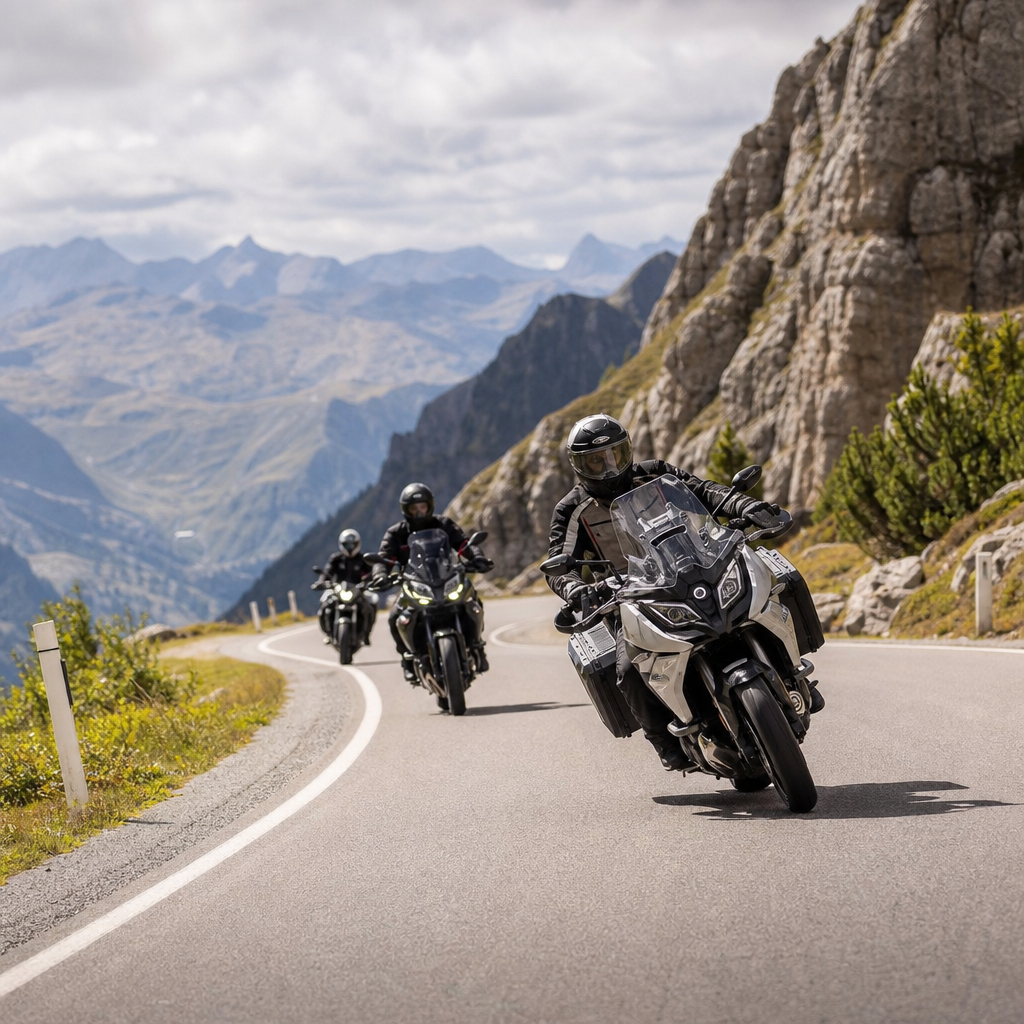
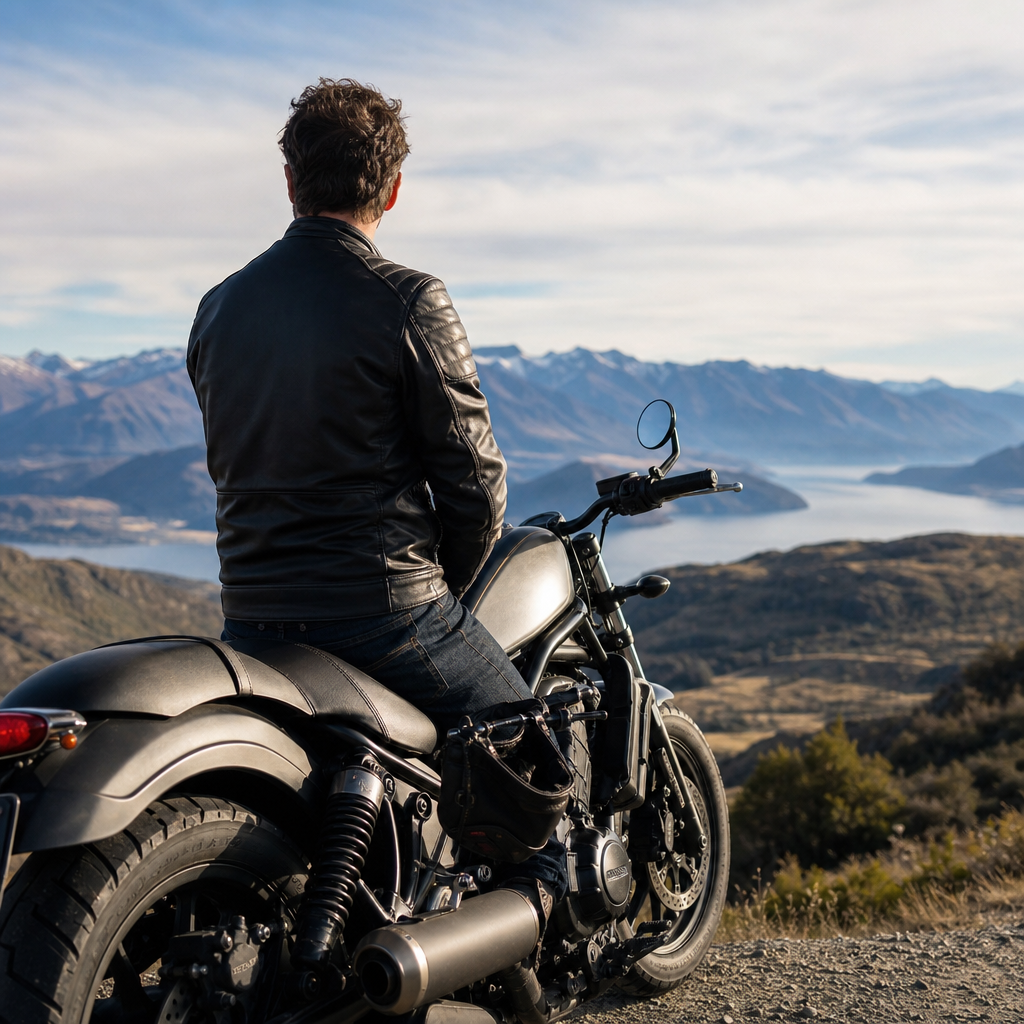
Moto-camping combines motorcycle touring with lightweight camping, allowing riders to travel farther, stay longer, and experience roads and landscapes that hotel-to-hotel travel often misses. For a first overnight trip, the idea sounds simple: pack a tent, point the bike toward a campsite, and ride. In practice, successful moto-camping depends on weight management, weather planning, bike setup, campsite selection, and a packing system that works when conditions change fast. I learned that lesson on my earliest trips, when overpacking made the bike unstable at low speed and underplanning turned a cool evening into a long, cold night. The good news is that first-trip mistakes are preventable.
At its core, moto-camping means self-supported travel by motorcycle with enough shelter, sleep gear, clothing, food, and tools to spend at least one night off the bike. Touring refers to longer-distance riding focused on comfort, efficiency, and route planning. Camping adds another layer: you are not just arriving somewhere, you are building a temporary base, managing your body temperature, securing gear, and preparing for the next morning. The overlap between touring and camping matters because every item you carry affects handling, fuel range, organization, and fatigue. That makes this topic one of the most important skills within The Open Road for riders who want freedom without sacrificing safety.
The main benefit of moto-camping is flexibility. You can ride remote scenic routes, stay near national parks, avoid expensive lodging, and wake up where the road is best rather than where rooms are available. It also changes how you budget. A tent site is usually far cheaper than a motel, which means more money for fuel, park fees, or extra days on the road. Just as important, it turns a ride into a complete travel system. You are no longer limited by check-in times or urban lodging clusters. If you understand the fundamentals of touring and camping, your first overnight trip becomes manageable, comfortable, and genuinely enjoyable.
This hub article covers the full foundation for Touring & Camping: choosing gear, loading the motorcycle, dressing for changing weather, planning routes and camp nights, cooking and hydration basics, campsite routines, and common first-trip errors. It is designed to answer the practical questions new riders ask first: What gear is essential? How much can I carry? Where should heavy items go? What if it rains? How do I sleep well enough to ride safely the next day? Master these basics once, and every future weekend trip, national park ride, and multi-state tour becomes easier to plan and execute.
Choose the Right Moto-Camping Gear First
Your first overnight setup should prioritize reliability, low packed size, and ease of use over extreme ultralight marketing claims. Start with the sleep system because poor sleep creates poor riding decisions. A three-season tent, a sleeping bag matched to realistic overnight lows, and an insulated sleeping pad are the foundation. Many first-time riders buy a warm bag but skip pad insulation, then lose heat to the ground all night. That is a classic mistake. Look at temperature ratings carefully: bag “survival” ratings are not comfort ratings. If the forecast says 40 degrees Fahrenheit, a comfort-oriented setup near or below that number is the safer choice.
For shelter, freestanding backpacking tents are popular because they pitch on gravel pads and uneven sites more easily than trekking-pole shelters. One-person tents save space, but a compact two-person tent often gives a solo rider better value by creating room for riding gear, helmet storage, and changing clothes during rain. I generally recommend keeping packed tent length in mind because short pole sections fit panniers better. Dry bags, stuff sacks, and compression sacks help organize, but waterproofing matters more than compression. One soaked sleeping bag can ruin an otherwise well-planned tour.
Cooking gear depends on trip style. For a first overnight ride, there is nothing wrong with skipping a stove and eating simple food from a grocery store or campground shop. If you do cook, use a compact canister stove, one pot, a lighter, and a mug. That is enough for coffee, oatmeal, soup, or dehydrated meals. Bring water treatment only if you will refill from uncertain sources; otherwise, carry known-safe water. Add a headlamp, power bank, first-aid kit, toiletries, and camp shoes, then stop. Most beginners overload the bike with “just in case” items. A controlled packing list always beats a giant pile of possibilities.
Pack the Motorcycle So It Still Rides Well
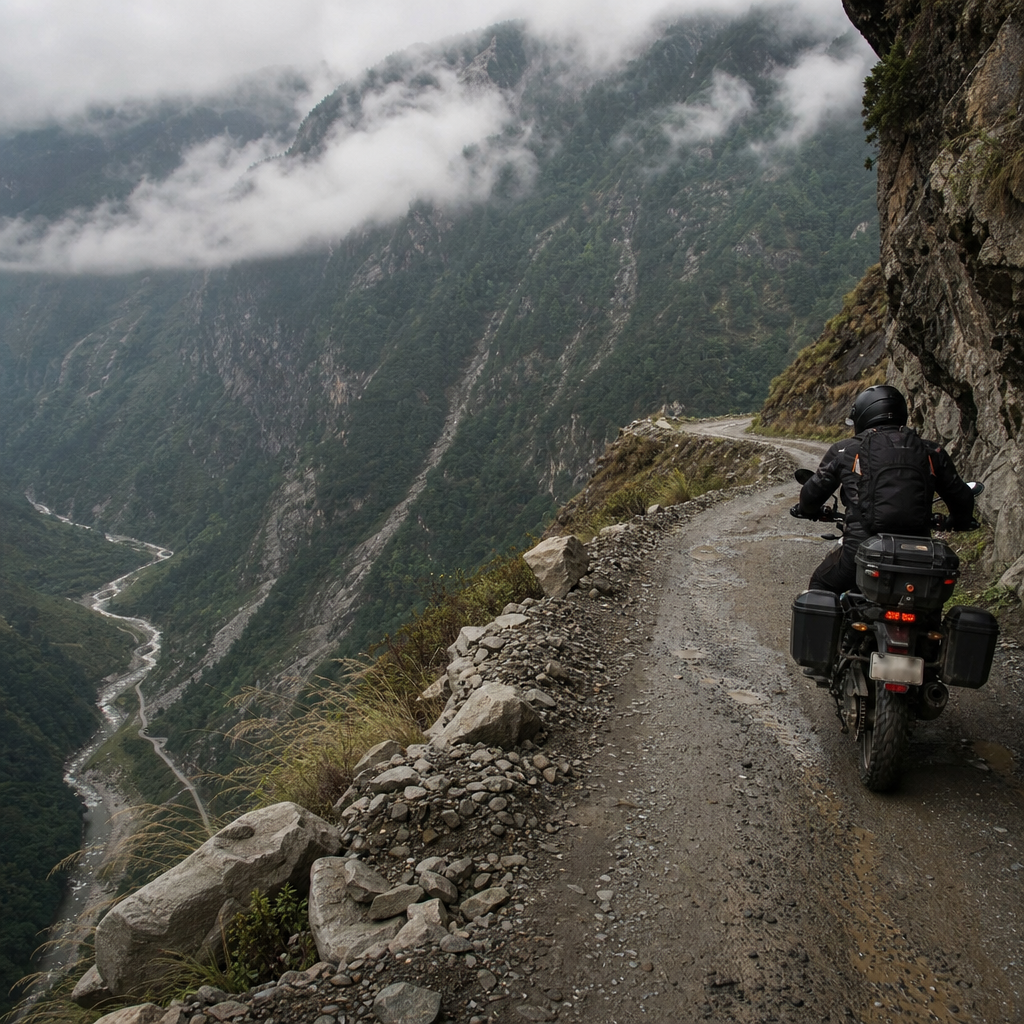
How you load the motorcycle matters as much as what you pack. Heavy items should sit low and close to the bike’s centerline to protect handling. Tools, water, stove fuel, and dense food belong low in panniers or side cases, not stacked high on a rear seat. Light, compressible gear such as a sleeping bag or clothing can ride in a tail bag or duffel. Keep left-right weight reasonably balanced. An uneven load is noticeable in turns, crosswinds, and parking-lot maneuvers. If your motorcycle has a manufacturer payload limit, respect it. Payload includes rider, passenger, luggage, accessories, and sometimes added fuel or water.
Soft luggage is lighter and often more forgiving in a tip-over, while hard panniers offer faster access, stronger security, and easier organization. There is no universal winner. Adventure riders often prefer soft systems on rough roads; sport-touring and touring riders may favor hard cases for commuting convenience and weather protection. Whatever you choose, secure every strap end so nothing can reach the chain, wheel, or exhaust. Use heat shields where needed. Before departure, take a fully loaded test ride close to home. Practice slow U-turns, emergency stops, and getting on and off the bike with luggage installed. If the front end feels light or the rear wallows, adjust load placement and suspension preload.
| Item Type | Best Storage Location | Why It Goes There | Common Mistake |
|---|---|---|---|
| Tools and tire kit | Low in pannier or under seat | Keeps dense weight low and central | Putting it in a top bag |
| Sleeping bag and camp clothes | Tail duffel or top case | Light and compressible | Using non-waterproof luggage |
| Tent poles and rain gear | Easy-access side case | Needed quickly during bad weather | Burying it under all camp gear |
| Food and stove | Separate pannier from clothing | Improves organization and cleanliness | Mixing fuel with loose soft items |
Finally, check tire pressures, chain condition, brake pad life, and lighting before every overnight trip. Touring and camping increase total load and often put you farther from repair shops. If your bike supports electronic suspension modes, set them for luggage. If it does not, use the owner’s manual preload guidance. Correct setup improves cornering stability, braking, and comfort immediately.
Dress for Riding, Sleeping, and Weather Swings
The best moto-camping clothing system uses layers that work on the bike, at camp, and inside a sleeping bag. For riding, wear gear with abrasion resistance and impact protection first; weather comfort comes second but still matters. Textile jackets and pants with removable liners are common, yet many experienced tourers prefer separate waterproof shells because they dry faster and adapt better across temperature ranges. Base layers made from merino wool or synthetic fabric help manage sweat and reduce chill. Cotton is a poor choice for active travel because it dries slowly and loses warmth when wet.
Your camp clothing should be simple and dry. One dedicated base layer for sleeping can transform a night in changing mountain weather. Pack extra socks, a warm hat, and a compact insulating layer such as a fleece or synthetic puffy jacket. Heated gear is excellent for cold touring, but do not let electric comfort on the bike tempt you to bring an inadequate sleep system for camp. They solve different problems. Likewise, waterproof gloves for riding do not replace dry camp gloves if you expect cold rain at elevation.
Weather swings are one of the defining realities of motorcycle travel. A route can begin at 85 degrees in a valley, cross a pass near freezing, and end at a damp lakeside campground. That is why forecast checks should include hourly conditions, wind, and overnight lows, not just daytime highs. Use reliable sources such as the National Weather Service, Environment Canada, Met Office, or mountain-specific forecasts where relevant. If thunderstorms are likely, know your shelter strategy before you leave. On a first trip, comfort comes from conservative planning: shorter mileage, earlier campsite arrival, and enough dry clothing to reset after rain.
Plan Routes, Campsites, and Daily Mileage Realistically
New riders often overestimate how many miles they can comfortably cover when they also need to set camp, cook, and sleep well. A fun day ride pace does not translate directly into overnight touring mileage, especially on secondary roads. For a first moto-camping trip, choose a destination close enough that you can arrive well before dusk. That gives you time to find the site, pitch the tent in daylight, organize food, and deal with surprises. In many regions, 150 to 250 miles is a sensible first-day target, though road type, weather, experience, and bike ergonomics matter more than a fixed number.
Campsite selection also shapes the trip. Established campgrounds offer toilets, water, level pads, and a lower learning curve. State parks, provincial parks, national forests, private campgrounds, and motorcycle-friendly campgrounds can all work well. Dispersed camping offers solitude and flexibility, but it requires better land-use knowledge, self-sufficiency, and Leave No Trace discipline. Confirm rules before you go. Some public lands allow dispersed camping only in designated corridors or with seasonal fire restrictions. If reservations are required, book early during peak months near popular riding regions such as the Blue Ridge Parkway, the Rockies, or coastal routes.
Route planning tools should support both riding quality and practical logistics. Google Maps is useful, but I prefer checking routes against dedicated planning tools such as REVER, Gaia GPS, Calimoto, or on-device Garmin routing, especially when fuel gaps or off-pavement sections are involved. Identify fuel stops, grocery options, and a bailout motel or alternate campground in case weather turns. Share your route with someone if you will be in remote areas. The best plan is not the most ambitious one; it is the one that leaves enough energy for safe riding on day two.
Master Camp Setup, Food, and Morning Routine
Efficient camp routine is what makes touring and camping sustainable rather than exhausting. When you arrive, start by assessing the site: drainage, wind direction, tree hazards, tent pad quality, and distance to facilities. Avoid low spots where rain collects. Set the tent first if weather looks uncertain. Then store riding gear in a consistent place so gloves, earplugs, keys, and chargers are easy to find the next morning. Many riders benefit from a simple rule: sleep items in one bag, cooking items in another, bike items in another. That system reduces the classic dawn scramble where one missing headlamp or key delays departure.
Food for a first overnight trip should be easy to eat, easy to store, and light on cleanup. Think instant oatmeal, tortillas, tuna packets, nuts, fruit, jerky, trail mix, or dehydrated meals. Hydration matters more than fancy camp cooking. Riders lose water steadily through wind exposure, heat, and concentration, even when they do not feel sweaty. Start hydrated, sip regularly during fuel stops, and top up before sleep. If you camp in bear country, follow local food storage rules exactly. Use lockers where provided, or approved canisters and proper separation from the tent where required.
Morning routine is where good systems pay off. Pack in reverse order of need: sleeping gear first after airing it out, then tent, then camp kit, with rain gear remaining accessible until the sky is clearly stable. Do a final site walk for trash, tent stakes, and small items under picnic tables. On the bike, take five minutes before riding off: check straps, lights, tire condition, and navigation. Touring success is built on repeatable routines, not speed.
Avoid the Most Common First-Trip Mistakes
The most common moto-camping mistakes are predictable. Riders bring too much gear, ride too far on day one, arrive after dark, ignore overnight temperatures, and fail to test their packing system before departure. Another frequent error is treating camping gear and motorcycle gear as separate worlds. They are one system. A tent that packs too long may not fit your luggage. A large chair may consume the space needed for rain layers. A budget sleeping bag may be acceptable for car camping but too bulky for a motorcycle. The fix is simple: lay everything out, pack the bike fully, and do a local shakedown night before any bigger tour.
Safety mistakes matter even more. Never assume cell coverage. Carry a paper backup map or offline navigation. Know basic tire repair if your route is remote, and understand whether your bike uses tubes or tubeless tires because the repair method differs. Watch campsite fatigue too. The final hour of a long ride is when small decisions get sloppy, from parking on unstable ground to forgetting to lock luggage. When storms, cold, or exhaustion stack up, there is no shame in choosing a motel. Good touring judgment is not about proving toughness; it is about preserving the ride.
Moto-camping opens the best part of motorcycle travel: the ability to ride great roads and stay where the experience is richest, not just where a room is available. Start with one overnight trip close to home, use reliable gear, pack lighter than you think you need, and build repeatable routines for loading, camp setup, and morning departure. If you get the fundamentals of Touring & Camping right now, every future weekend escape and long-distance tour becomes easier, cheaper, and more rewarding. Use this hub as your foundation, then plan your first simple overnight ride and learn what works for you on the road.
Frequently Asked Questions
What should I pack for my first moto-camping trip without overloading the bike?
For a first overnight moto-camping trip, the goal is to pack for comfort, safety, and changing conditions without turning your motorcycle into a top-heavy mess. Start with the basics in five categories: shelter, sleep system, clothing, cooking and water, and tools and safety gear. Your shelter should be compact and motorcycle-friendly, such as a lightweight tent, bivy, or hammock setup if your destination supports it. Pair that with a sleeping bag rated for temperatures a bit colder than the forecast and a sleeping pad that adds insulation as well as comfort. New riders often underestimate how cold the ground feels at night, even after a warm day of riding.
For clothing, focus on layers instead of bulk. Bring a moisture-wicking base layer, a warm mid-layer, dry socks, underwear, and a camp layer you can change into after the ride. Keep all spare clothing in waterproof bags or dry sacks. Cooking gear can be very simple for a first trip: a small stove, fuel, lighter, mug or pot, utensils, and easy meals. Many beginners do even better by skipping full camp cooking on the first night and bringing ready-to-eat food, snacks, and plenty of water. That reduces complexity while you learn the rhythm of packing and setting up camp.
Do not overlook the motorcycle-specific essentials. Carry a tire repair kit, inflation method, basic tools for your bike, a flashlight or headlamp, power bank, first-aid kit, registration and insurance documents, and a way to charge your phone or GPS. Weight placement matters just as much as what you pack. Put heavy items low and close to the center of the bike, and keep frequently used items accessible. If you need to unpack half the motorcycle to reach your rain gear, your system needs work. The best packing list is not the longest one; it is the one that covers likely problems while staying organized, balanced, and easy to live with on the road.
How do I pack a motorcycle for camping so it stays balanced and easy to manage?
Packing a motorcycle well is one of the biggest differences between a stressful first trip and an enjoyable one. A properly packed bike should feel stable at low speed, predictable in corners, and manageable when parking or moving around a campsite. The basic rule is simple: keep heavy gear low, centered, and secure. Tools, water, food, and dense camping items should go in panniers or low-mounted luggage if possible. Lighter gear such as a sleeping bag, clothing, and tent can ride higher or farther back, but even then you want to avoid stacking too much weight on the tail.
Balance left to right matters too. If one side of the bike is significantly heavier, you will notice it when maneuvering slowly, especially on gravel, uneven ground, or while backing the bike into a campsite. Before leaving, load everything and do a short test ride close to home. Check how the bike feels when braking, turning, and putting your feet down at stops. It is much better to discover that your duffel shifts under acceleration in your neighborhood than on a mountain road in the rain.
Organization also makes a major difference. Pack by function rather than by random available space. Keep camp setup items together, cooking items together, and emergency or roadside gear in a place you can reach quickly. Rain gear should always be accessible without unpacking the whole motorcycle. Use straps you trust, and recheck them after the first few miles because soft luggage often settles. If your bike has adjustable suspension, set preload appropriately for the added load. Finally, remember that packing is not just about fitting gear onto the bike; it is about preserving the handling, safety, and practicality of the motorcycle once the trip actually begins.
How do I choose the right campsite for a first overnight moto-camping trip?
For your first moto-camping trip, the best campsite is usually not the most remote one. Choose a location that is easy to reach, has reliable access, and gives you some margin for error if weather, timing, or fatigue becomes a factor. Established campgrounds are ideal for beginners because they often provide flat tent sites, bathrooms, water, picnic tables, and predictable rules. That structure makes the first night much easier, especially if you arrive later than planned or discover you still need to refine your packing system.
Distance matters as well. Your first trip does not need to be a thousand-mile adventure. In fact, a shorter ride to a nearby campground is often the smartest way to learn. It gives you the full experience of loading the bike, riding with gear, setting up camp, sleeping outdoors, and packing up in the morning without the added pressure of extreme mileage. You want to leave enough energy for camp tasks at the end of the day. Setting up a tent in fading light after a long, exhausting ride is one of the most common beginner mistakes.
Pay attention to surface conditions and bike access. A campsite that looks perfect online may involve deep gravel, sand, mud, or a steep approach that is awkward on a loaded motorcycle. Review maps, campground photos, and recent reviews if available. If you are booking ahead, choose a site with enough room to maneuver and ideally some shelter from wind. Also think about practical details: Is there potable water? Can you buy food nearby if needed? Is there cell service, or do you need offline navigation? The right campsite for your first trip is one that supports a smooth introduction to moto-camping, not one that tests every outdoor skill you have on night one.
What kind of weather planning should I do before a moto-camping overnight?
Weather planning is one of the most important parts of moto-camping because you are not just riding through conditions; you are sleeping in them too. Before your trip, check more than just daytime highs. Look at overnight lows, chance of rain, wind speed, humidity, and how quickly conditions may change along your route and at your campsite. A day that feels warm on the road can turn into a very cold night once the sun drops, especially at elevation. Riders often pack for the ride and forget to pack for camp, which leads to a miserable evening and poor sleep.
Rain deserves special attention. Even if the forecast looks decent, bring waterproof layers and make sure your luggage is genuinely weather-resistant or lined with dry bags. A first trip is not the time to assume your gear will probably stay dry. If your extra clothes, sleeping bag, or shelter get soaked, the entire experience can unravel quickly. Wind matters too, both on the bike and at camp. Strong crosswinds affect handling during the ride, and gusty campsites can make tent setup frustrating if you arrive late or tired. Know how your shelter performs in wind and whether your route includes exposed stretches that may be tiring with a loaded bike.
It is also smart to build a flexible plan. Have a bailout option in case storms move in, temperatures drop more than expected, or fatigue makes continuing unwise. That could mean a nearby motel, a lower-elevation campground, or simply turning a longer ride into a shorter one. Weather planning is not about eliminating discomfort entirely; it is about avoiding preventable problems. The most successful first-time moto-campers respect the forecast, pack for reasonable worst-case conditions, and stay willing to adapt when the sky does not cooperate.
What are the biggest mistakes beginners make on their first moto-camping trip?
The most common beginner mistake is overpacking. New moto-campers often bring too much clothing, too many “just in case” items, and bulky gear better suited to car camping. All of that extra volume and weight affects handling, slows packing and unpacking, and makes camp setup more frustrating than it needs to be. A close second is poor organization. If your headlamp is buried under cookware and your rain layer is trapped beneath camp gear, small inconveniences quickly become real problems when weather changes or darkness falls.
Another frequent mistake is choosing a trip that is too ambitious. A first overnight does not need to prove anything. Long mileage, unfamiliar backroads, difficult terrain, and primitive camping can all be great later, but stacking them onto your first outing raises the odds of stress and fatigue. Beginners also underestimate setup time. Arriving at camp with only a few minutes of daylight left can turn basic tasks into a scramble, especially if you are still learning how your tent, sleeping system, and luggage all work together. Give yourself enough time to arrive, settle in, and deal calmly with surprises.
Many riders also neglect bike readiness. Before any moto-camping trip, check tire condition and pressure, chain or final drive, fluids, brakes, lights, battery health, and luggage mounting points. A small mechanical issue is more annoying when you are carrying your home on the back of the bike. Finally, one of the biggest mistakes is not doing a trial pack or backyard test run. Setting up your tent once at home, sleeping in your bag before the trip, and loading the bike in advance can reveal missing straps, awkward packing choices, or gear that simply does not work for you. The first trip is supposed to teach you something, but it should not teach every lesson the hard way.