Electronic ignition upgrades for vintage points-system metric classics solve one of the most common reliability problems in older Japanese and European motorcycles: breaker points that drift out of adjustment, wear their rubbing blocks, and weaken spark timing as miles accumulate. In restoration work, I have seen beautifully rebuilt engines run poorly because the ignition remained the weakest link. A points system uses a cam-driven contact set to interrupt coil current, while an electronic ignition replaces mechanical switching with a sensor and solid-state module. The result is usually more stable timing, easier starting, cleaner idle, and less routine maintenance. For restorers working on metric classics built from 1970 to 2004, understanding these upgrades matters because ignition choice affects originality, charging load, coil compatibility, serviceability, and the long-term riding experience.
This hub article covers the restoration guides for metric classics in a practical way, with electronic ignition upgrades as the anchor topic. “Metric classics” here means motorcycles from manufacturers such as Honda, Yamaha, Suzuki, Kawasaki, BMW, Moto Guzzi, Ducati, and other non-imperial platforms whose specifications, fasteners, and service literature are metric. The period from 1970 to 2004 spans several ignition eras: pure contact-breaker systems in the 1970s, transistor-assisted ignitions in the late 1970s and 1980s, and widespread factory electronic ignitions by the 1990s. That range makes restoration decisions less straightforward than many owners expect. Some bikes benefit dramatically from a simple drop-in conversion, while others are better served by rebuilding the stock system, especially if originality, judging standards, or roadside fixability are priorities.
As a hub page within a maintenance and technical encyclopedia, this article is designed to answer the key questions restorers ask early: What does an electronic ignition upgrade actually change? Which parts of the motorcycle must be evaluated first? How do you preserve authenticity while improving dependability? What supporting systems, from coils to charging output to spark plugs, need attention? The answers differ by machine, but the core principles are consistent. A successful restoration does not start with buying parts; it starts with establishing a baseline, understanding the trigger method, and matching the upgrade to the engine, wiring harness, and intended use. Done correctly, electronic ignition upgrades can make a vintage metric motorcycle feel more precise without erasing its character.
Just as importantly, ignition work should be integrated into the larger restoration sequence. Fuel, compression, valve adjustment, charging health, and grounds all affect spark quality and engine behavior. On many 1970s UJMs and air-cooled twins, owners install a modern ignition module and expect it to cure carburetion faults, vacuum leaks, or low battery voltage. It will not. A good hub article therefore has to frame ignition upgrades within the whole machine. The sections below map that process and point toward the companion restoration topics every owner should study next, including wiring rehabilitation, charging-system testing, carburetor synchronization, and top-end mechanical inspection.
How points ignition works and why it becomes a restoration problem
A conventional points ignition is mechanically simple but dynamically imperfect. The cam on the advance unit or camshaft opens the breaker points, collapsing the magnetic field in the ignition coil and inducing high voltage for the spark plug. Dwell angle, point gap, condenser condition, and cam lubrication all influence spark timing and energy. When everything is fresh and adjusted correctly, these systems work surprisingly well. The problem is that mechanical contact surfaces pit, rubbing blocks wear, spring tension changes, condensers fail, and the advance mechanism develops slop. Every one of those changes alters timing consistency.
In real restorations, wear compounds with age-related neglect. A 1974 Honda CB350 may arrive with oxidized points, a dry advance cam, stretched plug caps, and a charging system that barely supports battery voltage at idle. The owner often blames carburetors because the bike misses off idle, but the true cause can be ignition scatter. I have measured timing marks wandering several degrees under a strobe on bikes with visibly worn advance weights and point plates. That instability shows up as hard starting, uneven idle, hesitation, and surging under load. Electronic ignition upgrades address the switching and trigger accuracy, though they cannot repair a mechanically loose advancer unless the system also replaces the advance function.
What an electronic ignition upgrade changes on a vintage metric classic
An electronic ignition upgrade replaces the wear-prone contact set with a magnetic, optical, or Hall-effect trigger and a transistorized control module. Instead of breaker points carrying coil current, the module switches current electronically. This eliminates contact arcing and the gradual timing drift caused by rubbing-block wear. Most kits for classic metric motorcycles retain the original ignition coils if their primary resistance matches the module specification. Others recommend dedicated coils with known resistance and faster saturation characteristics.
The practical benefits are direct. Spark timing becomes more repeatable, especially at low rpm where weak batteries and point bounce often show themselves first. Starting improves because the module can deliver consistent switching from the first crankshaft revolutions. Idle quality improves because cylinder-to-cylinder timing spread narrows. Maintenance drops sharply because there is no point gap to reset every few thousand miles. On bikes ridden regularly, that reduction in upkeep is a meaningful quality-of-life improvement. On bikes stored for months, electronic triggers also avoid the corrosion that often forms on point contacts.
There are tradeoffs. Electronic modules are less field-repairable than points. If a condenser fails, you can often substitute a generic part; if a proprietary module fails on a tour, replacement may require shipping. Some systems are sensitive to low voltage or incorrect coil resistance. Others hide timing marks or complicate static timing. For concours restoration, visible aftermarket components can reduce authenticity. The right decision depends on whether the motorcycle is being restored as a judged artifact, a reliable rider, or a balanced preservation build.
Choosing the right upgrade path for 1970–2004 metric motorcycles
The correct upgrade path depends on the motorcycle’s original architecture. Pre-1980 bikes commonly use twin points, single points with wasted spark, or points triggered from the camshaft with a mechanical advance unit. Late-1970s and 1980s machines may use factory transistorized ignitions that are already electronic but suffer from aging pickups, igniters, or cracked solder joints. By the 1990s, many metric classics within this 1970–2004 window use CDI or TCI systems that call for diagnosis rather than “upgrades” in the vintage sense.
For a true points bike, the usual options are drop-in modules from brands such as Dyna, Boyer, Newtronic, Power Arc, and model-specific systems from specialty suppliers. A Honda SOHC four might use a Dyna S retaining the mechanical advance, while an air-cooled BMW boxer might receive a bean-can conversion or a complete crank-trigger package. Moto Guzzi twins, Yamaha XS650s, and Kawasaki Z-series models each have dedicated ecosystems. The first rule is to identify whether the kit retains the stock advancer or replaces it with electronic advance mapping. Retaining the advancer saves money and preserves original geometry, but a worn advancer can undermine the benefit of the conversion.
| Motorcycle type | Common original ignition | Typical upgrade style | Main inspection before purchase |
|---|---|---|---|
| 1970s Japanese twin | Points and condenser | Hall-effect or magnetic trigger | Advance unit wear and coil resistance |
| 1970s Japanese four | Twin points | Plate-mounted electronic module | Alternator output and wiring-harness voltage drop |
| Air-cooled European twin | Points with mechanical advance | Crank trigger or optical conversion | Charging stability and timing chest condition |
| 1980s factory electronic bike | TCI or CDI | Refurbish stock system first | Pickup coils, grounds, connectors, solder joints |
This is why restoration guides for metric classics should be model-specific after the initial planning stage. A Yamaha XS650 with a healthy charging system and straight wiring may respond beautifully to a Pamco-style setup or equivalent modern trigger. A Suzuki GS1000 often benefits from improved coils, fresh plug caps, and harness repairs as much as from any trigger conversion. A BMW Airhead may need advance-unit service and bean-can inspection before any module decision. The machine dictates the path.
Supporting systems that determine whether the upgrade succeeds
Ignition modules do not operate in isolation. Before I fit any electronic ignition to a vintage metric motorcycle, I test battery condition, charging voltage, coil primary resistance, coil secondary resistance, plug-cap resistance, engine and frame grounds, and voltage drop from battery positive to the ignition feed. These tests prevent the common mistake of blaming a new module for faults already present in the harness. Factory service manuals, Clymer and Haynes manuals, and brand-specific forums provide baseline values, but a digital multimeter and a timing light remain the essential diagnostic tools.
Battery voltage is especially important. Many classic motorcycles will crank with a weak battery but deliver unstable ignition performance. A modern module generally wants clean voltage and good grounds. Charging-system health matters just as much on permanent-magnet alternator bikes and field-excited systems alike. A Honda CB750 with tired regulator-rectifier connections may undercharge at idle, causing weak spark and misdiagnosis. Replacing the ignition without addressing corroded connectors only adds confusion. On 1980s motorcycles, aging fuse boxes, heat-damaged stator connectors, and brittle kill-switch contacts are frequent hidden faults.
Coil matching is another decisive factor. Modules are designed around specific current draw. If the coil primary resistance is too low, the module can overheat; too high, and spark energy suffers. Many aftermarket suppliers specify 3-ohm coils for street applications, but the exact requirement must come from the ignition manufacturer. Spark plug caps and wires also deserve attention. Resistor caps often drift far above nominal values over decades. NGK caps are inexpensive, standardized, and dependable, which is why they are a default choice in many restorations. Basic supporting parts often deliver as much real improvement as the conversion itself.
Installation, timing, and setup without introducing new faults
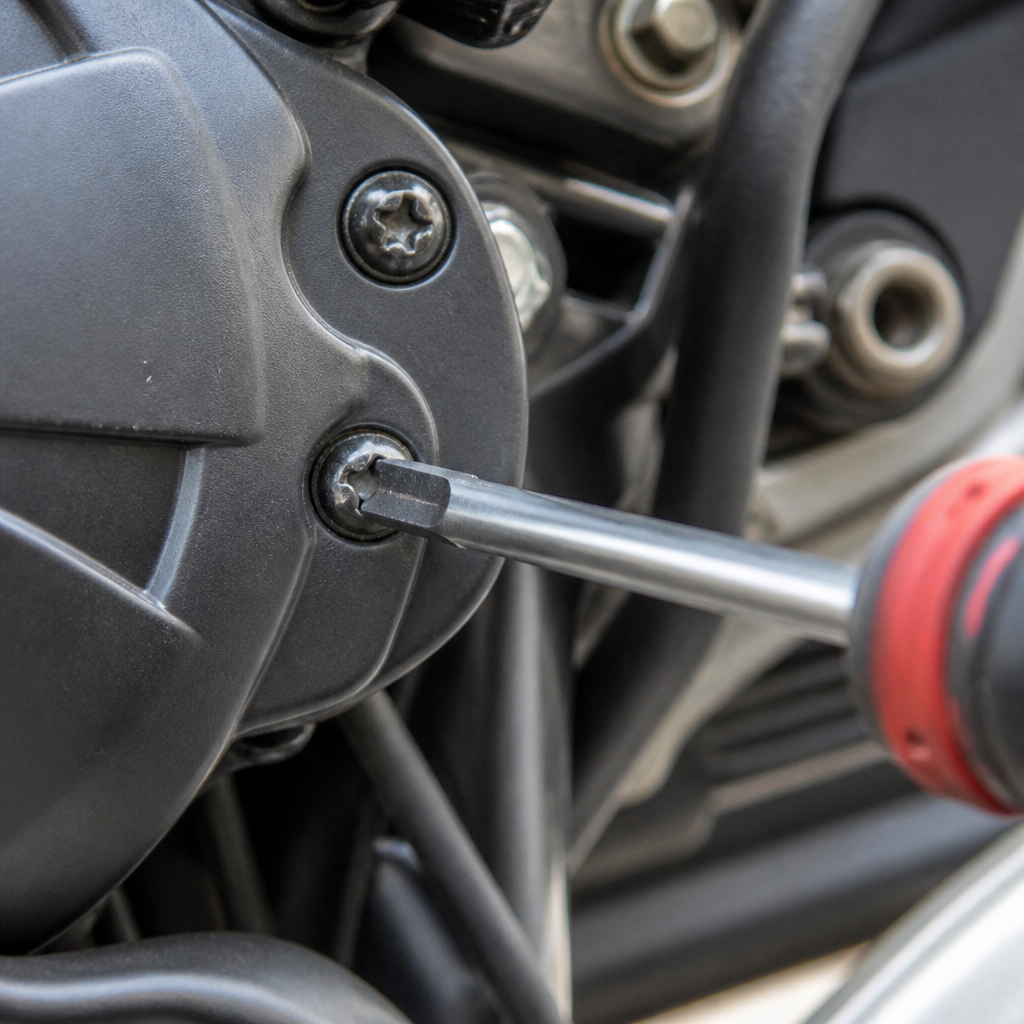
Installation quality separates a professional-feeling restoration from a frustrating one. The first priority is preserving reversibility where possible. I document the original routing, connector colors, timing marks, and point-plate position before removal. That record matters if the owner later wants concours correctness or if troubleshooting requires returning to a known baseline. Mounting surfaces must be clean, air gaps set accurately, and wiring secured away from heat and chain fling. Crimp quality matters. On older motorcycles, replacing poor aftermarket bullet connectors with proper terminals can eliminate intermittent faults that would otherwise be blamed on the ignition kit.
Timing setup should be done in two stages: initial static positioning and final dynamic verification with a strobe. Even systems marketed as “set and forget” need timing confirmed across the rev range. If the upgrade retains the mechanical advance, inspect full advance against the service-manual marks and verify smooth return to idle timing. Sticky weights or weak springs can still distort performance. On multis, check each pickup or trigger channel for cylinder synchronization. Uneven timing between cylinders can mimic carb imbalance. After setup, road-test under load, then recheck fasteners and wire retention once the engine has heat-cycled.
It is also wise to think about serviceability. Carrying the removed points plate and condenser on a long trip is not unreasonable if the conversion is fully reversible. Many experienced vintage riders keep a compact electrical kit with a test light, spare fuses, a plug, and a wiring diagram. Electronic ignition upgrades improve reliability, but restoration guides for metric classics should always respect the reality that any old motorcycle remains a system of aging parts.
Originality, value, and how this hub connects to broader restoration work
Electronic ignition upgrades rarely reduce the enjoyment of a rider-grade restoration, but they must be weighed against originality and market expectations. On mainstream Japanese standards and twins, buyers usually value dependable starting and smooth running more than untouched points. On rarer homologation models or highly judged restorations, visible modifications can matter. The best approach is often a reversible upgrade that leaves the original parts boxed, labeled, and documented. That protects value while making the motorcycle more usable.
As the hub for restoration guides for metric classics from 1970 to 2004, this article connects ignition decisions to the next maintenance topics every owner should address: wiring harness refurbishment, charging-system diagnosis, carburetor overhaul, valve-clearance setting, compression testing, fuel-tank rust remediation, brake-system rebuilding, wheel-bearing inspection, and suspension service. Ignition quality cannot be separated from these systems. A stable spark exposes carburetion faults more clearly; a healthy charging system supports stable spark; accurate valve timing and compression allow any ignition system to perform as designed. Treat the motorcycle as an integrated machine, choose parts with known compatibility, and document every change. If you are planning a metric classic restoration, use this hub as your starting point, then build a step-by-step checklist for your exact model before ordering components.
Frequently Asked Questions
What are the main benefits of upgrading a vintage points ignition system to electronic ignition?
The biggest benefit is consistency. A traditional points system can work very well when it is freshly adjusted, but its performance naturally changes over time. The rubbing block wears, the point gap drifts, contact surfaces pit, and timing becomes less precise as miles accumulate. On many vintage Japanese and European metric motorcycles, that gradual change leads to harder starting, rough idle, inconsistent revving, and a weaker spark under load. An electronic ignition upgrade removes those wear-prone switching contacts and replaces them with a solid-state triggering system that maintains timing far more accurately.
That improvement in timing stability often translates into easier starting, cleaner throttle response, smoother idle, and more predictable performance throughout the rev range. Riders also appreciate the reduced maintenance burden. Instead of periodically cleaning, gapping, and re-timing points, an electronic system generally needs little ongoing attention once installed correctly. For a bike that is actually ridden rather than displayed, that reliability improvement can be substantial.
Another important advantage is spark quality. While the exact gain depends on the coils, charging system condition, and the specific ignition kit used, many electronic systems provide more dependable coil saturation and trigger accuracy than aging points. The result is often a stronger, cleaner burn, especially on engines that have become sensitive to small ignition inconsistencies. It is not a magic horsepower upgrade, but it can make an older machine feel noticeably more refined and trustworthy. For many restorers and riders, the real value is not peak performance but removing one of the most common weak links in an otherwise sound vintage motorcycle.
Will an electronic ignition upgrade make my vintage motorcycle more reliable for regular riding?
In most cases, yes. For a regularly ridden vintage metric motorcycle, electronic ignition is one of the most practical reliability upgrades available. Points systems are inherently mechanical and depend on precise contact operation. As parts wear, performance slowly degrades even if the engine itself is healthy. That means a motorcycle can run well one month and begin misbehaving the next, simply because ignition timing and dwell have drifted. Electronic ignition eliminates most of that routine instability.
Reliability improves because there are fewer wear items affecting spark timing. You no longer depend on contact surfaces staying clean and flat, springs maintaining exact tension, or rubbing blocks keeping the same profile over time. Once an electronic system is properly installed and timed, it usually stays where it is supposed to be. That is especially valuable on motorcycles used for commuting, touring, or frequent weekend riding, where repeated heat cycles and miles quickly expose the weaknesses of old points hardware.
That said, the upgrade is not a cure-all. The charging system, battery, coils, plug caps, grounds, and wiring still need to be in good condition. A modern trigger cannot compensate for low voltage, poor connections, or failing ignition coils. In fact, electronic systems often reveal electrical weaknesses that points had been masking. The most reliable results come when the ignition upgrade is treated as part of a broader electrical refresh. If the rest of the system is sound, electronic ignition can dramatically improve day-to-day dependability and reduce the chance that a simple points issue leaves you stranded.
Is electronic ignition a good choice for a fully restored bike, or should I keep the original points for authenticity?
That depends on the goal of the restoration. If the motorcycle is being restored for concours judging, museum presentation, or strict period-correct authenticity, retaining the original points ignition may be the better choice. Original equipment matters in those contexts, and points are part of the machine’s historical character. A properly rebuilt and adjusted points system can perform very well, especially on a bike that sees limited mileage and receives careful maintenance.
However, if the restoration is intended to produce a motorcycle that starts easily, runs consistently, and can be ridden with confidence, electronic ignition is often the more sensible option. Many owners want the visual charm and mechanical feel of a vintage machine without the recurring maintenance of breaker points. In those cases, an electronic conversion provides a very useful balance between originality and usability. Some kits are also discreet enough that the motorcycle retains a stock appearance, especially if the original points cover remains in place and the installation is done cleanly.
A common compromise is to save all original ignition components so the bike can be returned to stock later if desired. That approach preserves flexibility and collector value while still allowing the owner to enjoy modernized reliability. In practical restoration work, this is often the smartest path: keep the original parts labeled and stored, document the modification, and use the electronic system for real-world riding. That way, the motorcycle remains historically respectful without forcing the owner to accept the points system as the permanent weak spot.
What should I look for when choosing an electronic ignition kit for a vintage points-system metric motorcycle?
The first priority is model-specific compatibility. Vintage metric motorcycles vary widely in crankshaft triggering arrangement, advancer design, coil requirements, charging system output, and wiring layout. A kit that works perfectly on one Honda, Yamaha, Suzuki, Kawasaki, or European twin may not suit another even if the engines seem similar. Always verify that the kit is designed for your exact make, model, engine configuration, and year range. Pay close attention to whether it is intended to work with the stock mechanical advance unit or replace it entirely.
Next, consider system design and parts quality. Reputable ignition kits use durable trigger components, stable electronics, clear installation hardware, and complete instructions. Good support from the manufacturer matters more than many buyers realize, because vintage motorcycles frequently have been modified over the years. A quality brand with strong technical documentation can save substantial time during installation and troubleshooting. It is also wise to check whether the system requires specific coil resistance values. Using the wrong coils can cause weak spark, overheating, or module failure.
You should also think about how you use the motorcycle. For a mostly stock street bike, a straightforward reliable trigger conversion is usually ideal. For a higher-performance build, you may want a more advanced system with programmed timing curves or improved high-rpm control. At the same time, simplicity has real value on a vintage machine. The best ignition upgrade is usually the one that is robust, proven, easy to time correctly, and well matched to the bike’s electrical system. Features are less important than stability, compatibility, and long-term serviceability.
Finally, inspect the rest of the ignition and charging system before ordering parts. If your wiring harness is brittle, grounds are poor, connectors are corroded, or the regulator-rectifier is failing, even an excellent ignition kit may disappoint. Choosing the right upgrade means looking at the motorcycle as a complete system, not just replacing the points and hoping every other old electrical component will cooperate.
Can I install an electronic ignition on a vintage bike myself, and what mistakes should I avoid?
Many owners can install an electronic ignition themselves if they are comfortable with basic motorcycle electrical work, careful timing procedures, and methodical mechanical assembly. Most kits are designed as bolt-on upgrades, but the quality of the result depends heavily on installation accuracy. The job typically involves removing the points and condenser components, mounting the trigger or pickup assembly, checking the mechanical advance if retained, making wiring connections, and setting the initial timing according to the manufacturer’s instructions. On some motorcycles, this is straightforward. On others, limited access, prior owner modifications, and aging hardware can complicate the process.
The most common mistake is assuming the new ignition will compensate for existing problems. If the battery is weak, the grounds are poor, the charging voltage is unstable, or the coils are incorrect, the motorcycle may still run badly after the conversion. Another frequent error is skipping the inspection of the advance mechanism. If the bike still uses a mechanical advancer and that unit is sticky, worn, or loose, the ignition timing can remain erratic even though the points are gone. Riders then blame the electronic conversion when the real issue is in the advance unit or the rest of the electrical system.
Wiring errors are another major concern. Reversed polarity, incorrect coil resistance, bad crimp connections, or careless routing near heat and vibration can damage the ignition module or create intermittent faults that are frustrating to diagnose. Timing setup also deserves patience. Static timing may get the bike started, but final verification with a timing light is often the best way to confirm that advance behavior is correct across the rev range. On multi-cylinder bikes, synchronization between cylinders is especially important.
If you install the kit carefully, follow the instructions exactly, verify charging-system health, and test the ignition thoroughly before regular use, a do-it-yourself conversion can be very successful. But if the motorcycle has unknown wiring, a history of electrical issues, or a rare ignition layout, professional installation may be money well spent. The goal is not simply to replace points with electronics. The goal is a stable, correctly timed ignition system that complements the restored engine and makes the motorcycle genuinely dependable.