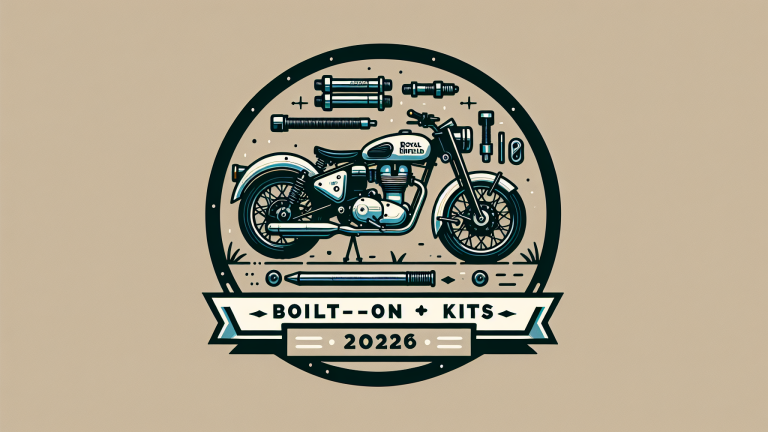
The 2026 Royal Enfield is one of the best platforms for a first project bike because it combines classic styling, simple mechanical layouts, broad aftermarket support, and approachable pricing. When riders talk about customizing a motorcycle, they usually mean changing parts that alter comfort, appearance, luggage capacity, protection, lighting, or exhaust note without rebuilding the engine or fabricating one-off components. Bolt-on kits are the easiest entry point because they install with standard tools, follow existing mounting points, and can usually be reversed if your taste changes or you later sell the bike.
I have worked on Royal Enfields in home garages and small workshops long enough to know what beginners get right and where they get stuck. The 2026 lineup, especially likely project favorites such as the Hunter 350, Classic 350, Meteor 350, Bullet 350, Guerrilla 450, Himalayan 450, and Super Meteor 650, gives new builders a rare advantage: these bikes respond well to modest upgrades. You do not need a welder, dyno time, or a race mechanic to make a noticeable improvement. You need a plan, the right kits, and a clear understanding of how each modification affects fit, reliability, handling, legality, and resale value.
This project bikes hub covers the best beginner-friendly bolt-on kits for the 2026 Royal Enfield, with a focus on practical choices rather than show-only parts. It also serves as a foundation for more detailed builds across the wider custom culture category, where cafe racer conversions, scrambler parts, touring setups, garage tools, and budget planning all branch out from the same core decisions. If you are starting your first Royal Enfield project, this guide will help you choose modifications in the right order, avoid compatibility mistakes, and build a motorcycle that looks personal while still riding better than stock.
Why the 2026 Royal Enfield is ideal for project bikes
A good project bike is not just affordable; it needs a strong owner community, easy parts access, forgiving engineering, and enough visual identity that small changes make a big difference. Royal Enfield checks all four boxes. Across the 350, 450, and 650 families, the company uses straightforward chassis designs, exposed frames, accessible fasteners, and bodywork that can be removed without stripping half the bike. That matters to beginners. On many modern motorcycles, replacing bars or indicators can turn into an all-day routing exercise. On a Royal Enfield, the same job is often realistic in an evening.
The other reason these motorcycles work so well as custom platforms is that they already have a strong design language. The Classic 350 rewards traditional accessories such as bench seats, touring screens, and polished engine guards. The Hunter 350 responds well to compact tail tidies, bar-end mirrors, and blacked-out trim. The Himalayan 450 invites rack systems, skid plates, hand guards, and auxiliary lighting. The Super Meteor 650 can shift from stock cruiser to light tourer with a windshield, backrest, and pannier rails in a single weekend. Because the starting point is coherent, you do not need a radical build to create a custom bike that looks intentional.
For beginners, the safest custom path is to prioritize kits tested on your exact model. Reputable suppliers usually design around OEM mounting points, include torque specs, and account for wiring lengths, brake line clearance, steering sweep, and passenger peg access. Known brands in the Royal Enfield space include Hitchcocks Motorcycles, TEC Bike Parts, Zana, GIVI, SW-Motech, Hepco & Becker, S&S, DNA, and Royal Enfield’s own Genuine Motorcycle Accessories range. Factory accessory catalogs are often underrated; they are not always the cheapest option, but they reduce fitment risk and preserve a cleaner warranty discussion if a dealership later inspects the bike.
The best beginner bolt-on kits to install first
The smartest first modifications improve daily use before they chase a theme. In practice, I advise new builders to begin with protection, ergonomics, and storage. Those three categories deliver immediate value and teach you how your motorcycle is assembled. Crash bars, sump guards, radiator guards on liquid-cooled models, and hand guards protect vulnerable components and usually fit with basic sockets and hex keys. Ergonomic kits such as different handlebars, risers, touring seats, footpeg relocation kits, and adjustable levers can transform comfort more than a loud exhaust ever will. Luggage systems, whether a simple rear rack or full pannier frames, make the bike more usable and help you identify what style of riding you actually do.
Once those fundamentals are in place, cosmetic and performance-oriented bolt-ons make more sense. A seat cowl, fly screen, fork gaiters, machined reservoir caps, compact indicators, and bar-end mirrors can sharpen the bike’s look without affecting reliability. Slip-on exhausts are popular because they are straightforward to fit and noticeably change character, but they also introduce tradeoffs. Some are louder than expected, some create drone at highway speed, and some alter fueling enough that riders should pair them with an intake and a proper tune. On current fuel-injected Royal Enfields, not every “plug and play” claim produces smooth throttle response in real riding. Beginners should remember that clean fitment and dependable operation matter more than chasing the most aggressive sound clip online.
| Kit type | Best for | Typical installation difficulty | Main benefit | Common caution |
|---|---|---|---|---|
| Engine guards or crash bars | Classic 350, Meteor 350, Himalayan 450, Super Meteor 650 | Easy | Protects engine cases and bodywork in low-speed drops | Check torque after first 100 miles |
| Handlebar and riser kits | Hunter 350, Guerrilla 450, Classic 350 | Easy to moderate | Improves reach, posture, and urban control | Confirm cable and brake hose length |
| Touring seats and backrests | Meteor 350, Super Meteor 650, Classic 350 | Easy | Increases comfort for longer rides | Seat height and rider triangle may change |
| Luggage racks and pannier rails | Himalayan 450, Meteor 350, Bullet 350 | Easy to moderate | Adds carrying capacity for commuting or travel | Do not exceed subframe load ratings |
| Slip-on exhaust kits | 350 and 650 twins | Easy | Changes tone, reduces weight, sharpens style | Review noise, emissions, and fueling impacts |
Model-specific kit choices for popular 2026 builds
Different Royal Enfields reward different upgrade paths, so the best beginner kit is always model specific. The Hunter 350 is the easiest urban custom base. Riders typically start with flatter bars, bar-end mirrors, a compact rear fender solution, and a cleaner seat profile. Keep the build light and simple; adding oversized crash protection or heavy hard luggage fights the Hunter’s best quality, which is agility in traffic. For the Classic 350 and Bullet 350, period-correct accessories work best. Chrome or black engine guards, bench or touring seats, small windscreens, fork gaiters, and leather-style panniers preserve the bike’s identity rather than forcing a trend onto it.
The Meteor 350 and Super Meteor 650 are ideal for beginner cruiser projects because comfort upgrades are so effective. A touring screen, rider backrest, passenger backrest, wider footpegs, and soft luggage supports can turn either machine into a credible weekend travel bike. The Himalayan 450 belongs in a separate category because function should lead style. Prioritize a skid plate, radiator protection, stronger hand guards, luggage rack systems, auxiliary lights from proven brands like Denali or GIVI, and footpegs with better off-road grip. For the Guerrilla 450, think road-focused performance and control: lever upgrades, a fly screen, a lighter slip-on, tank pads, and subtle tail cleanup work better than overbuilt adventure accessories.
If your project goal is a cafe racer, scrambler, tourer, commuter, or weekend show bike, set that identity before buying parts. I have seen beginners waste hundreds on mismatched accessories because they bought based on discounts instead of a build brief. The best project bikes evolve in layers. A scrambler-oriented Classic 350 might need dual-purpose tires, a sump guard, fork gaiters, a compact rack, and a high-mount style fender kit. A touring Super Meteor 650 needs wind protection, luggage, and a seat upgrade before decorative trim. Build logic keeps costs controlled and prevents the common result of a motorcycle that looks customized in photos but feels compromised on the road.
How to choose quality kits and avoid beginner mistakes
The biggest customization mistake is assuming all bolt-on kits are equal. They are not. A good kit includes model-specific hardware, spacers machined to the right width, clear instructions, and a finish that withstands vibration, weather, and heat cycles. A bad kit uses universal brackets, vague fitment claims, and low-grade fasteners that strip before they reach torque. Before buying, verify whether the supplier lists your exact 2026 model and variant, because trim differences, emissions equipment, and chassis revisions can matter. Read owner forum threads, watch installation videos from independent builders, and check whether replacement hardware is available if a piece goes missing.
Material quality matters more than flashy marketing. Stainless steel hardware resists corrosion better than untreated mild steel. Powder coating should be even, with no thin edges around welds. Aluminum accessories should have clean machining and proper thread engagement, not rough cast surfaces that invite cross-threading. If a rack or crash bar does not publish a load rating or explain its mounting points, that is a warning sign. The same applies to lights and electrical kits. Look for waterproof connectors, relay protection where needed, and realistic lumen claims. I trust brands that publish technical details, not just studio photos.
Installation discipline also separates satisfying project bikes from frustrating ones. Use a service manual, organize fasteners on a tray, and tighten hardware only loosely until the full assembly is aligned. Apply the correct threadlocker where specified, never everywhere by default. Use a torque wrench on axle-adjacent hardware, brake components, handlebar clamps, and engine-mounted accessories. After the first ride, recheck clearances, especially steering lock, chain movement, passenger peg operation, and exhaust heat near luggage. Many beginner problems are not true fitment failures; they are alignment errors created by tightening one side too early or routing a wire where the fork leg pinches it under full compression.
Budgeting, legal considerations, and the smartest build order
A beginner Royal Enfield project does not need a massive budget. In fact, a restrained budget often leads to a better motorcycle because it forces prioritization. A practical first-phase build on a 350 can often be done for the cost of a few monthly payments on a larger bike: guards, mirrors, a seat, and a rack. A more advanced 450 or 650 setup with luggage systems, suspension improvements, and premium lighting will cost more, but the core principle stays the same: buy fewer, better parts. Cheap accessories are expensive when they fail, rust, crack, or need replacement after one season.
Legal and warranty issues deserve more attention than social media usually gives them. Exhaust noise and emissions compliance vary by market, and a part that is road legal in one country may not be legal in another. Lighting kits must meet local rules on color, brightness, and indicator spacing. Tail tidies often cross the line into plate visibility problems. Insurance companies may also require declared modifications, particularly for luggage systems, security accessories, and performance parts. None of this means you should avoid customization. It means smart builders document what they install, keep receipts, and understand local regulations before spending money.
The best build order for most beginners is simple. Start with protection and ergonomics, then add luggage or touring function, then refine appearance, and only after that consider intake, exhaust, or tuning changes. This sequence produces a bike you can ride and evaluate between stages. It also creates natural internal paths for deeper project bikes coverage across the custom culture hub: one rider may branch into scrambler kits, another into touring luggage systems, another into budget exhaust comparisons, and another into suspension setup. If you are customizing a 2026 Royal Enfield for the first time, begin with one clear goal, choose quality bolt-on kits designed for your exact model, and build the motorcycle you will actually enjoy riding.
Frequently Asked Questions
What makes the 2026 Royal Enfield such a good motorcycle for beginner-friendly bolt-on customization?
The 2026 Royal Enfield is an especially strong platform for first-time customization because it strikes a rare balance between style, simplicity, and affordability. For many new builders, the biggest challenge is not enthusiasm but confidence. A bike that is overly complex, packed with tightly integrated bodywork, or expensive to modify can make even basic changes feel intimidating. Royal Enfield models are appealing because they typically retain a straightforward mechanical layout, accessible fasteners, and a design language that welcomes personalization without requiring major fabrication or deep engine work.
Another major advantage is the broad aftermarket support. Beginners benefit most when they can choose from proven bolt-on kits rather than trying to piece together custom solutions one bracket at a time. For the 2026 Royal Enfield, that means a strong selection of seats, windscreens, luggage racks, crash protection, lighting upgrades, engine guards, handlebar accessories, exhaust systems, and cosmetic trim pieces designed to fit with minimal hassle. These kits are often developed specifically for common rider goals such as improving comfort, adding touring utility, enhancing visual character, or giving the bike a more scrambler, retro, or urban look.
Just as important, the approachable price of the motorcycle itself leaves room in the budget for upgrades. A beginner can buy the bike, ride it stock, and then improve it gradually based on real riding experience. That is the smartest way to customize. Instead of replacing everything at once, new owners can prioritize the parts that solve actual needs, whether that means a more supportive seat for longer rides, a rear rack for everyday cargo, handguards for weather protection, or a slip-on exhaust for a deeper sound. In practical terms, the 2026 Royal Enfield makes customization feel less like a high-risk project and more like a manageable, rewarding introduction to motorcycle ownership.
Which bolt-on kits should a beginner install first on a 2026 Royal Enfield?
The best first upgrades are the ones that improve how the motorcycle feels and functions every time you ride. For most beginners, that means starting with comfort, protection, and utility before moving on to purely cosmetic parts. A comfort-focused seat kit is often one of the most worthwhile first purchases because it changes your relationship with the bike immediately. If the stock saddle is too firm, too narrow, or not shaped for longer rides, an upgraded seat can dramatically improve confidence and reduce fatigue.
After that, a luggage solution is one of the most practical bolt-on categories. A rear rack, tail rack, pannier rails, or small side bag support kit can turn the 2026 Royal Enfield from a stylish weekend machine into a genuinely useful daily rider. This is especially valuable for beginners who want to commute, carry rain gear, bring tools, or take short trips without wearing a backpack all the time. These kits are usually straightforward to install and offer one of the highest day-to-day returns on investment.
Protection parts also belong near the top of the list. Engine guards, crash bars, sump guards, radiator guards if applicable, and handguards can protect the motorcycle from minor drops, road debris, and light off-pavement hazards. A beginner rider is statistically more likely to experience a low-speed tip-over than a veteran rider, so protection is not just cosmetic toughness; it can save money and frustration. In the same category, fork gaiters, headlight guards, and frame sliders can be worthwhile depending on your riding style and model configuration.
Windscreens and ergonomic kits are also excellent early upgrades. A small flyscreen or touring screen can reduce fatigue on faster roads, while handlebar risers, adjustable levers, wider footpegs, or different mirrors can make the bike fit your body better. Finally, once those essentials are addressed, many beginners move into style and sound upgrades such as slip-on exhausts, LED turn signal kits, upgraded lighting, tank pads, and dress-up accessories. The right order is simple: make the bike more comfortable, more usable, and more durable first; then refine the appearance and personality.
Are bolt-on kits really easy to install, or do beginners still need special tools and mechanical experience?
Bolt-on kits are the easiest path into motorcycle customization, but “easy” should be understood realistically. In most cases, beginner-oriented kits are designed to install using standard mounting points with basic hand tools and clear instructions. That is exactly why they are so popular. You are not rebuilding the engine, cutting the frame, welding tabs, or fabricating spacers from scratch. Instead, you are removing factory hardware, fitting the new component, torquing everything correctly, and checking alignment. For many riders, that makes bolt-on customization an ideal way to learn the motorcycle gradually.
That said, beginners still benefit from having a proper setup. At minimum, you should expect to need common metric sockets, hex keys, combination wrenches, screwdrivers, and a torque wrench. A torque wrench is especially important because overtightening can damage threads or crush softer components, while undertightening can allow critical parts to loosen over time. Threadlocker, trim tools, zip ties, a soft cloth to protect painted surfaces, and a service stand or stable way to support the bike can also make installation easier and safer. For lighting kits or accessory power connections, basic electrical knowledge is helpful, even if the kit uses plug-and-play connectors.
Mechanical experience is helpful but not mandatory for many upgrades. Seats, racks, guards, mirrors, windscreens, and some exhaust components are often very manageable for patient first-timers. The key is to choose well-supported kits from reputable brands, read the instructions fully before starting, and work slowly. Lay out all hardware, compare it to the parts list, and do not fully tighten everything until the part is properly aligned. Take photos during disassembly so you can remember where washers, clips, and brackets belong. If a part resists installation, stop and verify fitment rather than forcing it.
There are also situations where a professional install is the better choice. Full exhaust systems, more involved electrical kits, suspension-related components, or any upgrade that affects safety-critical systems may be worth handing to a shop if you are uncertain. Beginner-friendly does not mean risk-free. The smart approach is to use bolt-on kits as a learning opportunity while respecting your limits. Done properly, the process is one of the most rewarding parts of owning a 2026 Royal Enfield because each successful installation builds skill, familiarity, and confidence.
How do I choose high-quality bolt-on kits for a 2026 Royal Enfield without wasting money?
The best way to avoid wasting money is to buy upgrades that match your riding goals instead of buying parts purely because they look good in photos. Before shopping, think about how you actually use the bike. Are you commuting, weekend cruising, touring, riding rough back roads, or building a certain visual style? A rider who needs all-weather practicality should prioritize racks, guards, and a windscreen. A rider focused on comfort should start with seat and ergonomic improvements. Someone building a cleaner visual theme may care more about lighting, body trim, mirrors, and exhaust note. Clarity about purpose keeps you from accumulating random accessories that do not improve the experience.
Quality usually shows up in fit, finish, hardware, and documentation. Reputable bolt-on kits for the 2026 Royal Enfield should have clean welds where applicable, corrosion-resistant coatings, properly machined brackets, accurate hole alignment, and hardware that feels durable rather than generic. Product listings should clearly state model compatibility, year fitment, and whether additional adapters are required. Good brands also provide installation instructions, torque guidance when relevant, and customer support in case something is unclear. If a product description is vague about fitment or uses universal language for a supposedly model-specific part, that is a reason to be cautious.
Reviews are valuable, but the best reviews are detailed ones from riders who actually installed the kit themselves. Look for comments about alignment, interference with factory parts, vibration, finish quality over time, and whether the part works with other accessories. For example, a rear rack might fit perfectly on its own but conflict with a passenger grab rail, top box mount, or certain seat configurations. A crash bar may interfere with a sump guard from another brand. These real-world compatibility notes matter a lot on a project bike that may accumulate multiple upgrades over time.
It also helps to think in terms of a long-term build plan. Beginners often make the mistake of buying twice: first an inexpensive part that is “good enough,” then a better version later after the first one disappoints. You do not need to buy the most expensive product in every category, but it usually pays to buy from known manufacturers with a track record for Royal Enfield accessories. Durable powder coating, stainless hardware, proper rubber isolation, and tested fitment are worth paying for. A good bolt-on kit should feel like an integrated improvement, not a compromise you notice every time you ride.
Will bolt-on modifications affect reliability, warranty coverage, or resale value on a 2026 Royal Enfield?
In most cases, carefully chosen bolt-on modifications do not harm reliability, and many can actually improve the ownership experience when installed correctly. Comfort parts, luggage racks, protection kits, guards, windscreens, and ergonomic upgrades generally have little direct effect on engine durability or day-to